
July 22, 2021 1401 words 5 minutes to read
Making mosaics with Stellina and AstroPixel Processor: Polaris
Summary
This post walks through one technique for making mosaics, or pictures that are combined from multiple exposures. This approach integrates the mosaic during stacking using AstroPixel Processor.
My first mosaic was Collinder 399. The first time I observed it, I realized it was too large for the field of view. I decided to use a feature of Stellina called reframing and take a run at AstroPixel Processor’s solution for mosaics. I was happy with the result, so this time I set out to do the same thing with the North Star, Polaris, “Engagement Ring” asterism.
Stellina and reframing
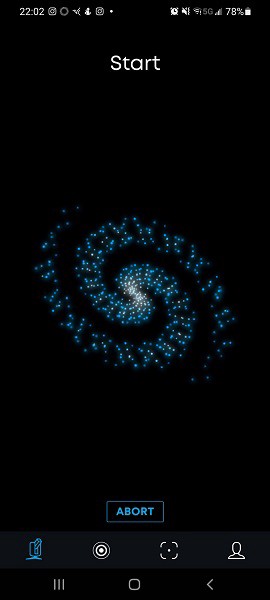
Anyone familiar with Stellina will smile when they see this screenshot.
 |
|---|
| Stellina starting |
This is the phone app telling us that Stellina is “waking up” and about to align and autofocus. It will scan a section of the sky based on GPS, use astrometry to plate solve the area, and adjust the focus to match the known starfield.
 |
|---|
| Autofocus |
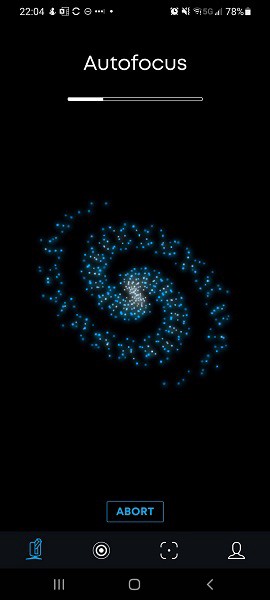
The autofocus step means Stellina has successfully plate solved its orientation and is now setting up focus. This is a good step because it usually means it is ready to observe. Most failures will occur by now (i.e., sky obscured by high ceiling clouds or too close to dawn). Once the autofocus is complete, you “dial in” your selection. I chose the Engagement Ring (found it by searching, “Polaris”) and tapped “Start observation.” This moves Stellina into position, verifies the position, and begins to track. Sometimes atmospheric turbulence, light pollution or simply clouds may throw a wrench in tracking. If you see the following screen, you can be fairly confident an image is coming.
| Tracking activation |
The unit begins to capture subframes and use built-in algorithms to discard bad frames. While it is sorting the initial frames, a black hole keeps us company with fast moving lights streaming into the center.
 |
|---|
| “The ring” |
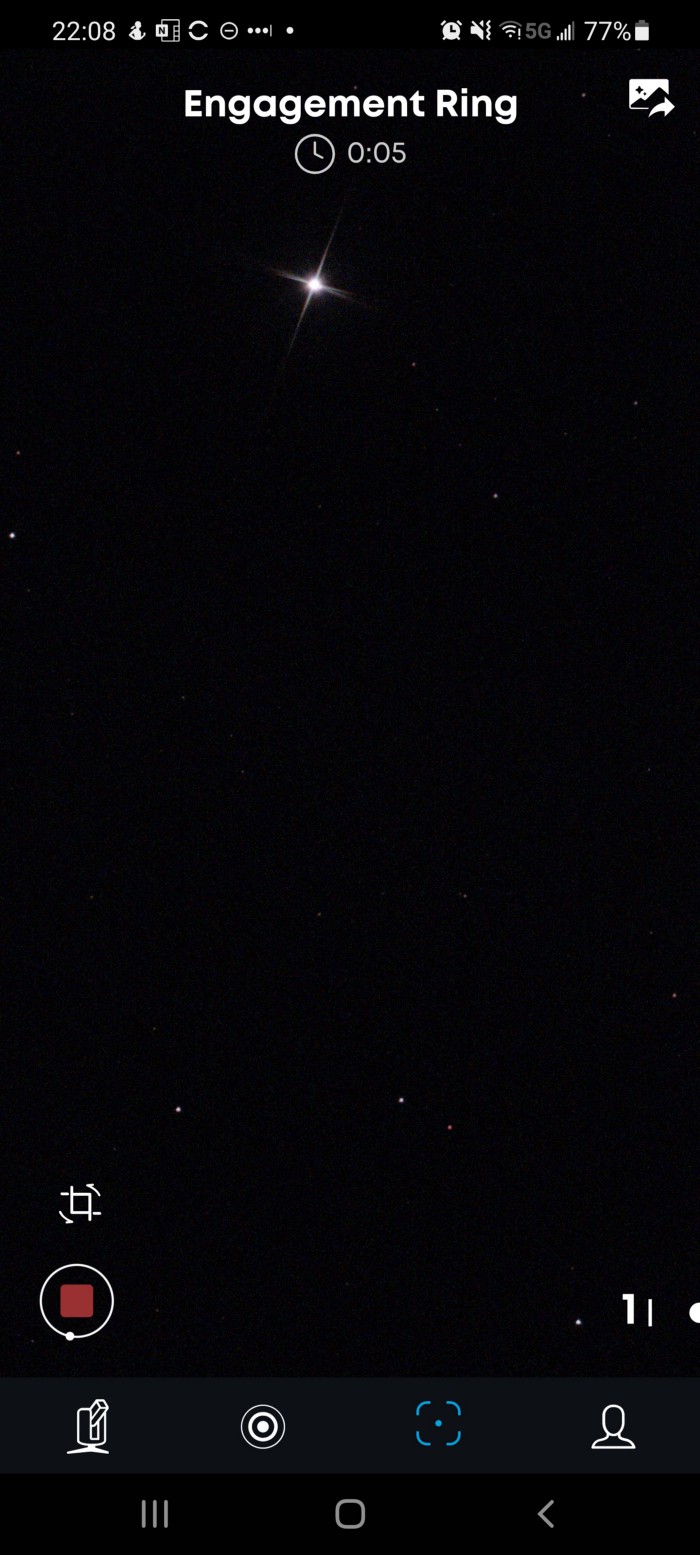
When the ring becomes solid, Stellina is locked and the first image appears. Which happens to be another ring.
 |
|---|
| The Engagement Ring |
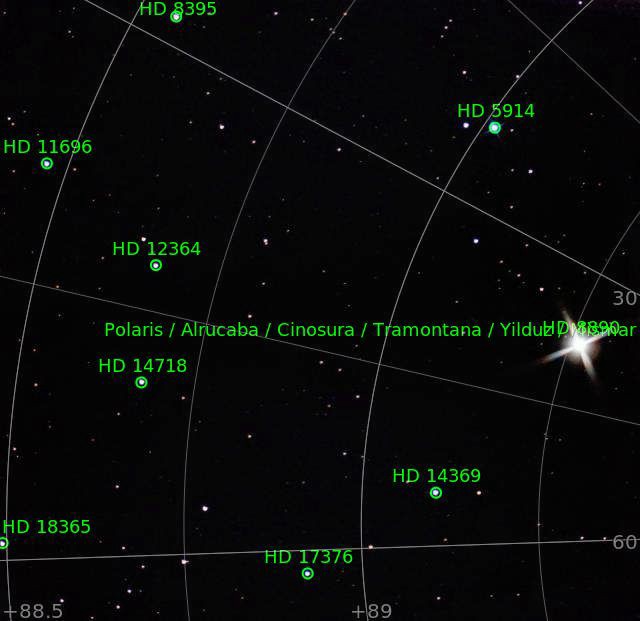
What you see is Polaris, the North Star, conveniently centered near the top, and some of the stars that make up the engagement ring.
👉 Ordinarily, Stellina would render the star as a near perfect circle. I prefer the look of diffraction patterns, so I fashioned a cap out of a tripod box, dental floss and tape that places crosshairs across the lens for diffraction.
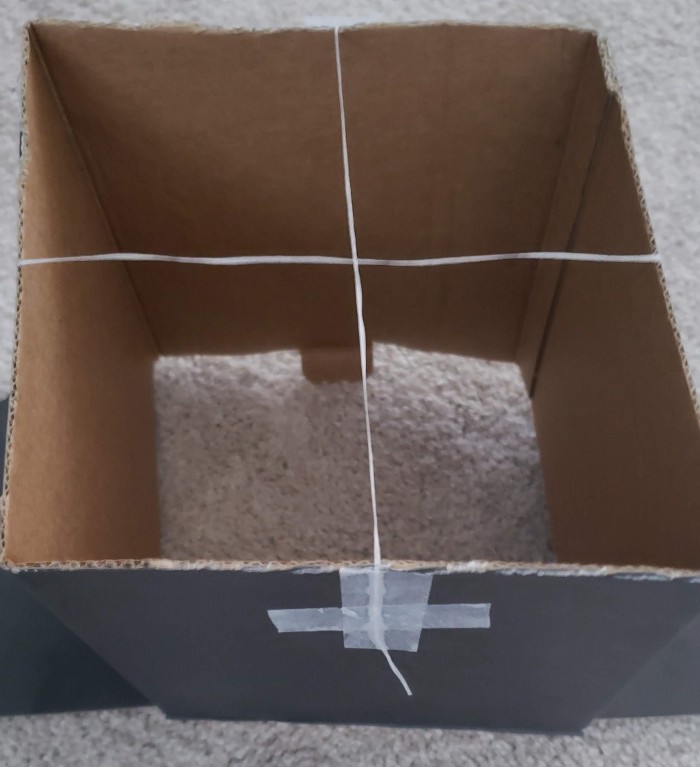 |
|---|
| Diffraction filter |
Now that I know the observation is possible, I tap the grid above the “stop button” and am presented with options to reframe.
 |
|---|
| Initial Stellina framing |
I drag the star to the right to capture the “left” side of the field. Here is the first adjustment (subsequent captures will fill in the left column)…
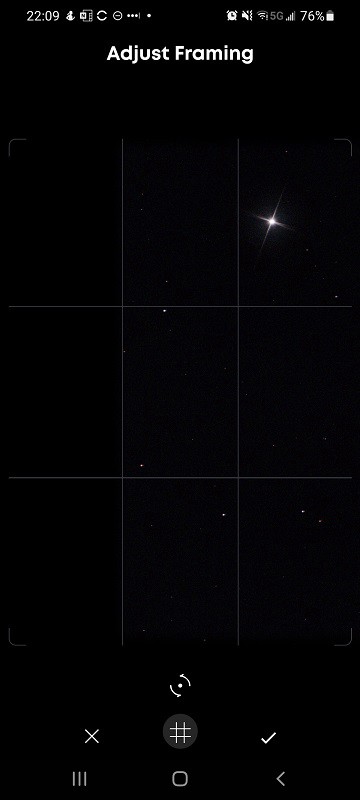 |
|---|
| Adjusted framing |
I essentially slid the image 33% to the “right” to bring in 33% of the field of view to the “left”. After five minutes of exposure, I then reframed 66% in the opposite direction. The result is an image with 33% overlap that extends the same amount to either side of the original. Think of it as two pieces of paper side-by-side overlapping in the right third/left third.
I used my custom Stellinator tool to copy over the files and then launched AstroPixel Processor.
AstroPixel Processor (APP) mosaic setup
I prefer APP to stack and integrate my images. It consistently outperforms the built-in scripts that PixInsight has. I even tried the free DeepSky Stacker (DSS) but I always end up coming back to APP. The process is aligned in steps. First, I start with the “Load” panel and specify a working directory and the name of what I’m processing. Then I click “lights” and load my main images. I don’t have to specify which framing and just load them all into the app. I follow that by clicking “darks” and loading the most recent set of darks I took.
Darks are taken with the same settings as lights, only the lens is completely covered to prevent any light from coming in. You might expect the result to be a black square, but it’s not. Defects in the pixel array cause certain pixels to “light up”. By taking darks, software like PixInsight (PI) and APP can subtract these “bad pixels” from your lights to eliminate noise from the image you process.
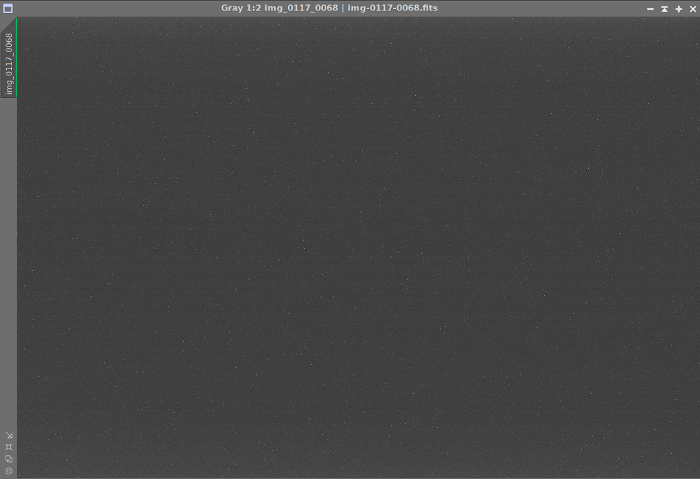 |
|---|
| Sample dark frame |
Here is the first dialog:
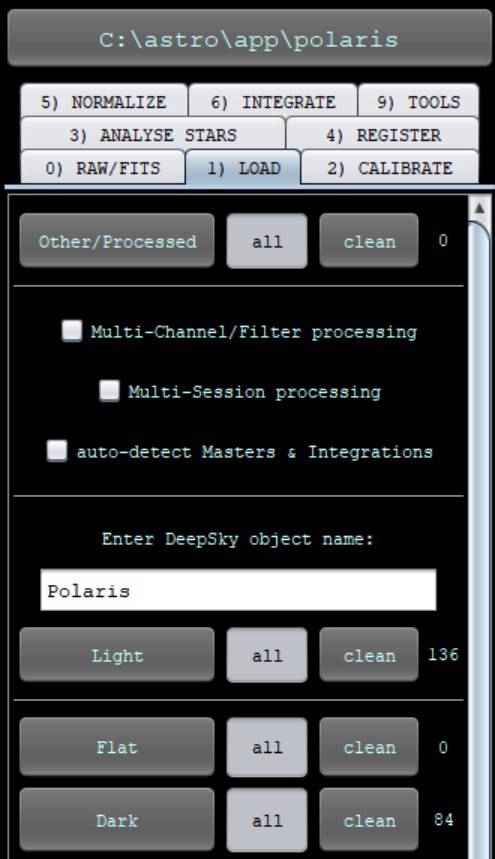 ] ] |
|---|
| Loading subframes |
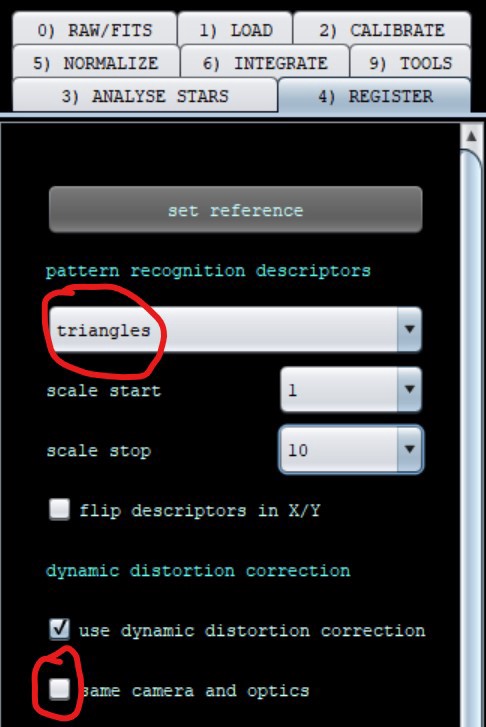
On the “register” tab, I increase the scale stop and change the mode to “mosaic.”
 ] ] |
|---|
| Registration settings |
I keep most of the defaults. I sometimes switch to triangles (trial and error) and always uncheck “same camera and optics.” Even though it is the same, for a mosaic we want it to do extra processing to fit the panels.
 |
|---|
| Registration tweaks |
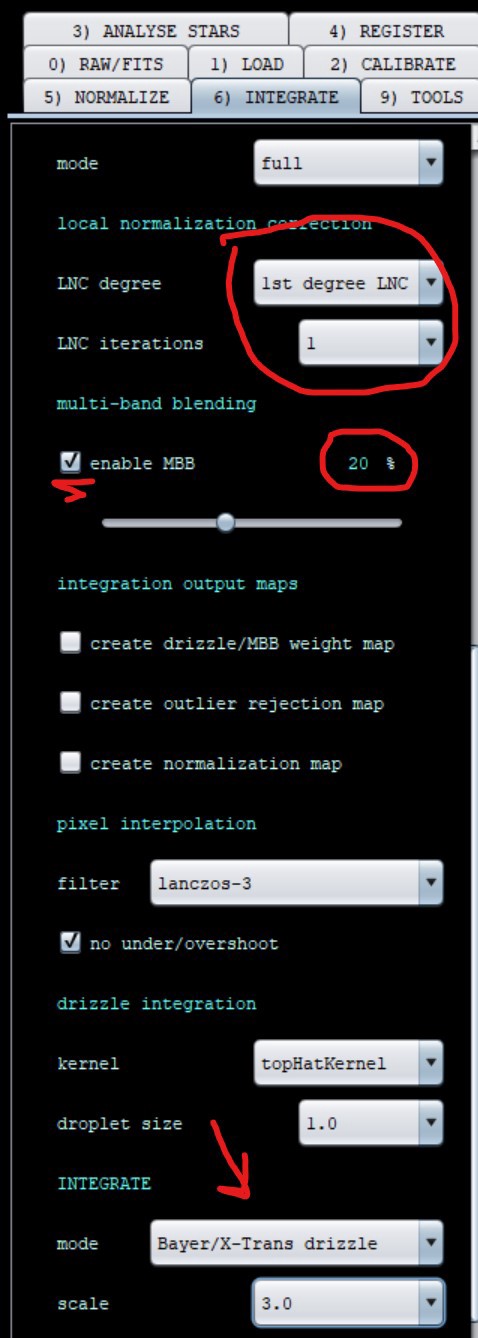
Finally, on the “integrate” tab, I set up a few things:
- I turn on Local Normalization Correction (LNC). This makes it take much longer to process but helps align the images better.
- Multi-band blending helps smooth the seams across panels. The percentage should be near the actual overlap, but you can see here I backed off from 33% to 20% and it worked fine.
- Because Stellina uses a Color Filter Array (CFA) I always use Bayer (the name for the CFA) and X-Trans drizzle. I make the image very large (300% of the captured size) so I can manipulate the larger image, then scale it down to reduce noise.
Drizzle is a technique that takes advantage of frames shifting ever-so-slightly. Imagine if you had a sequence of numbers 1234 and your lens was “two numbers wide” so you could only sequence 1.5 and 3.5 (the average of 1 and 2, and 3 and 4). Now imagine you could shift the lens so it captures the “2 and 3” pair too. With the same lens and resolution, now captured 1.5, 2.5, and 3.5 and have a higher resolution. That is an over-simplified explanation of Drizzle.
Note: the larger images take a lot of resources. You may want to actually reduce the size of your target to speed up the process and conserve space.
 |
|---|
| Integration settings |
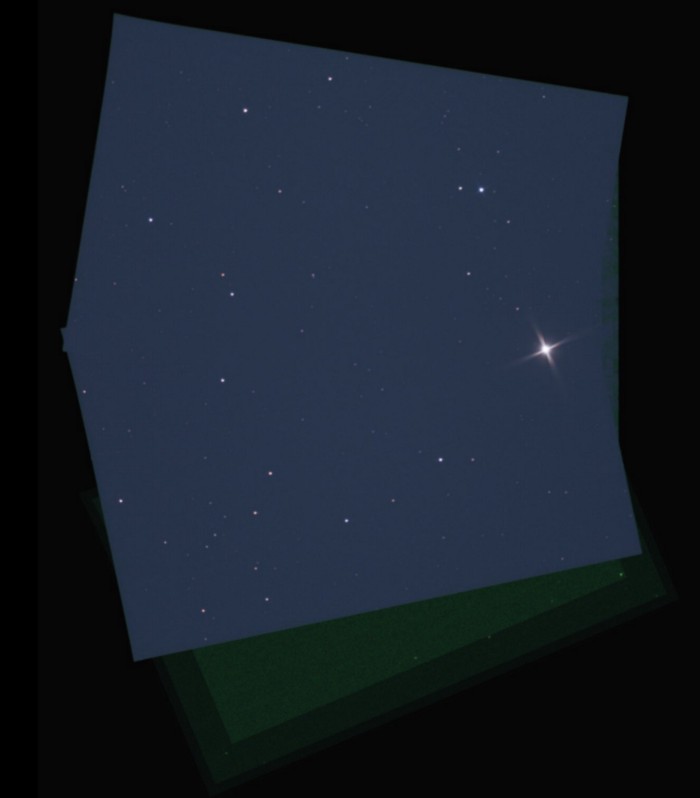
Finally! 👉🔘 I hit the integrate button. A few hours later, I was presented with this image. It “fans out” because with each framing the sky rotated a bit.
 |
|---|
| The final mosaic |
I then loaded it into PixInsight for processing.
Presenting: “The Engagement Ring.”
 |
|---|
| The Engagement Ring |
No special notes — this was a straightforward workflow.
Regards,
Jeremy
Post categories: Related tags: