
October 06, 2022 2084 words 8 minutes to read
Planetary processing with PixInsight (no RegiStax!)

Summary
Lucky imaging is a process used to image planets and the lunar surface. You capture video or frames at a high rate, then use software like Planetary Imaging PreProcessor to eliminate bad frames and center your target, then stack with Autostakkert!. The resulting images often need to be sharpened, which is done via wavelet processing in RegiStax. The software was last updated in 2011 and can be slow and buggy on some systems. I’ve moved to processing most of my results entirely in PixInsight. The only caveat is that PixInsight is paid software, so if you’re looking for a free solution then RegiStax is still probably the way to go.
I also covered this topic in the video, Planetary processing with PixInsight (and NO RegiStax).
Deconvolution
Deconvolution is that feature that helps make your stars round, right? Sort of. You may or may not have heard the story that the Hubble telescope had a flaw in its primary mirror. The “computer image reconstruction techniques” to compensate for the flaw are rumored to be the same algorithms adopted for deconvolution. The process in modern astrophotography software is used to counter the effects of atmospheric distortion, and planetary imaging can benefit from that. There is no magic formula that I am aware of. Instead, I try different leveles of standard deviation and iterations until I find the clearest image using a preview. After that, I apply it to the image. I circled the two settings I change in the screenshot below.

The interactive image below shows the difference with different deconvolution settings. Change the iterations and standard deviation to see the results. Tap Reset to revert to the original image.
(original image)


As you can see, deconvolution provides a substantial amount of sharpening already. The next step is to target the wavelets directly.
Wavelets
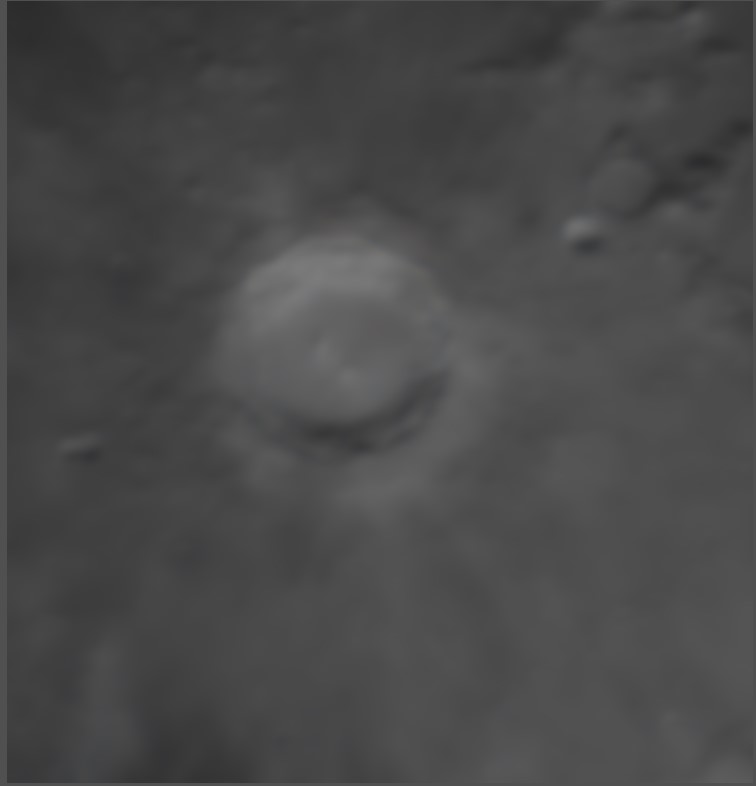
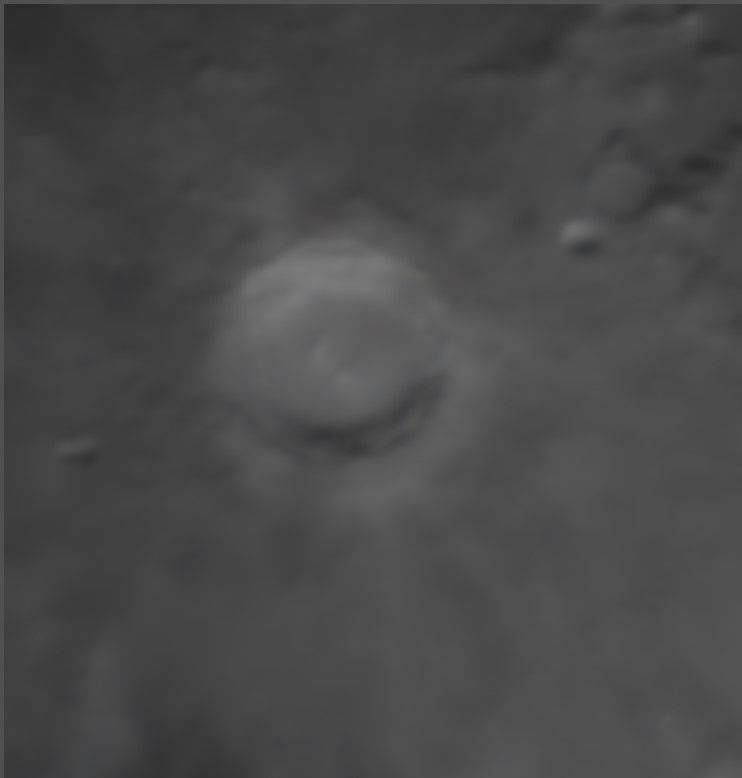
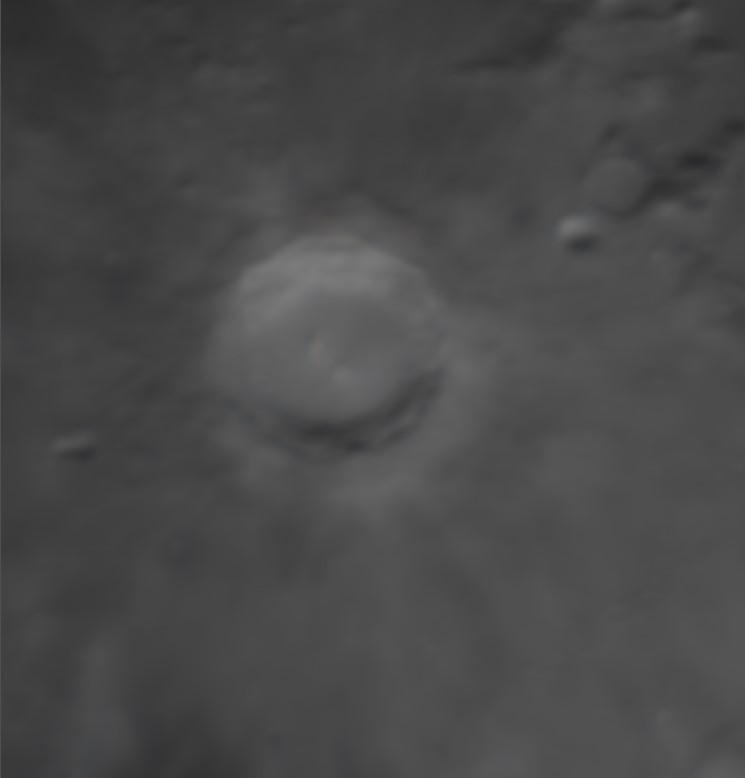
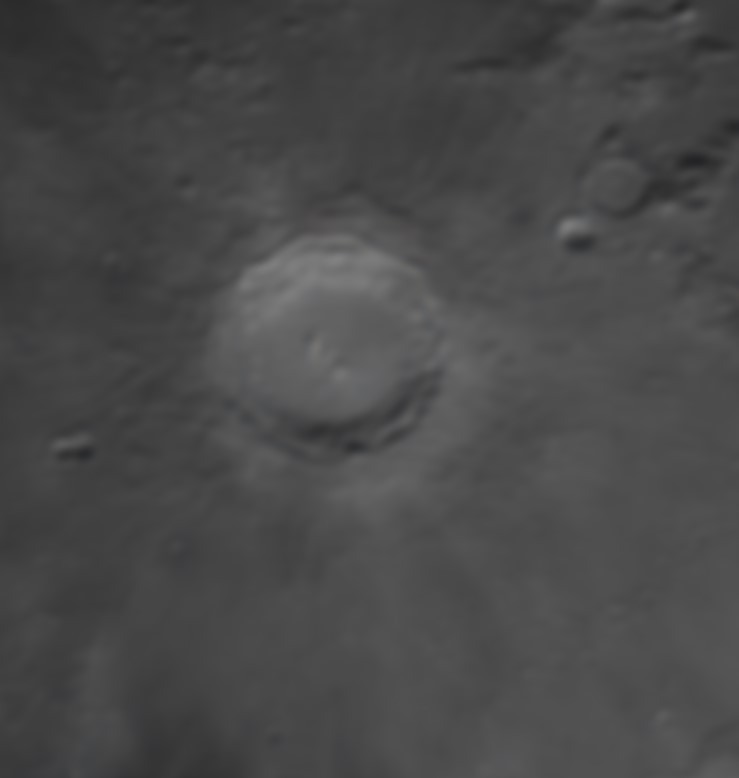
What’s this wavelet thing, anyway? Wavelets are a way of managing images at multiple levels of detail. Each wavelet layer represents patterns at a pixel scale. Each level represents a view of larger structures in the image. For example, layer 1 is for single pixels. Layer 2 looks at the image as blocks of 2x2 pixels, and layer 3 is 3x3 blocks or 9 pixels per unit. The last layer is always the residual or R layer and represents everything that’s left.
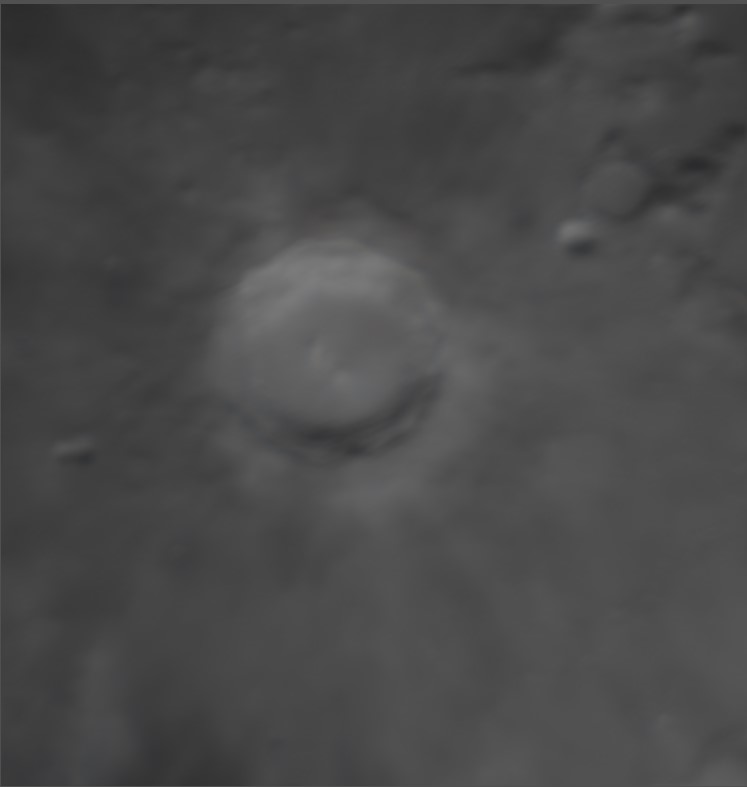
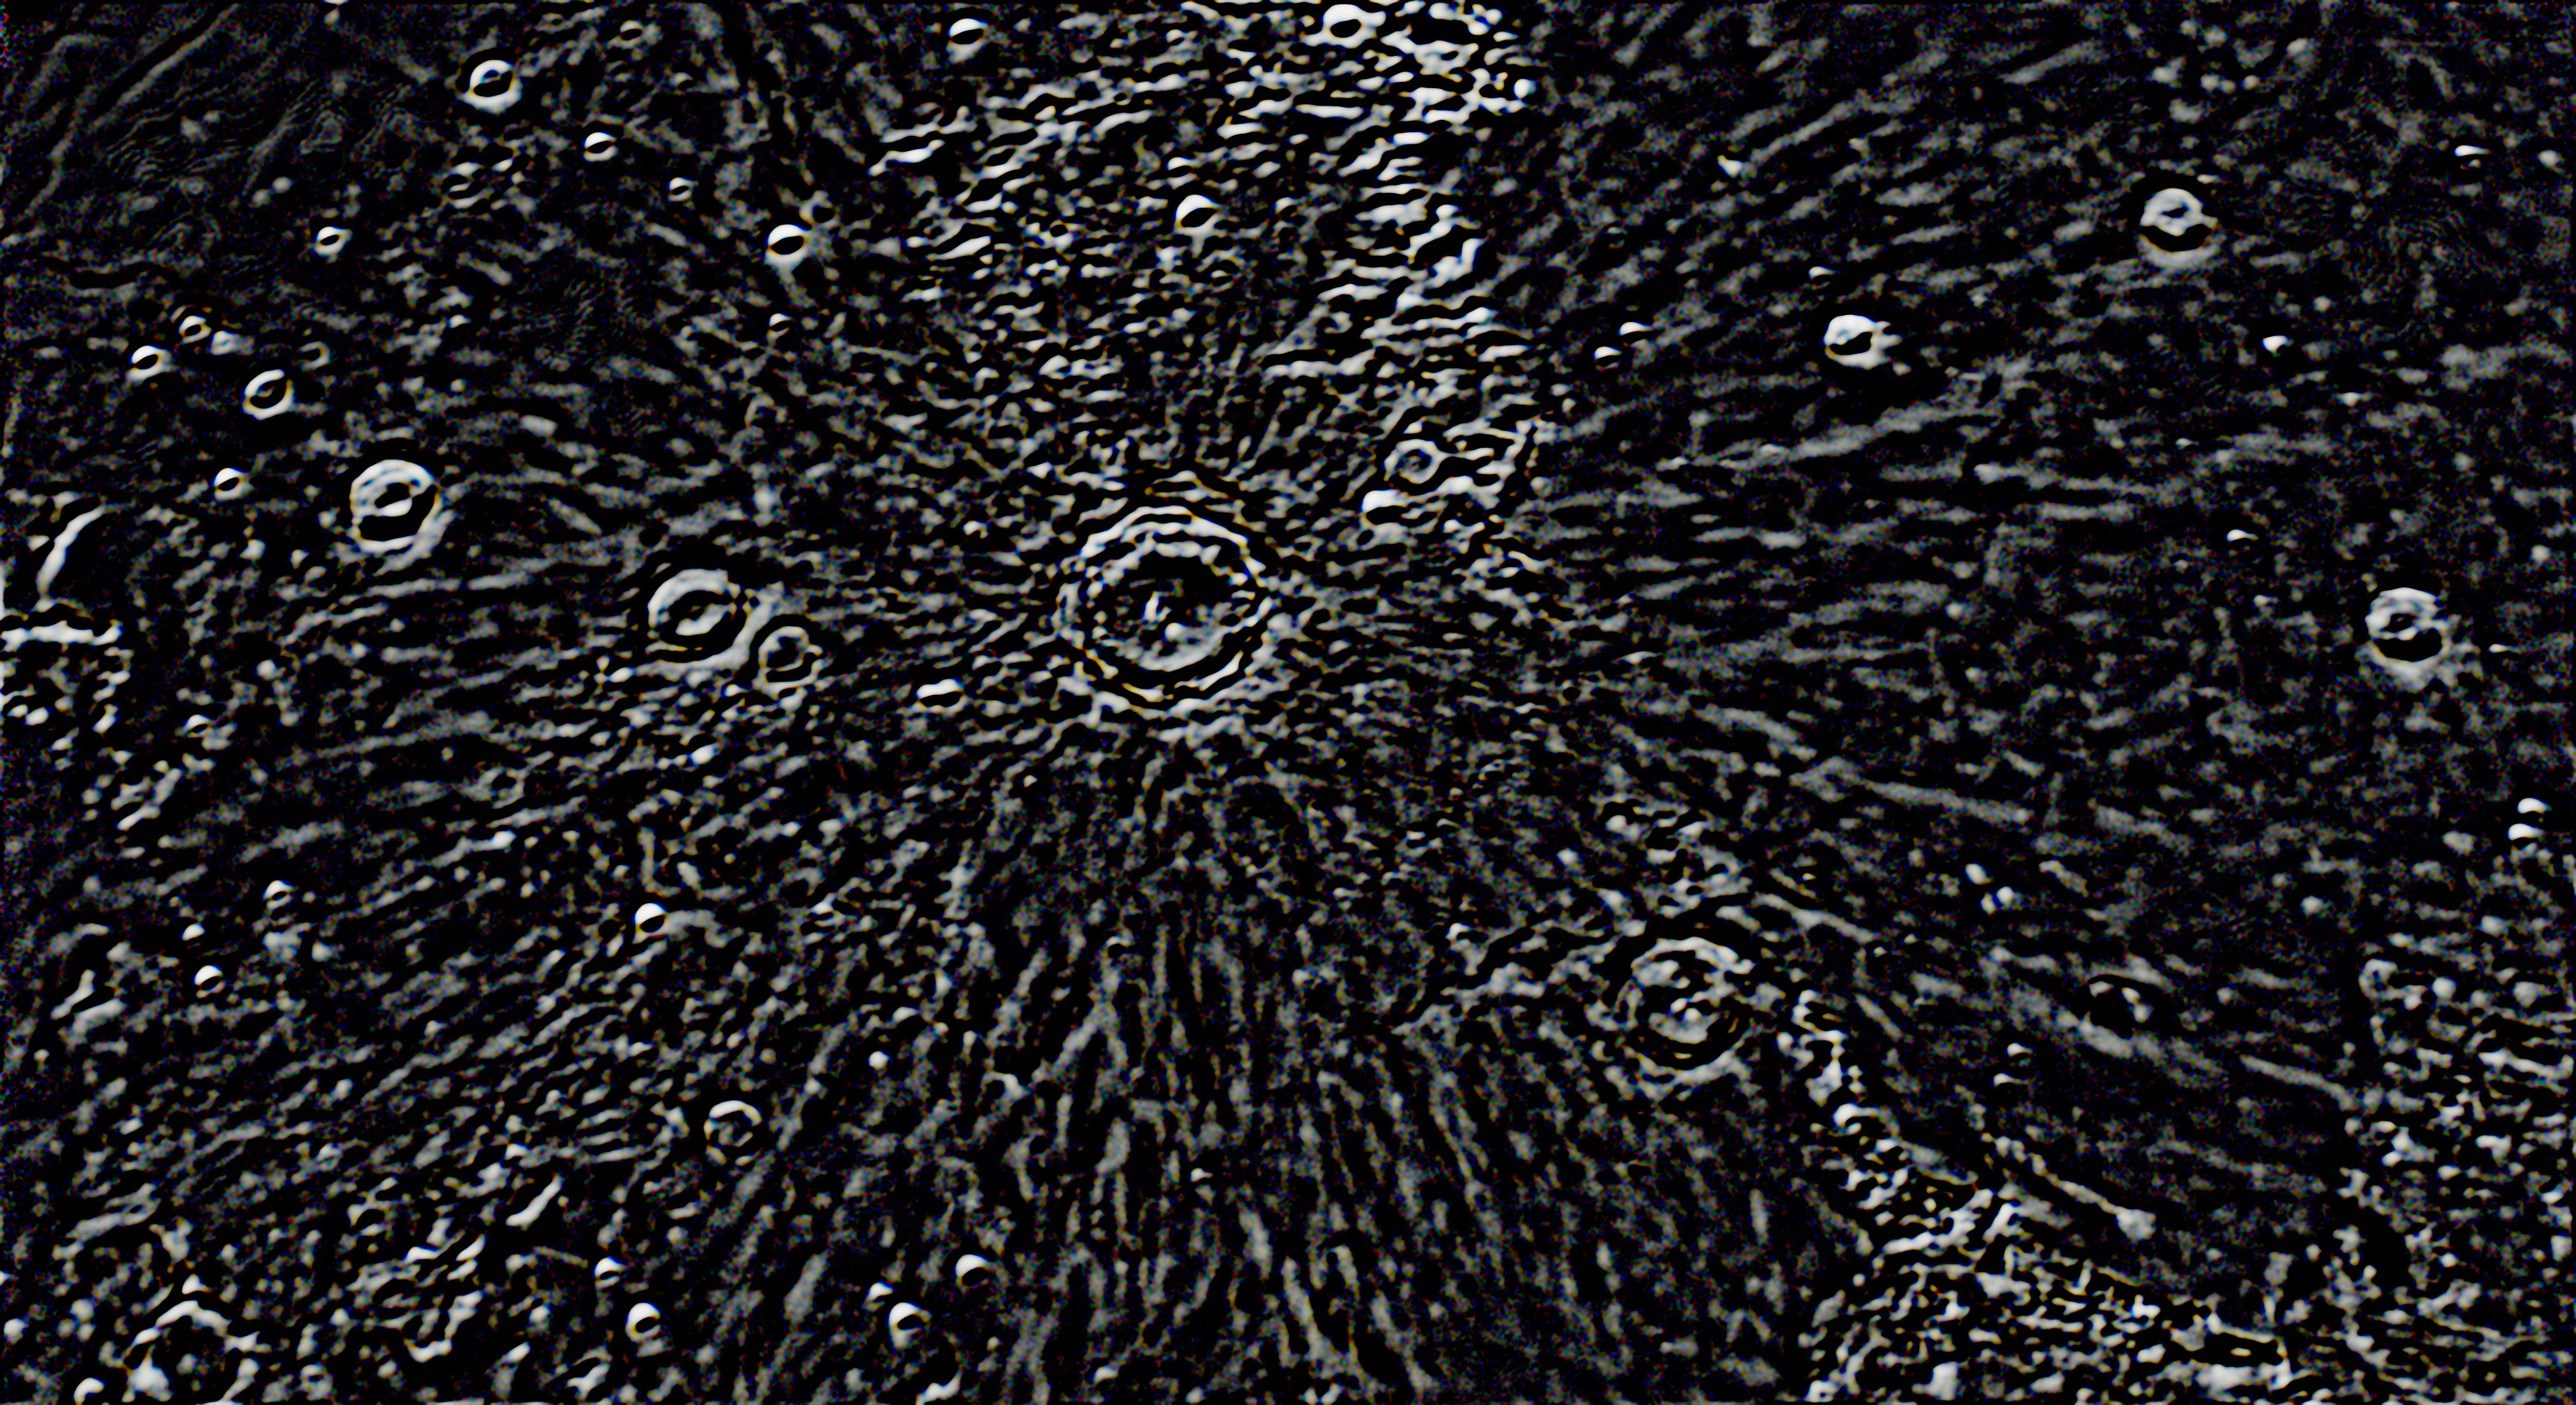
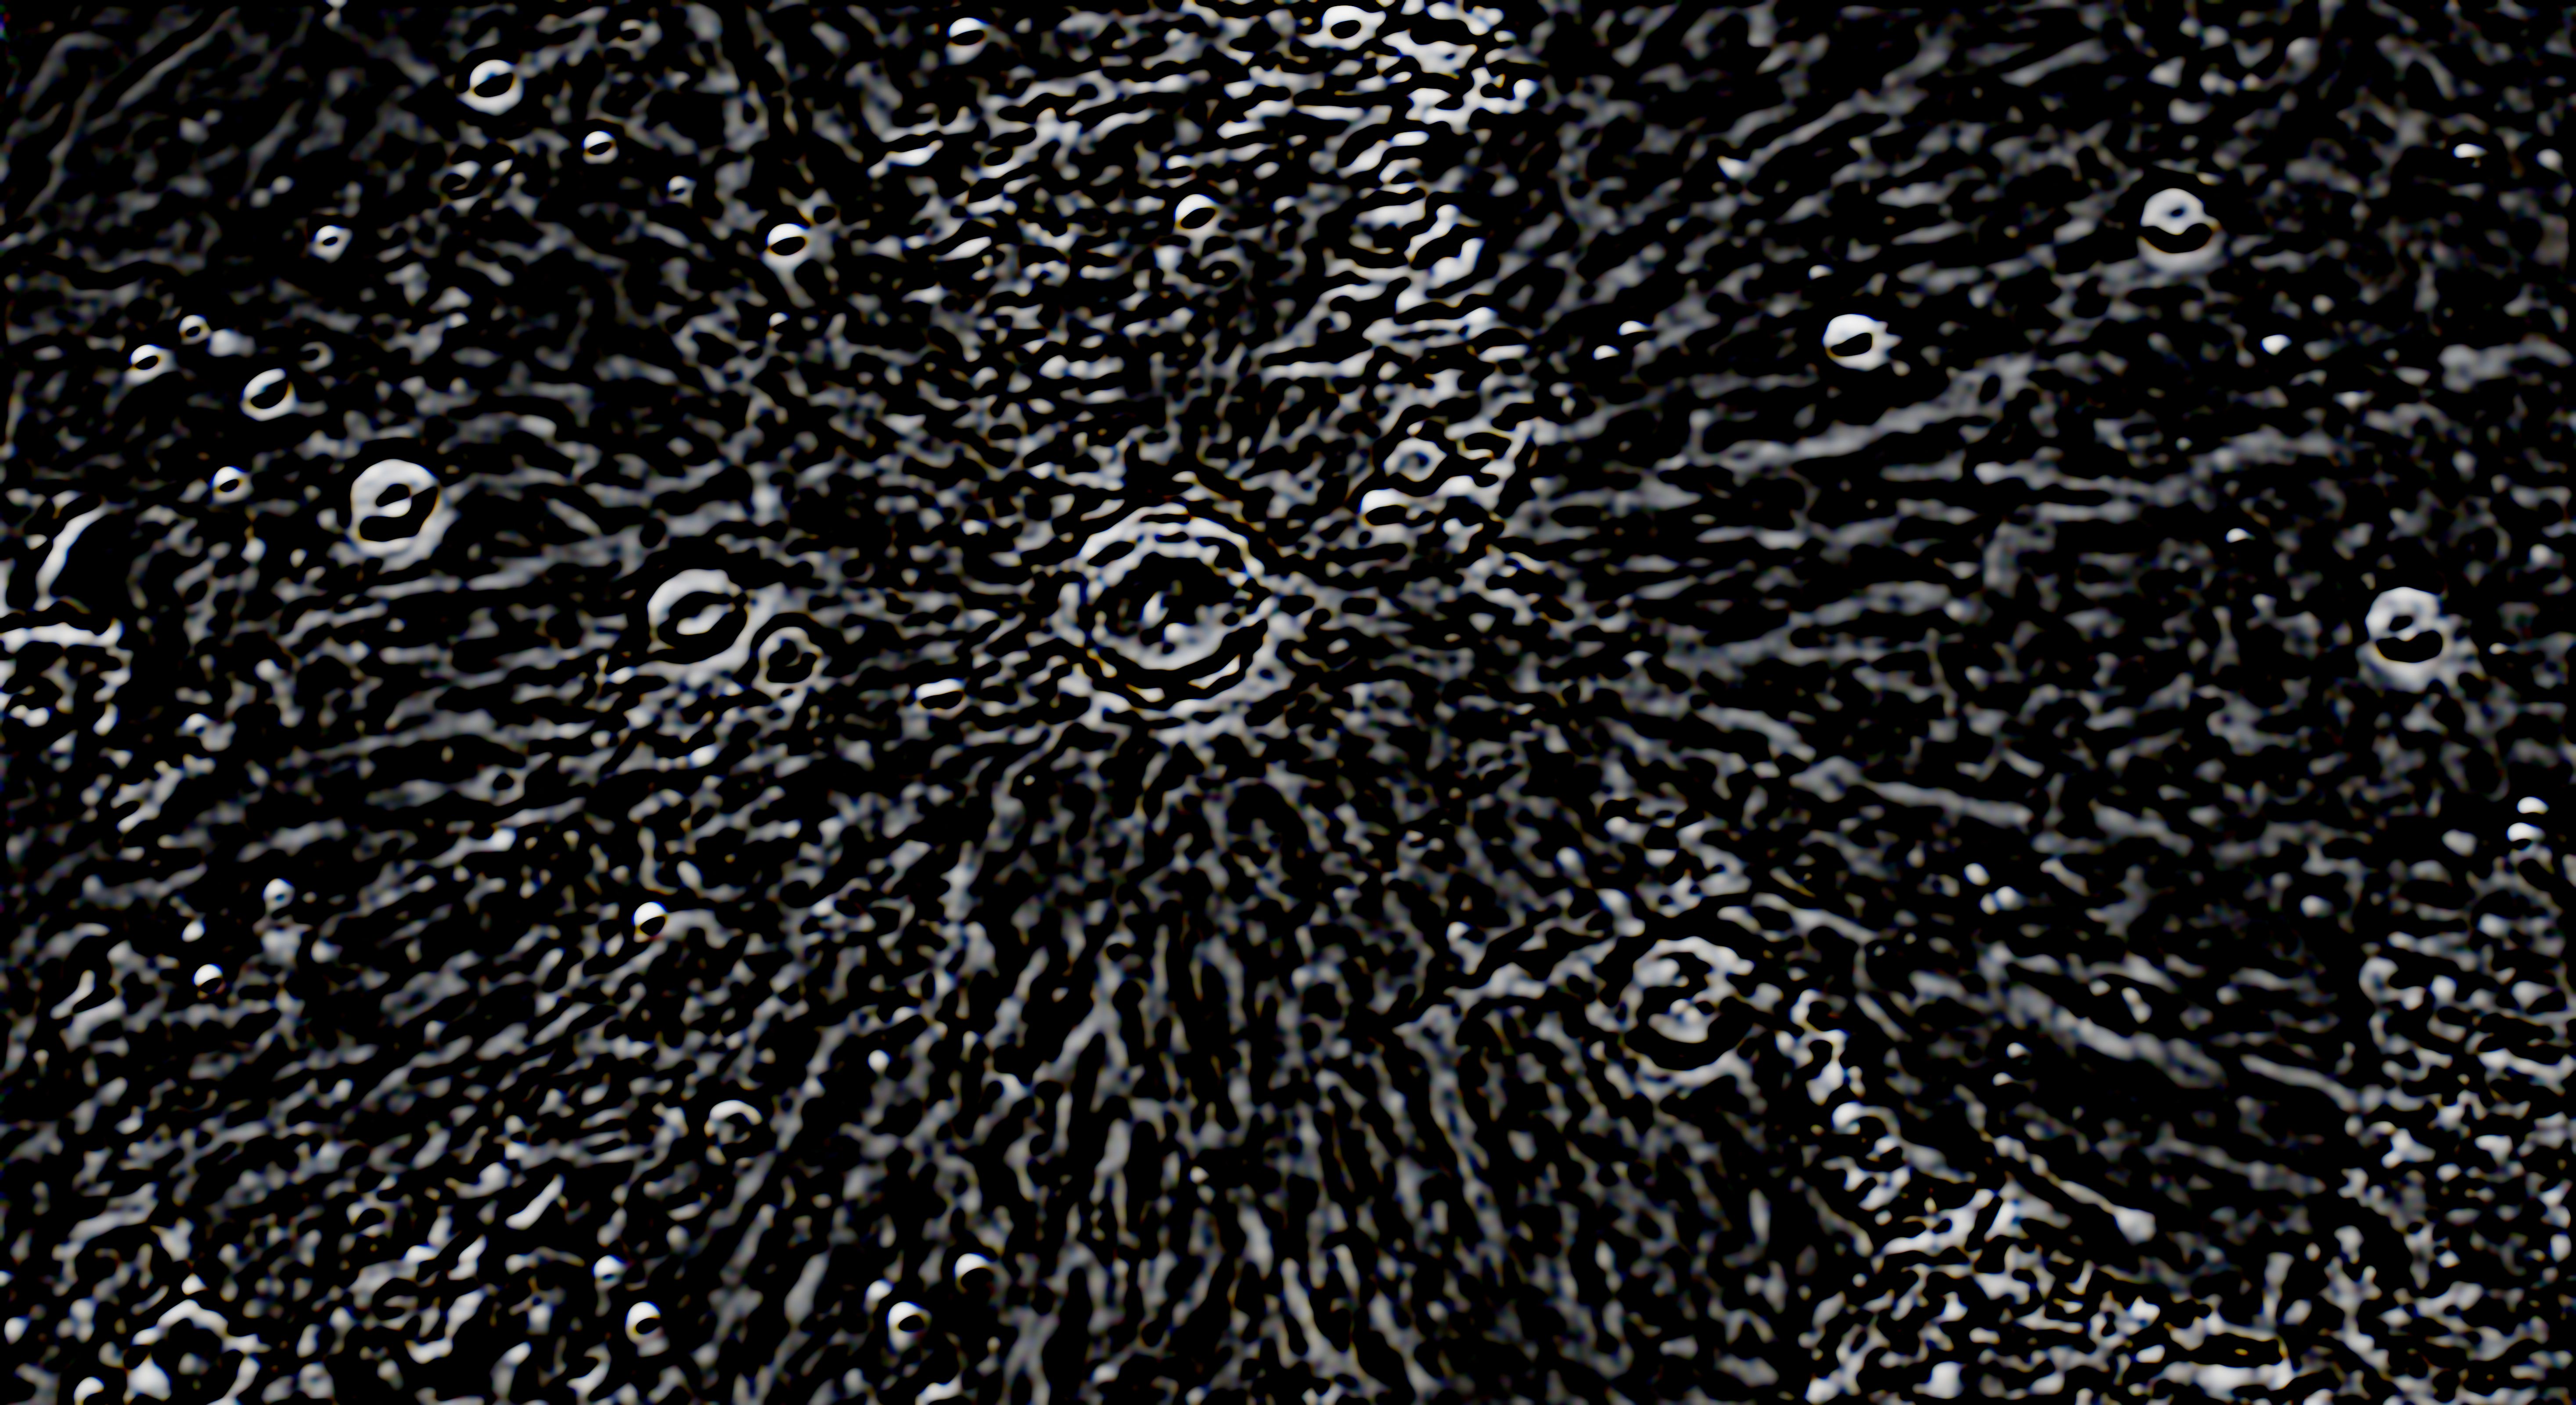
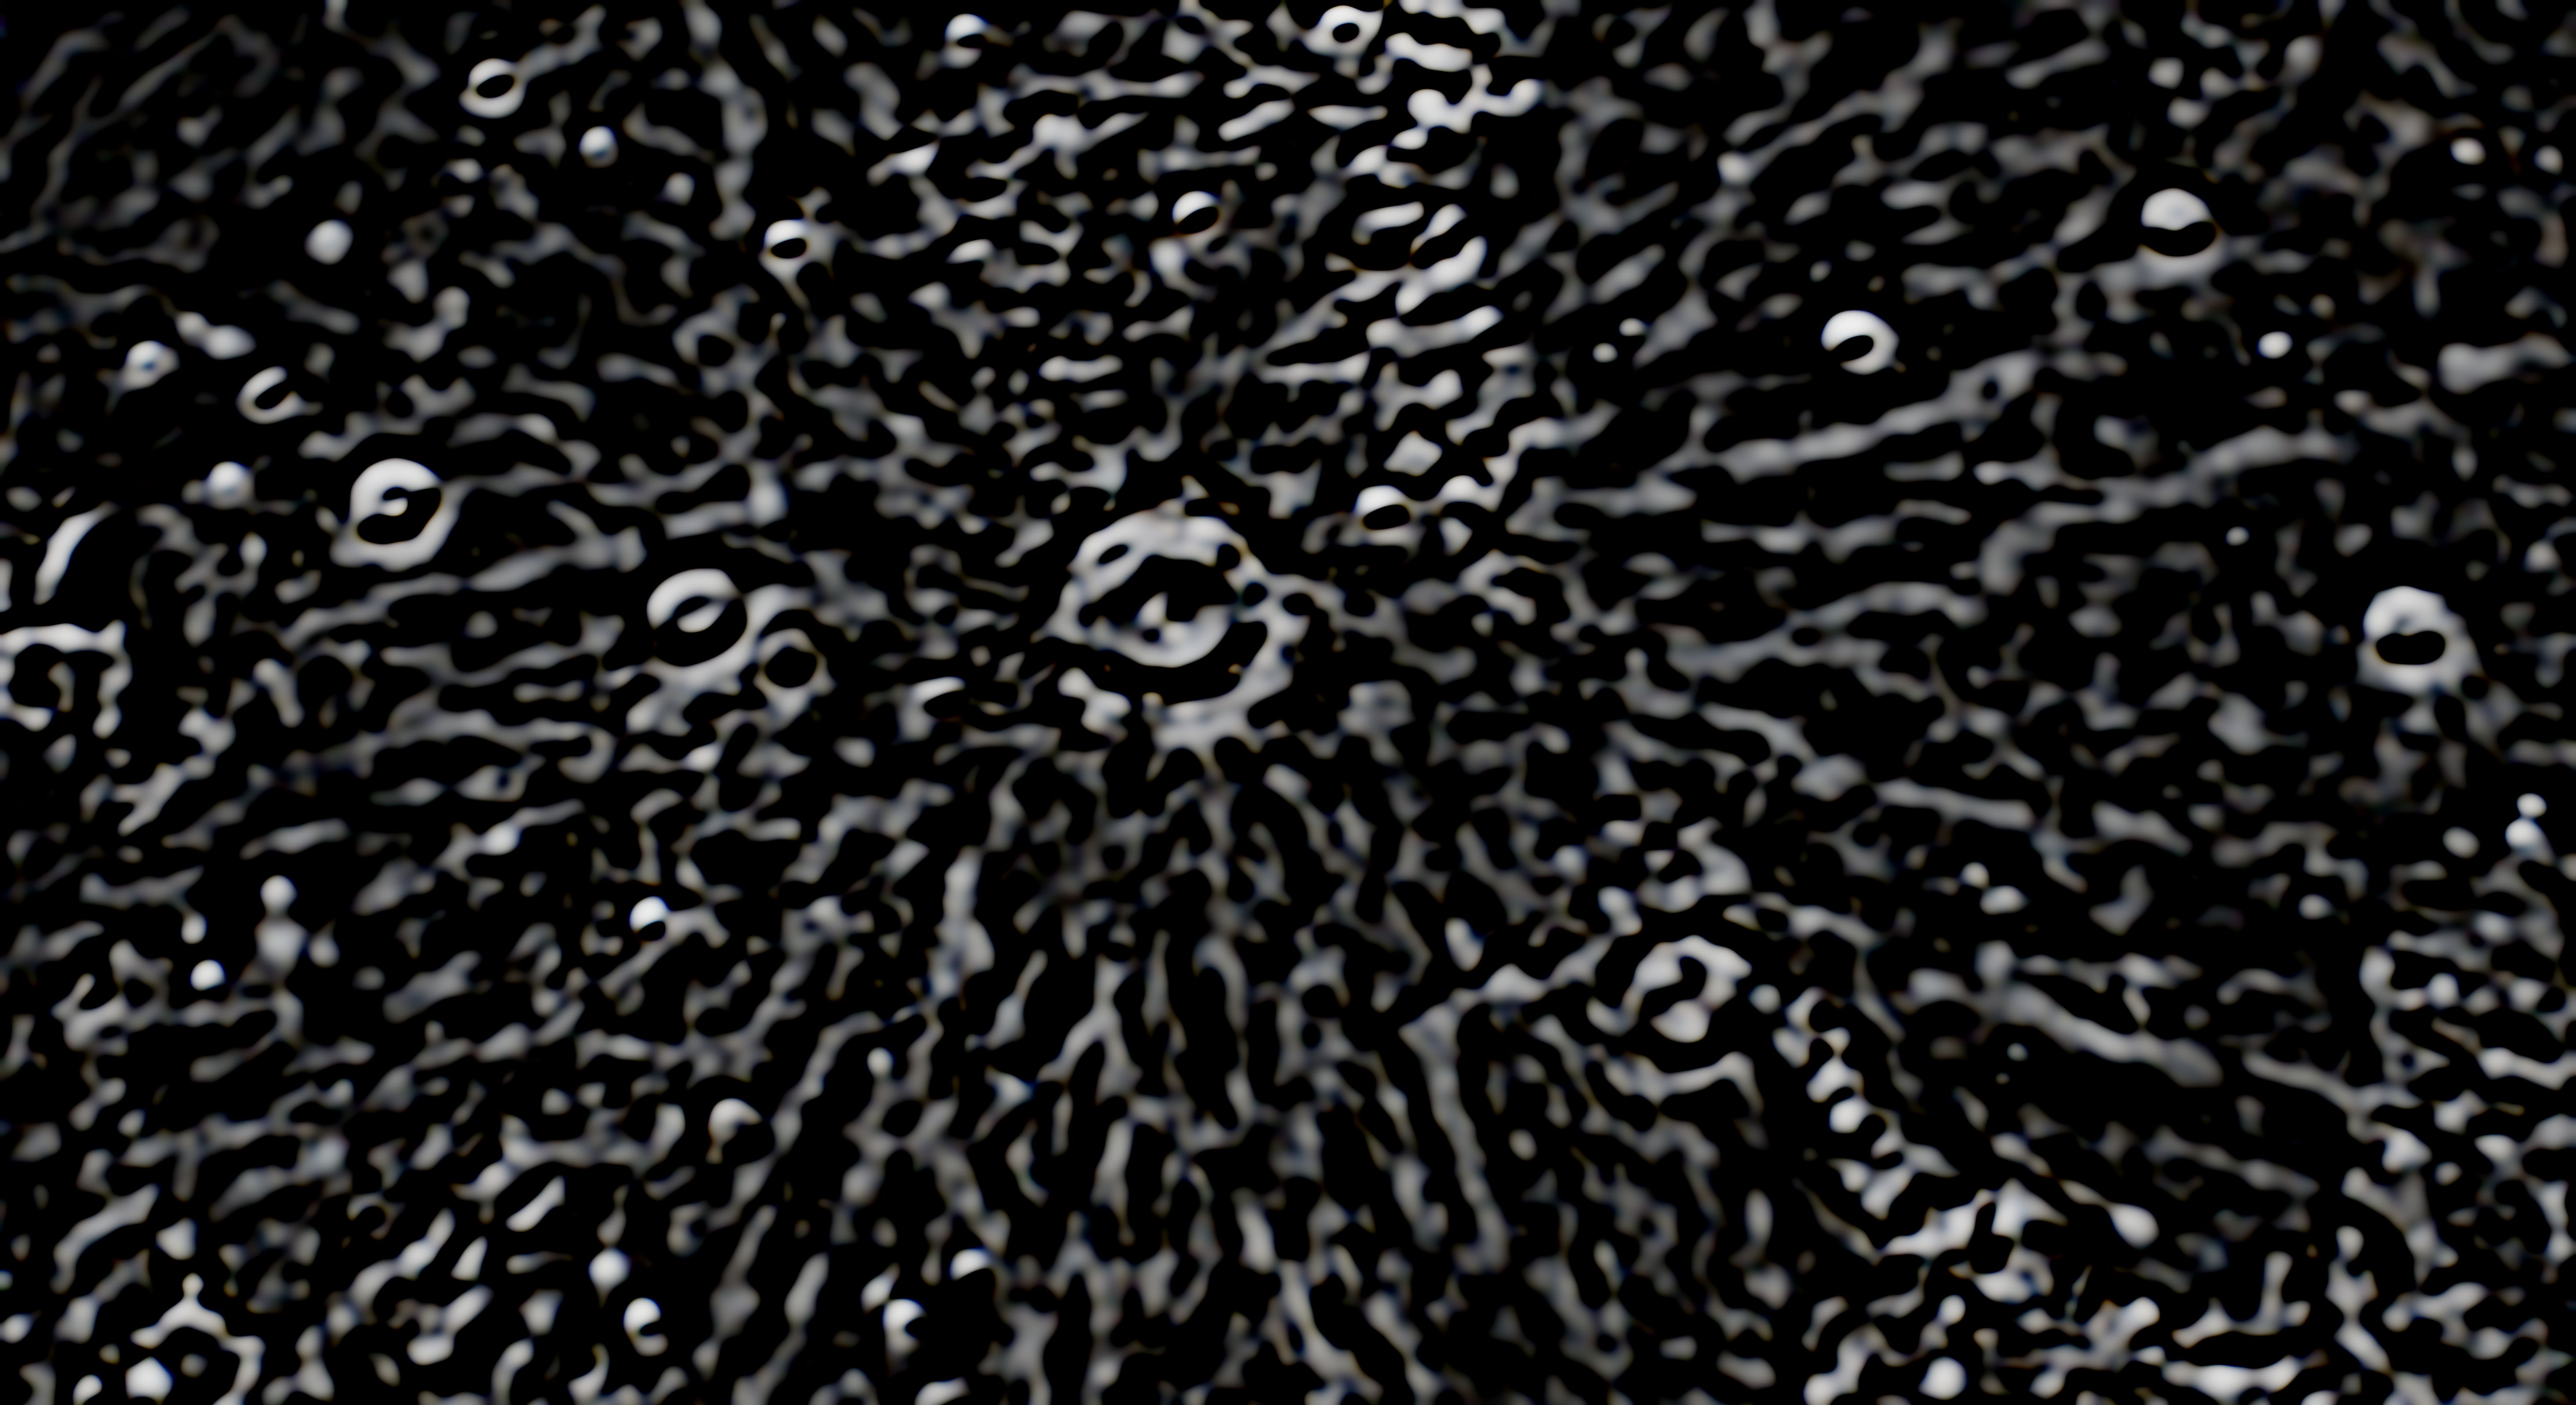
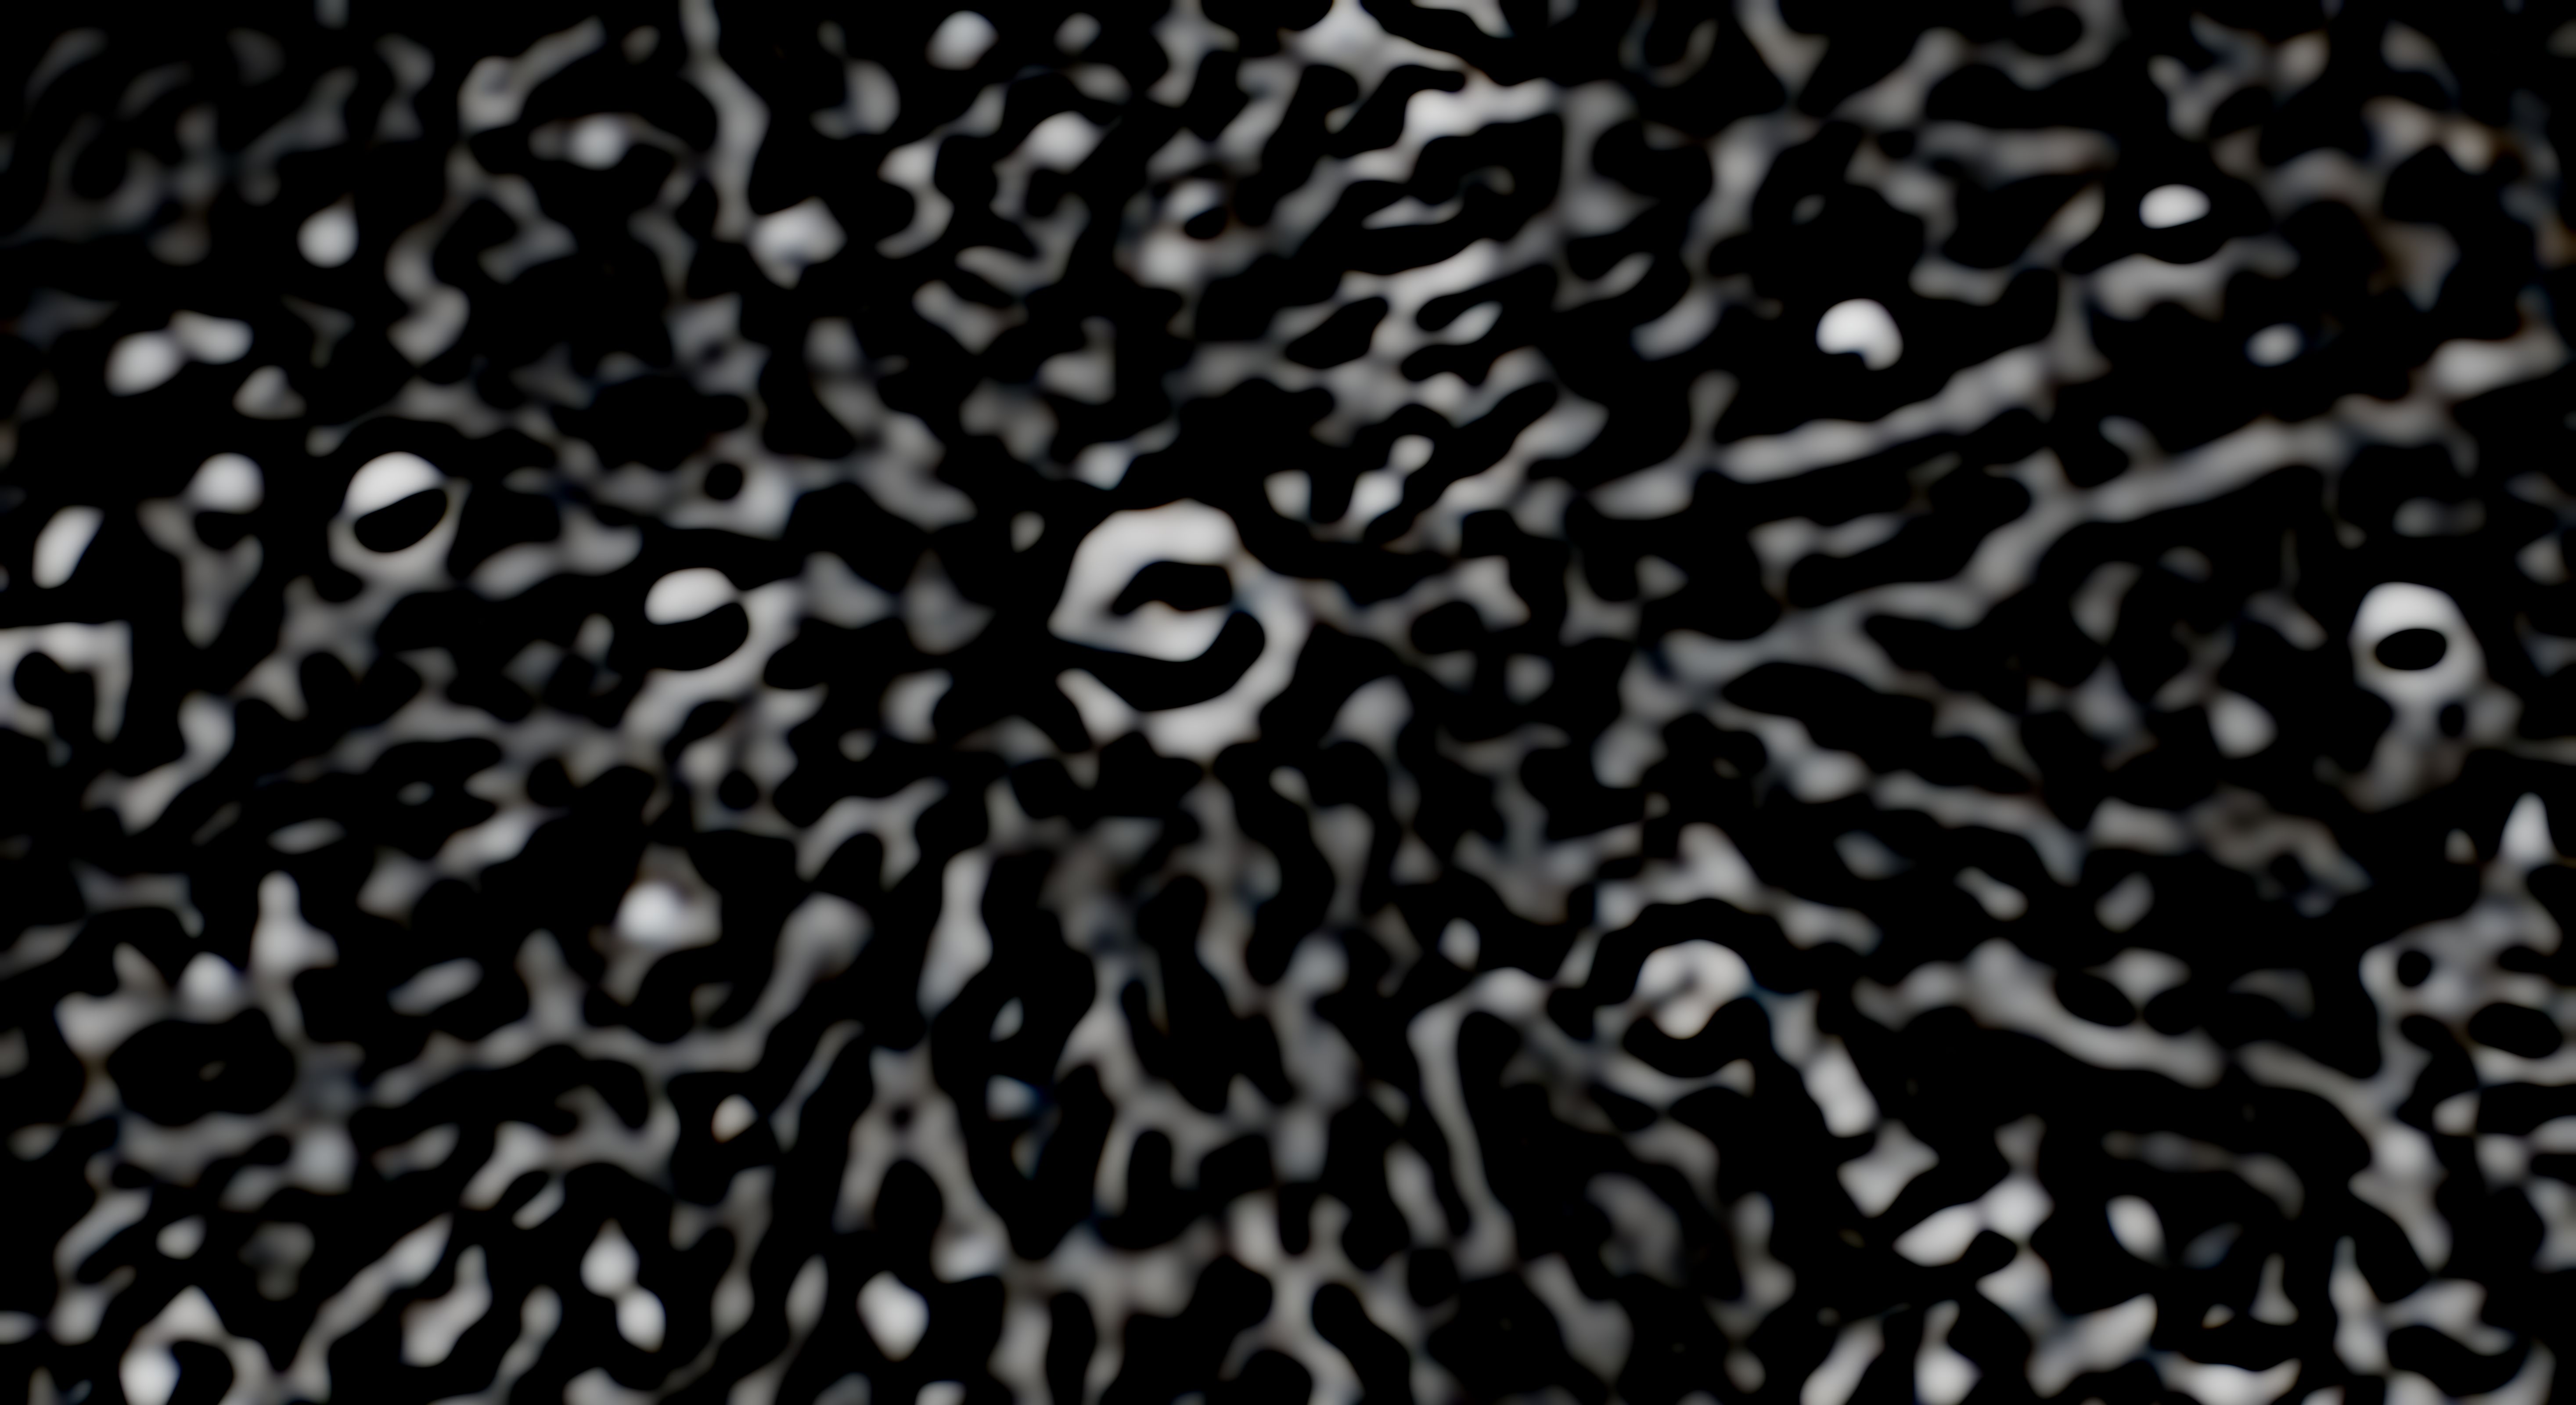
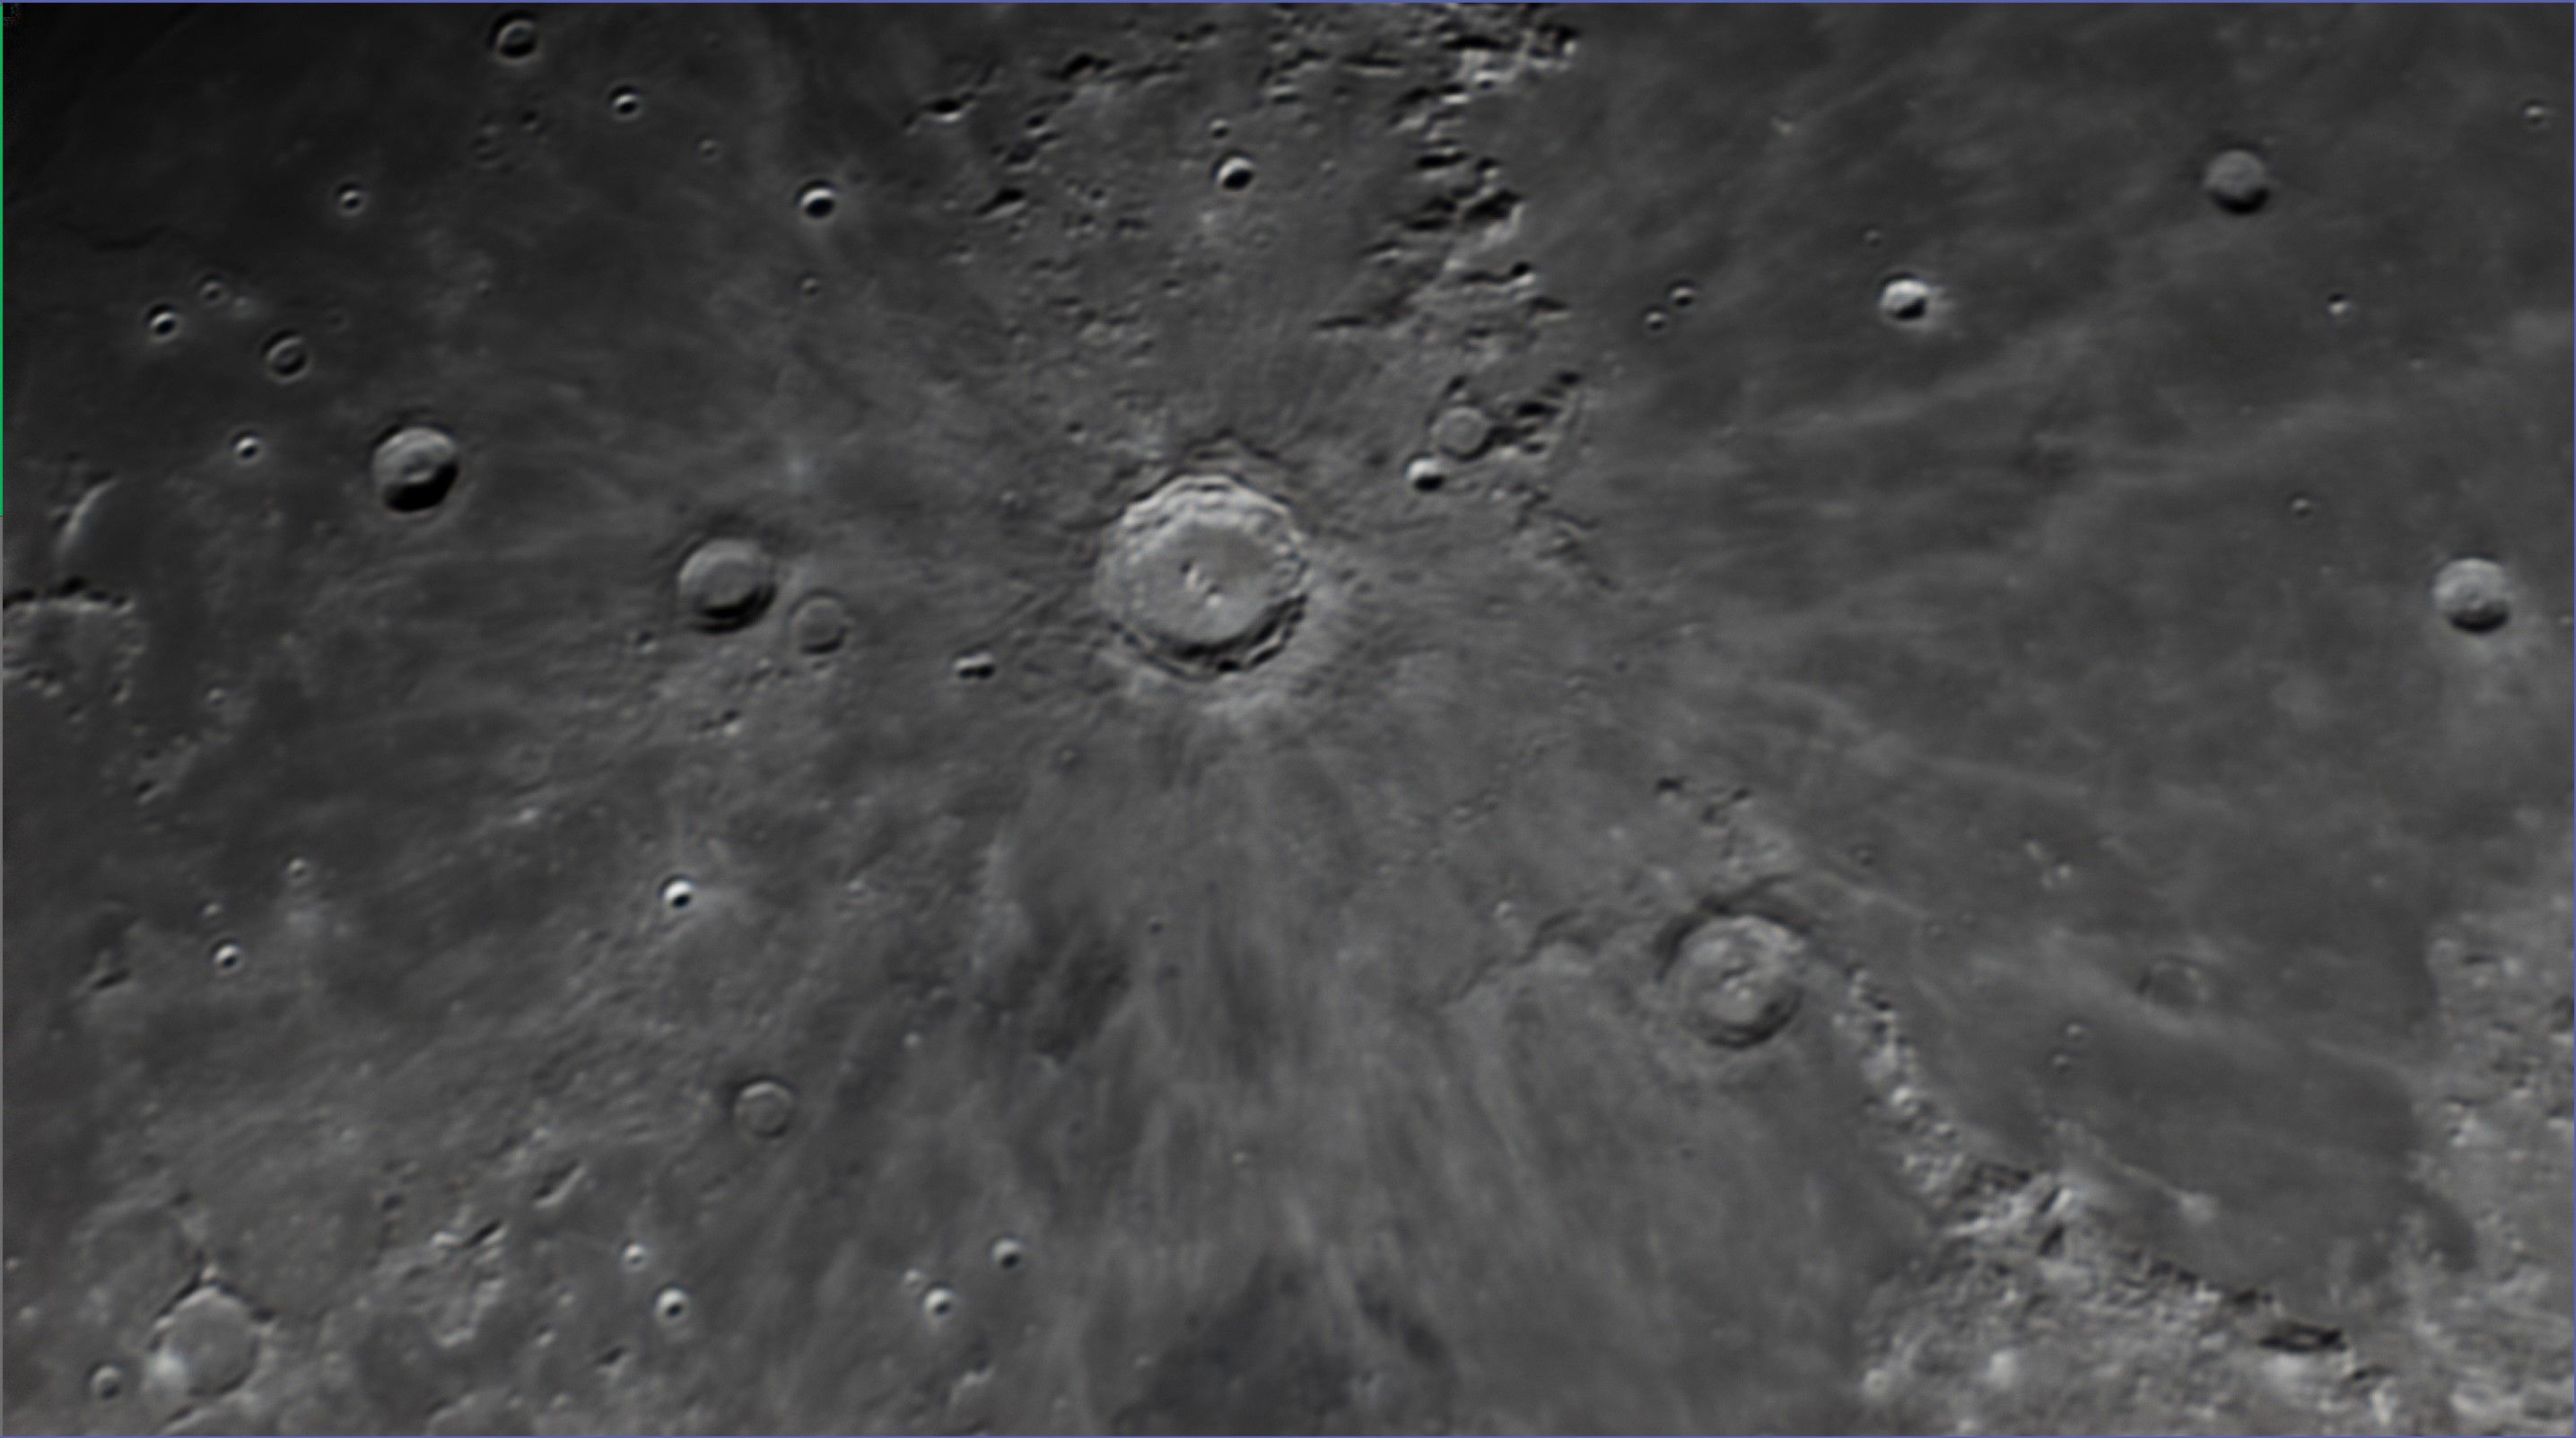
Wavelets are great for targeting the right scale. For example, most noise appears as errant pixels, so wavelet layer 1 is the best place to reduce noise. Stars appear across multiple pixels and structures like galaxies and nebulae have information at much higher levels. To illustrate this, look at the following image of the moon. Then, slide the slider to view various wavelets. Notice how the higher wavelets are more “blurred” and larger than the lower ones. To make each image, I used the Multiscale Linear Transformation (MLT) tool, set the number of levels to 8, and deleted all levels except the layer I wanted to show.


A full explanation of wavelets involves math and more knowledge than I possess, but hopefully this gives you a higher level understanding. Let’s work on our lunar image.
Multiscale Linear Transformation
Multiscale linear transformation, or MLT for short, is often introduced as a way to reduce noise in your image. A lesser known function is for sharpening of image. At each level or layer, you can manipulate a bias setting from 0.001 to 15. For all practical purposes, the bias is the level of sharpening. Because higher layers involve more pixels per unit, small changes in bias have major effects on the image. The lower layers can handle higher bias because the impact is distributed across more pixels and affects a finer set of details.
One frustration I have with RegiStax is the lack of a repeatable approach to sharpening. Everyone seems to do it their own way and has their own opinions about what works. They are capable of producing amazing images, but I struggle to learn the technique and apply it to my own. With MLT, however, I have a very precise methodology to share with you.
Maybe I’m biased from my 8-bit computer programming days, but eight layers seems to give me the right amount of control over the process. The default of 4 doesn’t leave me enough room. Here’s my process:
- Create a preview over an area with intersting details
- Open MLT
- Reset
- Set the layers to
8 - On the residual layer, set the bias to
0.001and click preview to review the results - If I don’t see any result, I double the bias and let the preview refresh
- I inspect the image to make sure it’s no oversaturated or clipping pixeles — when either happens, I back off on the bias level
- As a general rule of thumb, lower layers can be sharpened more, so I always start with the next layer’s bias (for example, if layer 4 is at
0.42bias, I’ll start working on layer 3 with0.42) - I generally double until I hit saturation, then back off
- After I have the preview in a satisfactory state, I apply MLT to the entire image
Tip When you find a good set of values, consider saving the process to a process icon so you can start with those settings the next time. Every image is different and may require tweaking but having some values that worked on other images can help you get to a result faster.
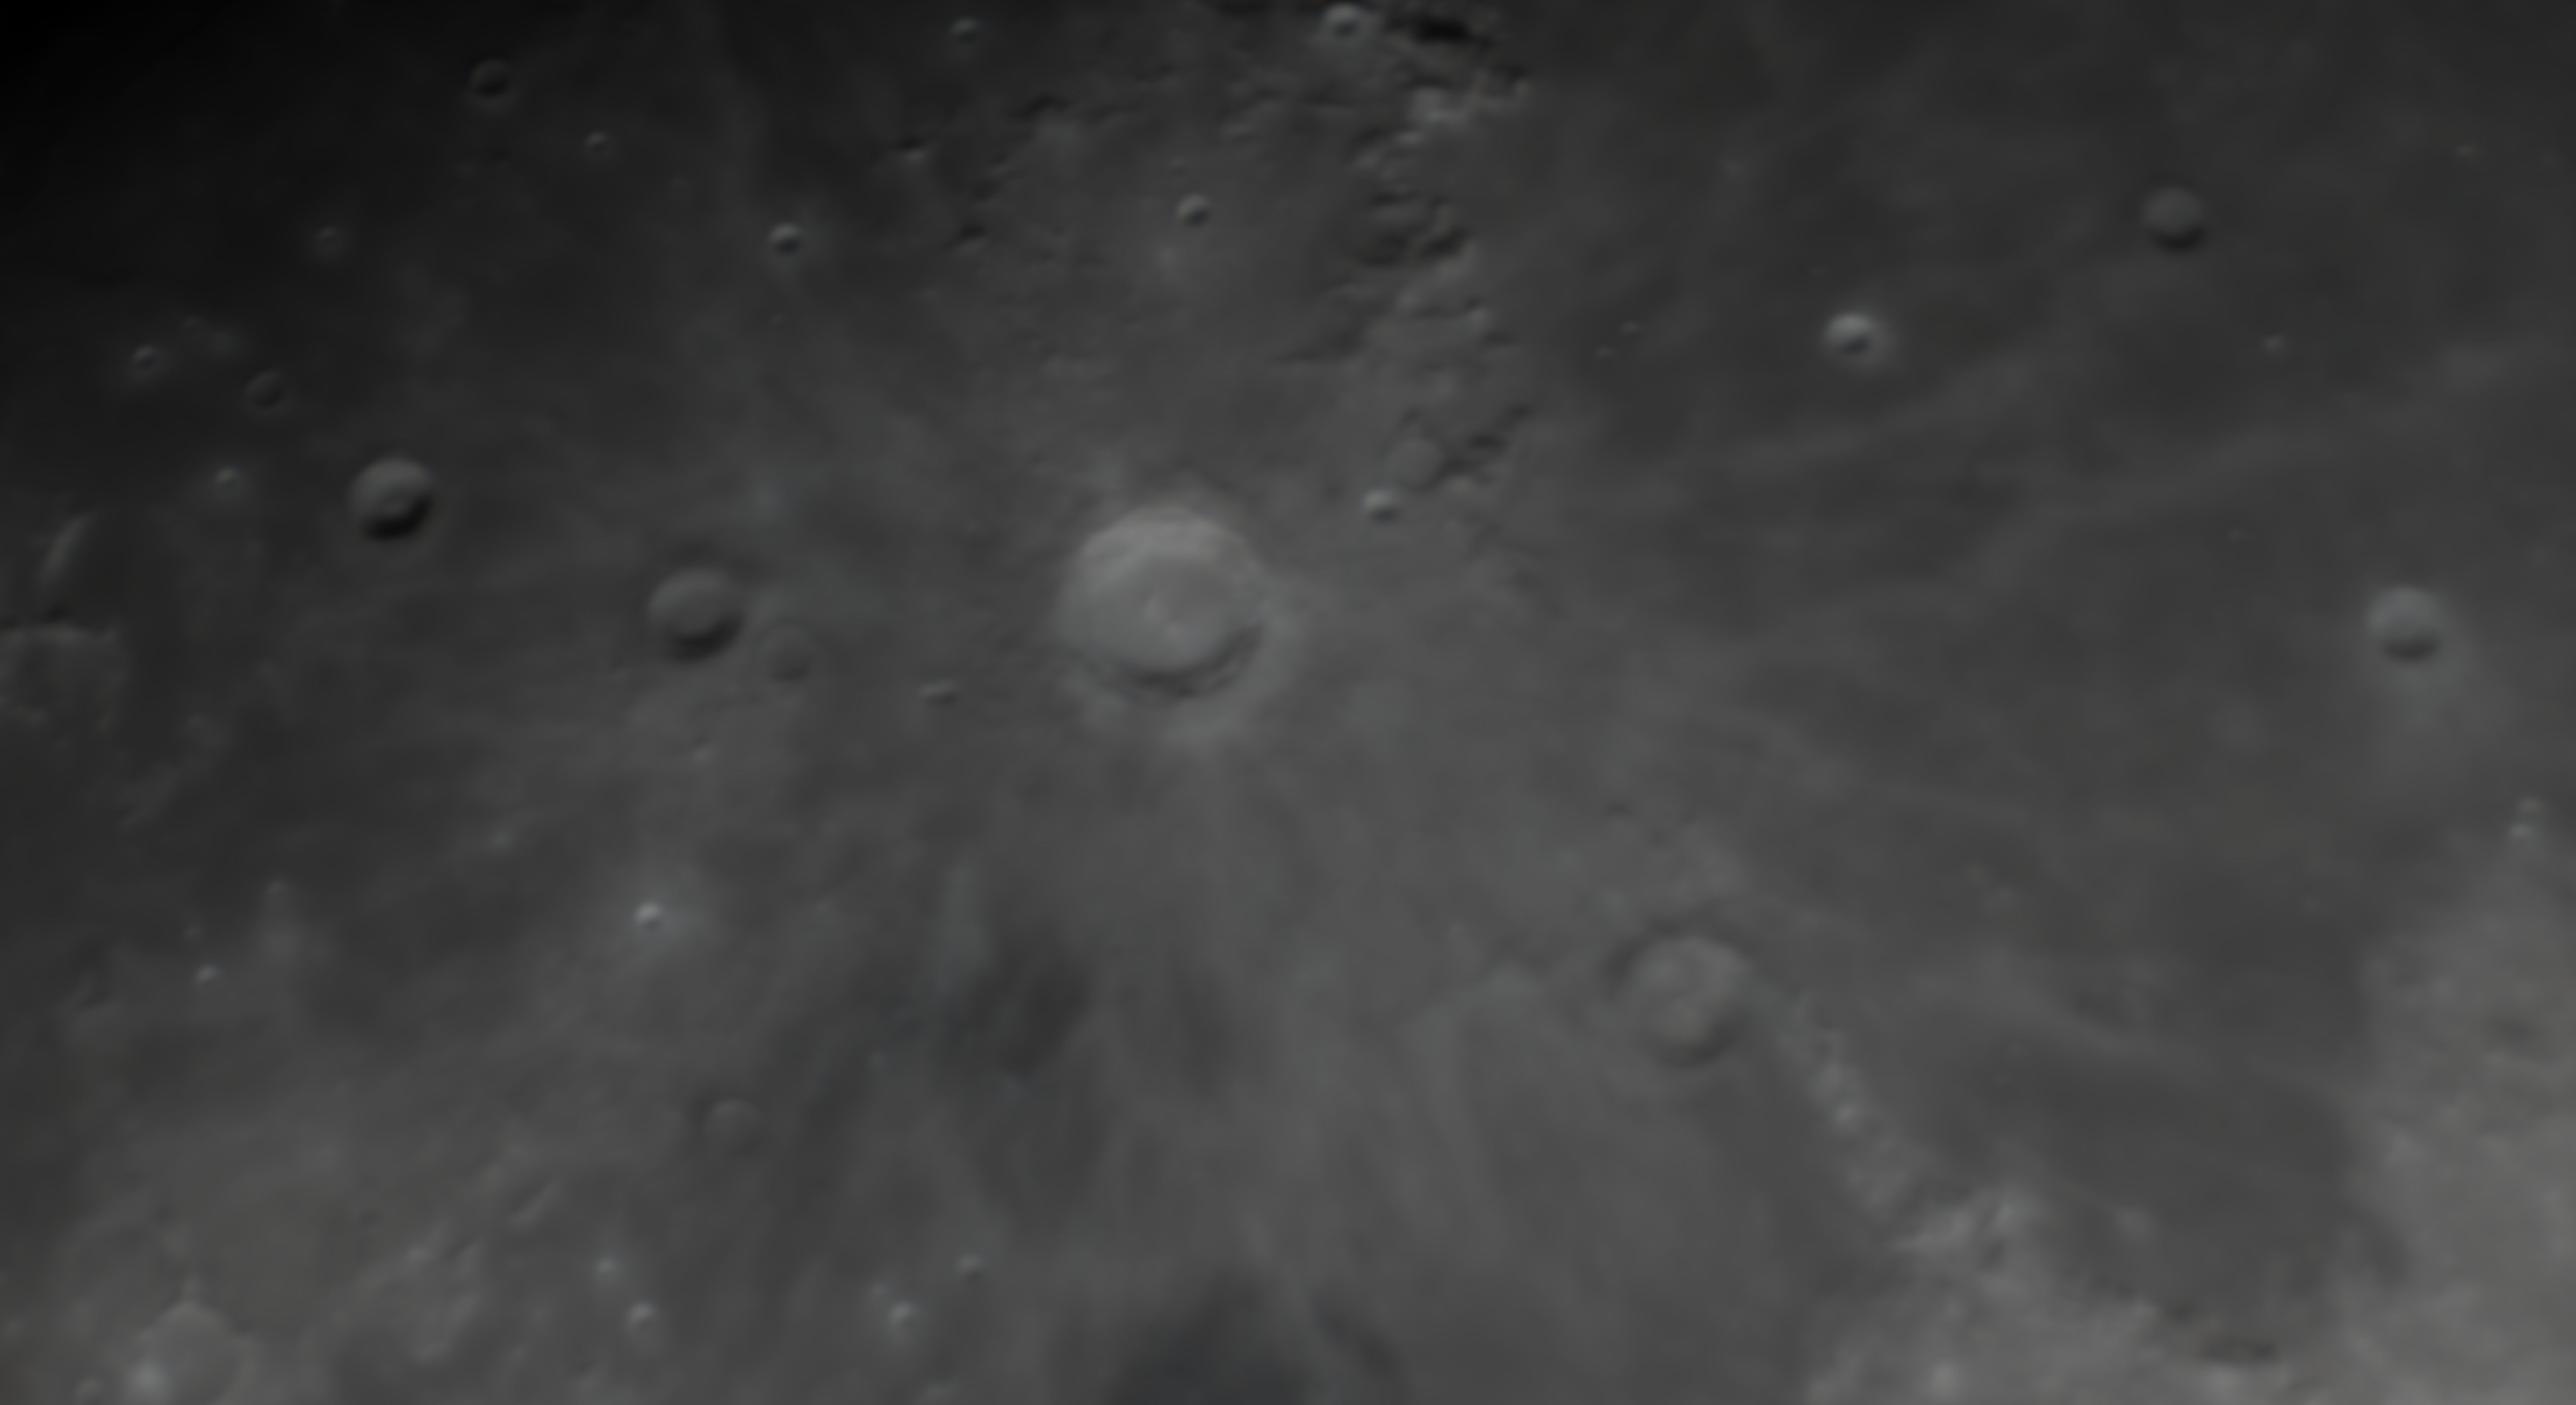
Here is the preview at the start of the session:

Here the adjustment is too high and has oversaturated and clipped pixels:

And when it appears just about right:

After finding the sweet spot, I apply to the whole image and move on.
The finishing touches
Two more tools in my arsenal are LocalHistogramTransformation and HDRTransformation. As with other options, the key is to use preview and expereiment with different values until you find what works.
- Save your work often as the new
xisfformat also embeds history - One trick I do is to apply a transformation, such as LHT, and the clone the image. I then undo the original image, and use PixelMath to blend the original with the clone. This gives me more control over how much is applied. For example, if I want to keep 70% of the original and 30% of new, I’ll use the expression
0.7*$T+0.3*hdrwhere$Tis the target image I’m manipulating andhdris the easy identifier I gave to the cloned image. - Another trick is to use multiple clones and blend them as described in this excellent article
- Curves can also help manipulate the image by increasing contrast.
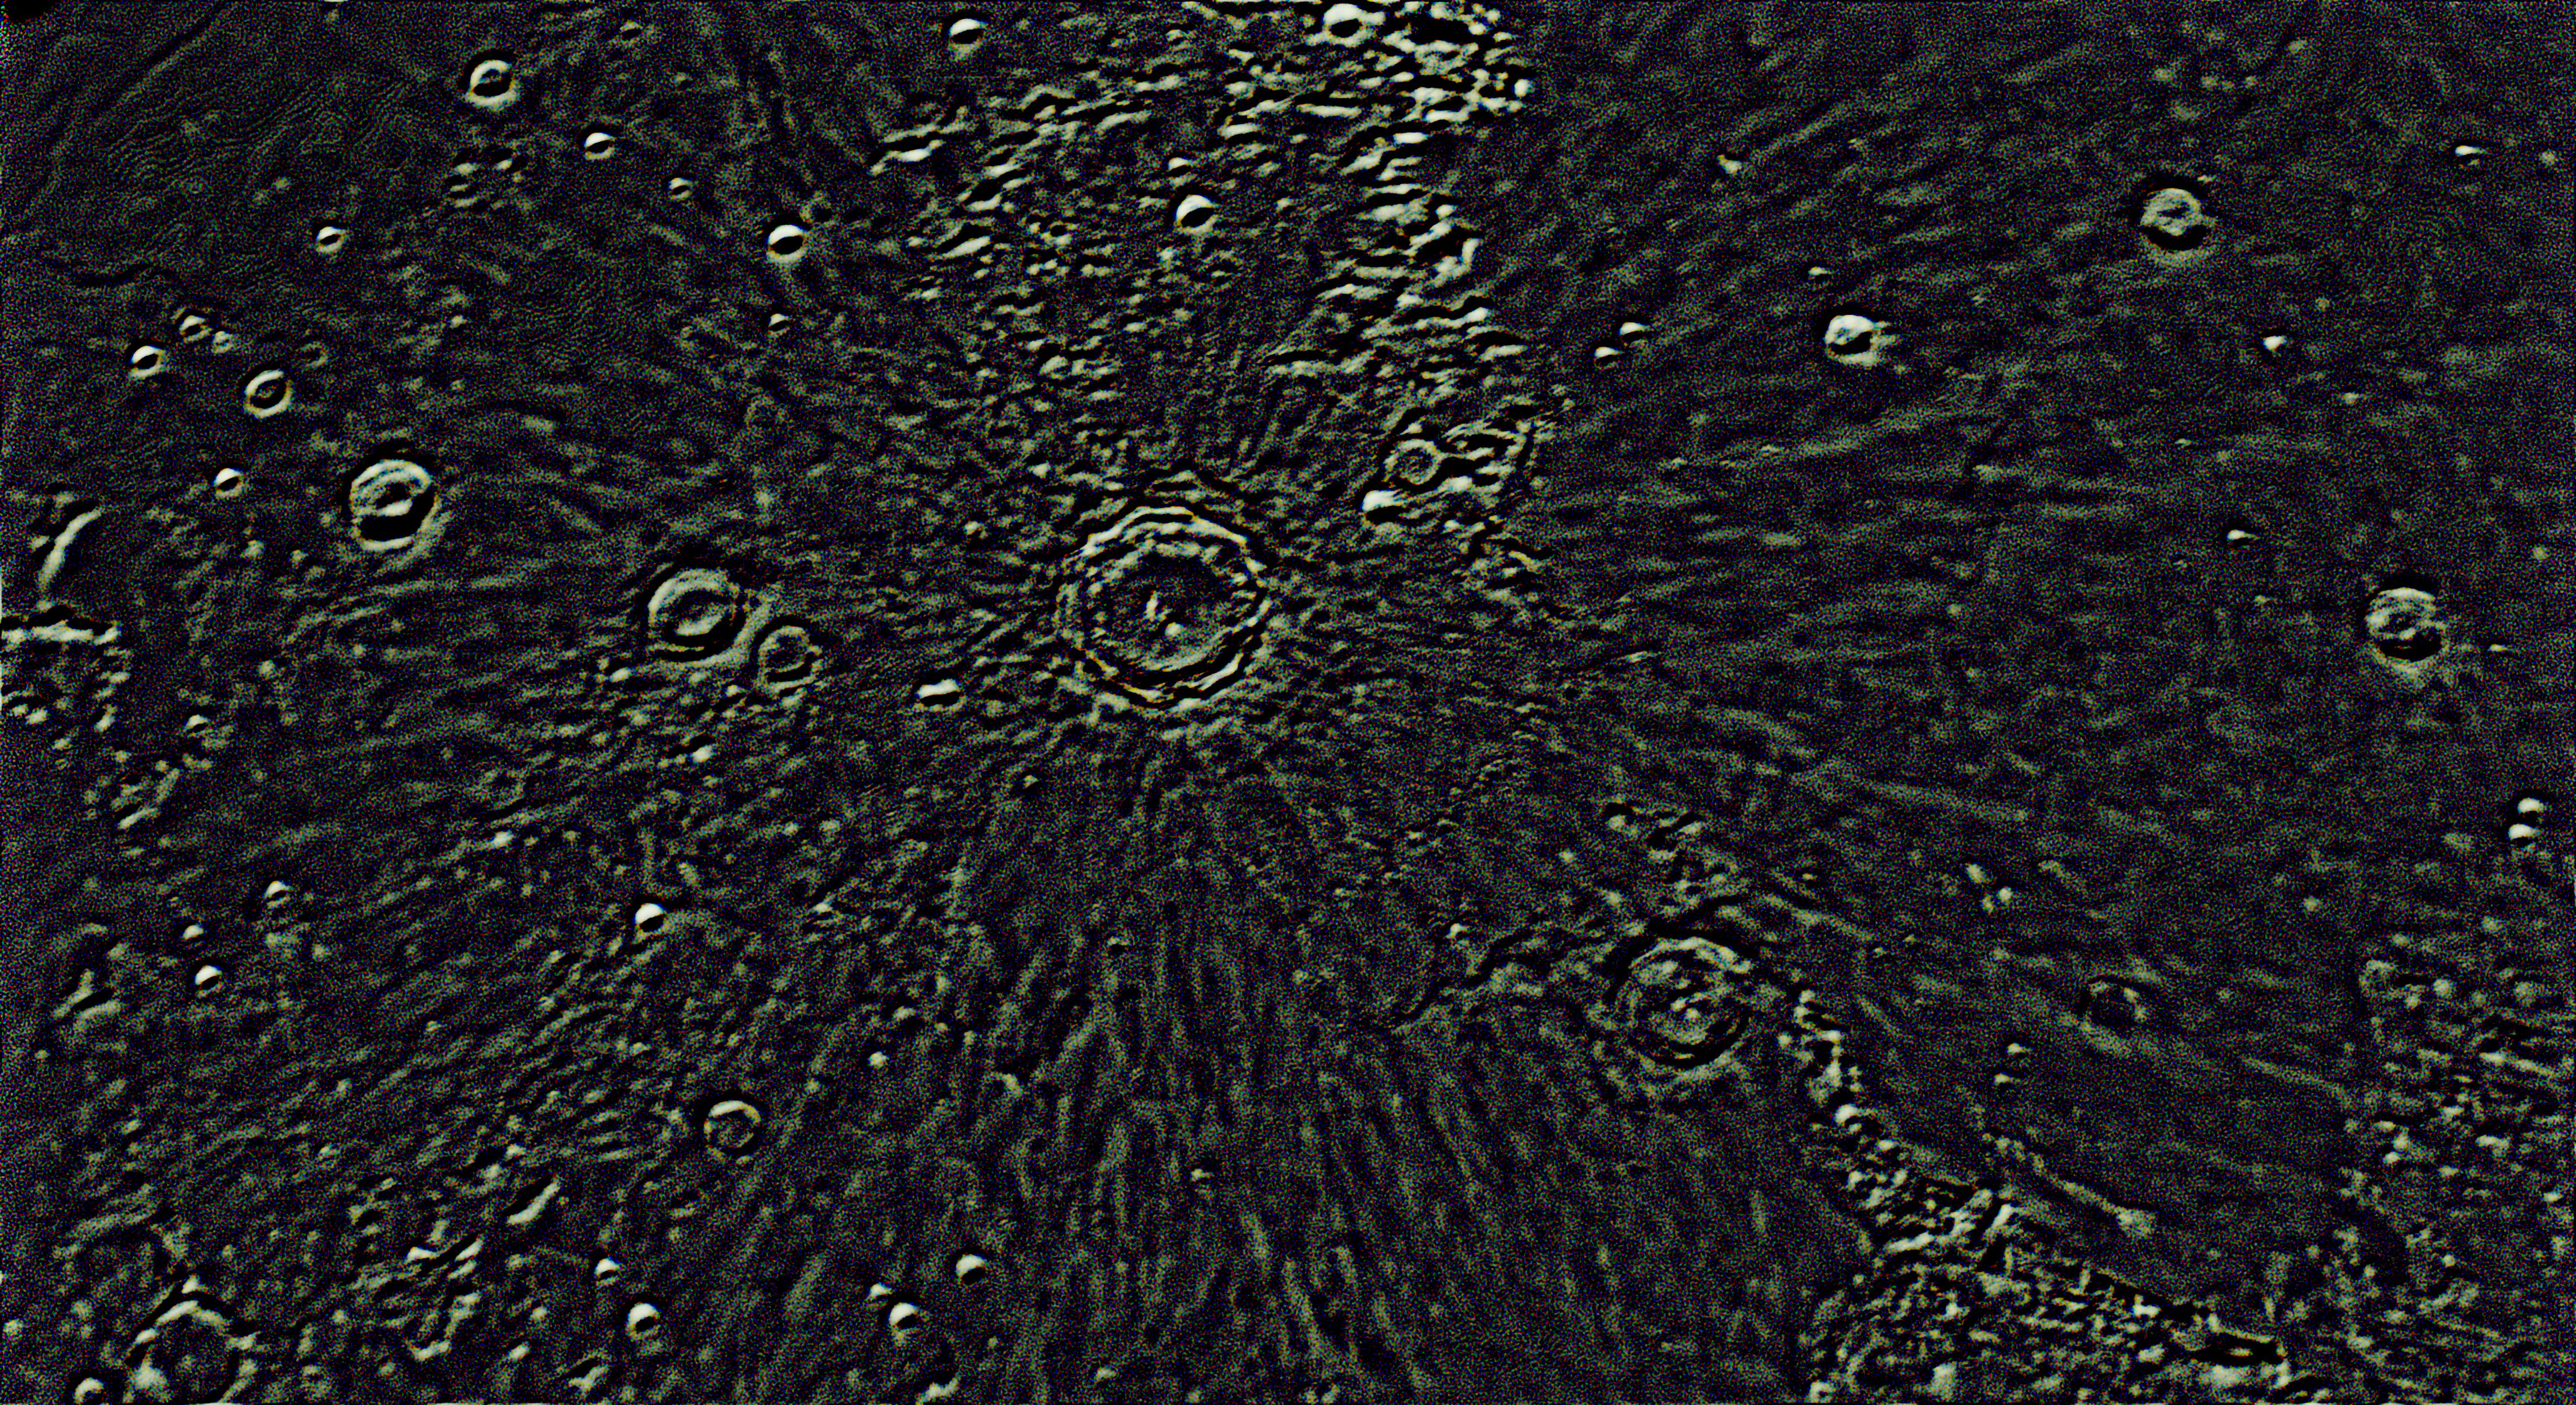
Here is my before and after.

That’s all for this post! Be sure to visit my astrophotography YouTube channel and subscribe!