
November 05, 2022 1857 words 7 minutes to read
A Quick (Bias-ed) and Dirty Look at Calibration

Summary
- Why you should take calibration frames
- What calibration frames to take
- See for yourself
- How to take calibration frames
- Conclusion
There are a lot of sites with videos, articles, and blogs that explain calibration frames in detail and provide instructions about “what goes where.” If you want to know the exact science behind calibration frames and fascinating in-depth discussions about electrons and well-depth, you should definitely not waste time reading this post. Those things are important, but many of you just want to take pictures and get results. I hope this gives you enough to understand what you need to get started without getting lost in the details.
If you’re more of a video person, check out Calibration explained in less than 4 minutes. It’s actually great if you have 4 minutes.
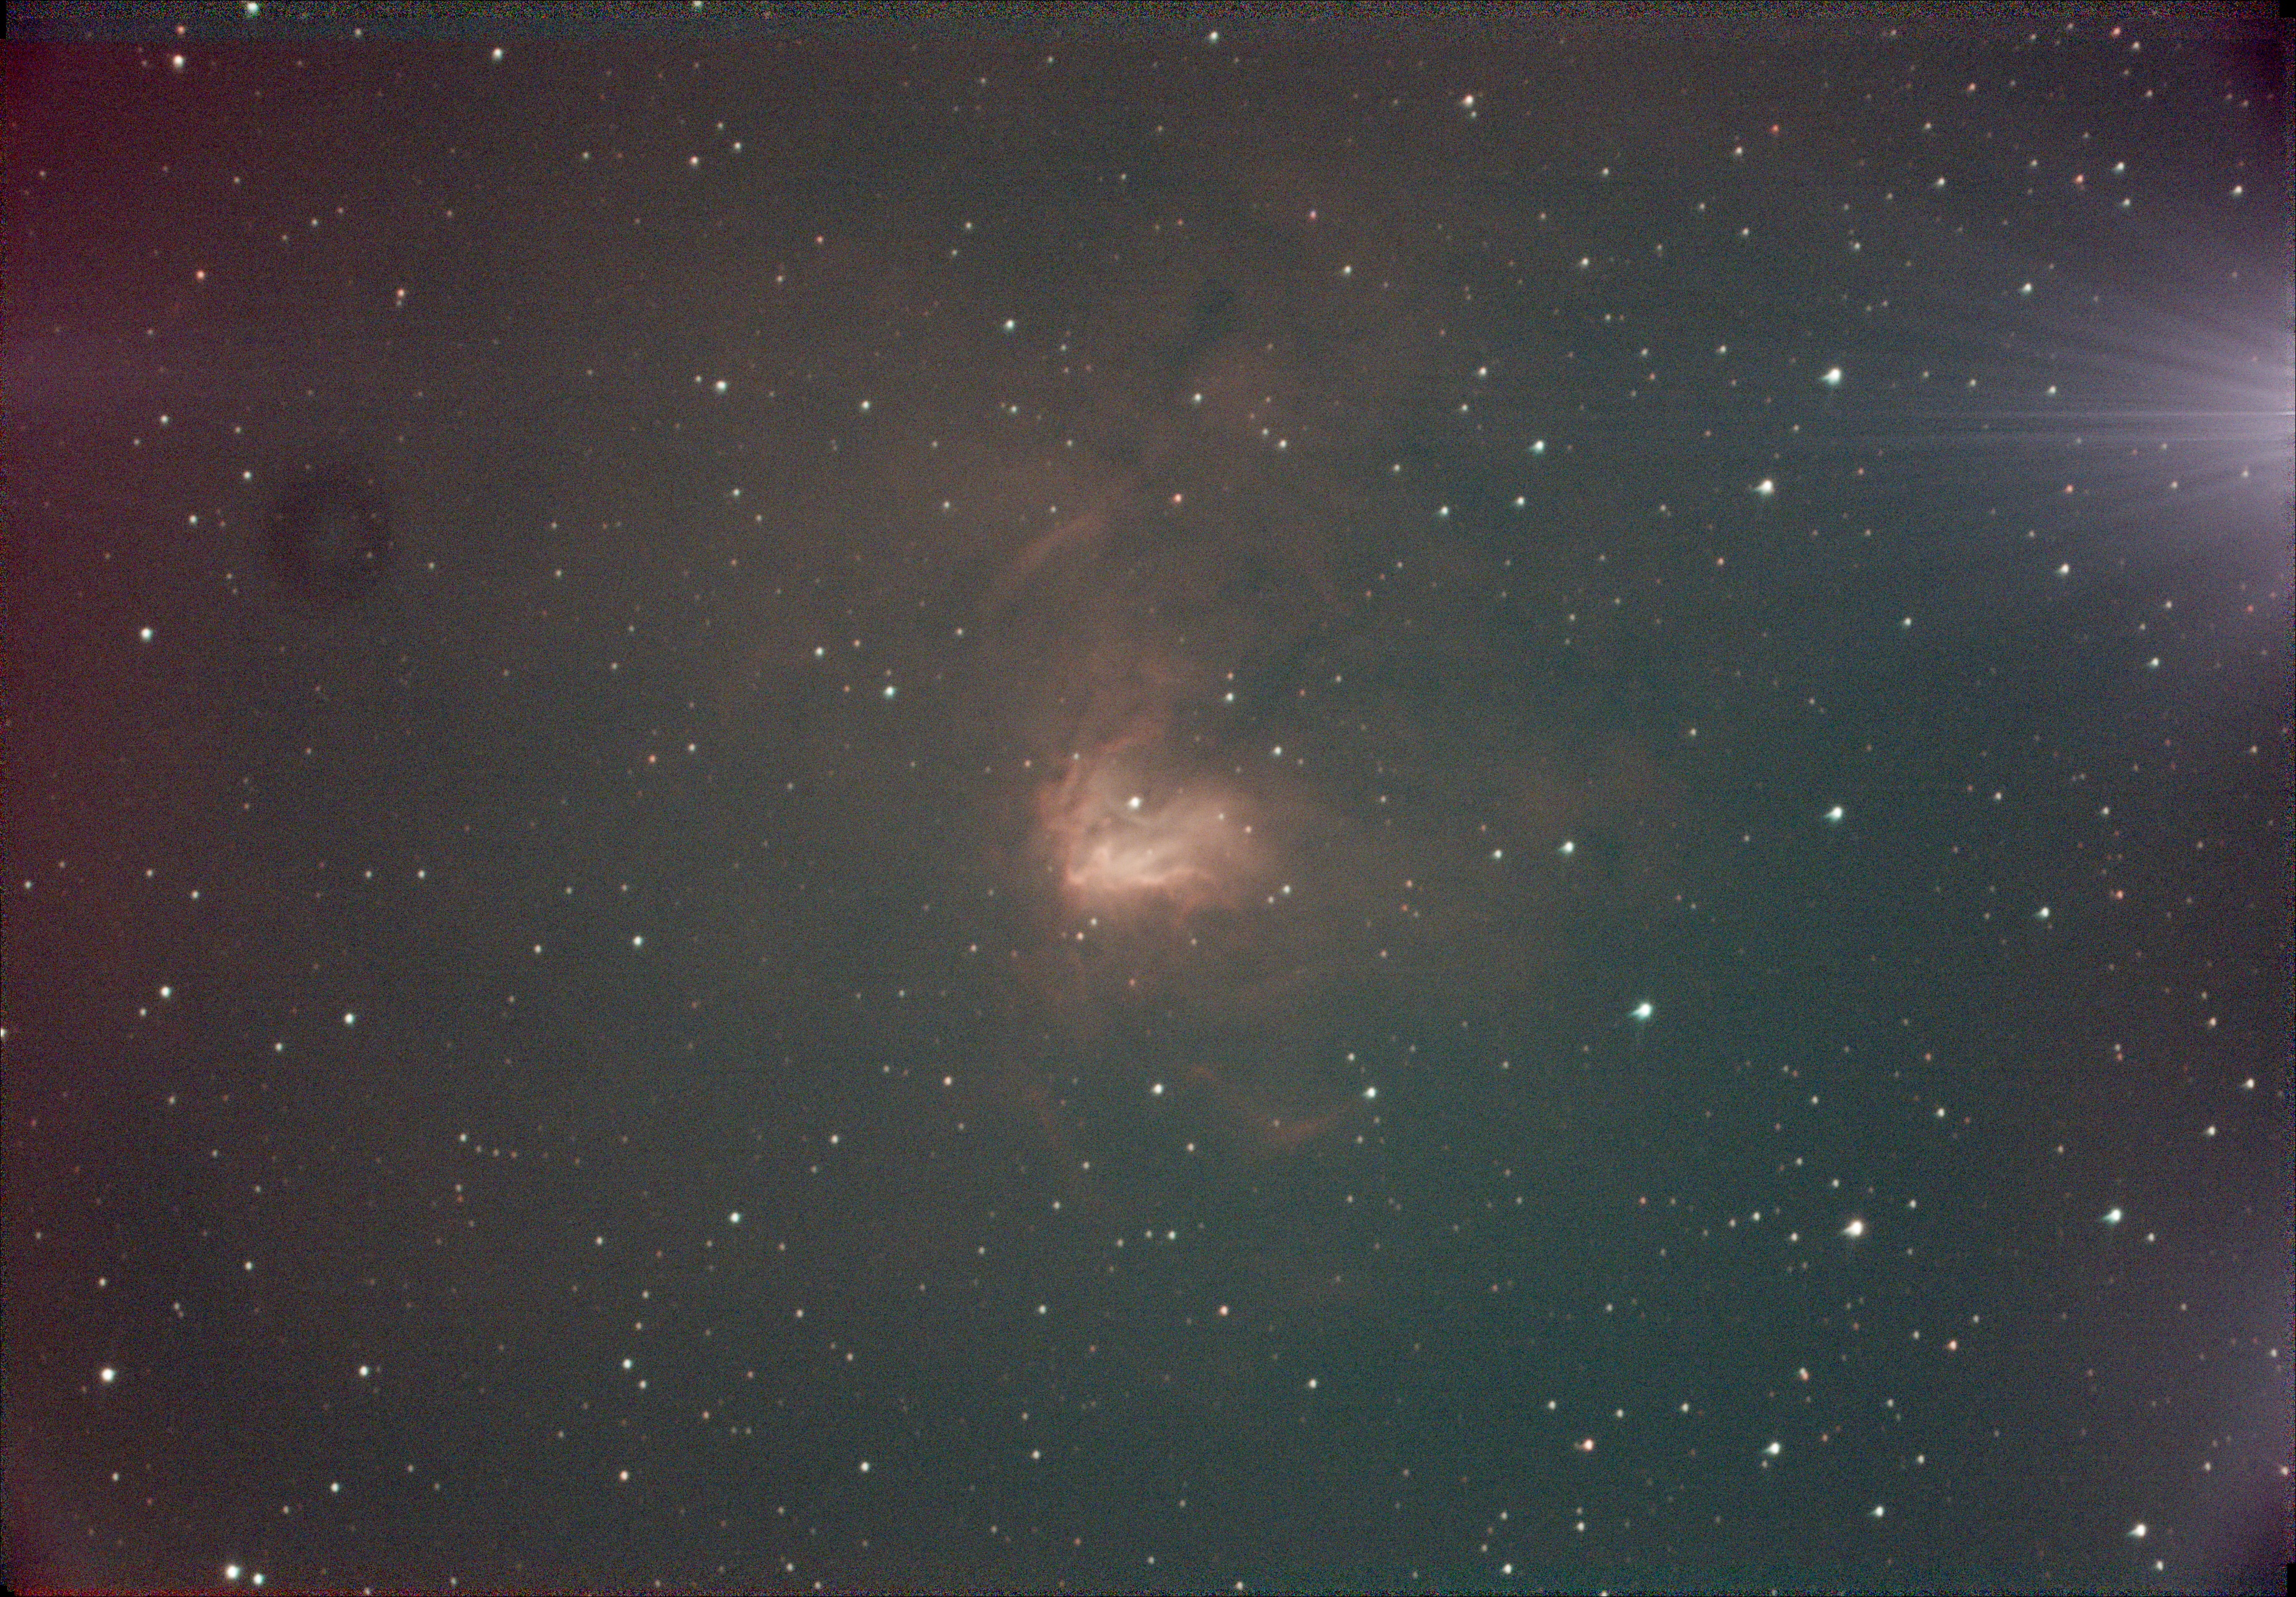
Let’s get right to it. Here’s how I take calibration frames. Trust me, it’s helpful to know when we go into the why. Last night, I took 30 1-minute pictures of the Orion constellation. This is what a single frame looks like:

After I took the pictures, I came inside and pulled up an app on my phone that just makes the entire screen turn white. I dimmed my phone a little bit, then set it so my camera lens was pointed squarely at the phone. I kept the same ISO settings as my raw photos and took a few pictures with different exposures until I verified my histogram level was between 50% - 75%. It turned out to be 1/3rd of a second for this round. I then shot 20 pictures of just the phone screen. I took 20 more pictures with the lens cap on at the same ISO and exposure as the previous set. After that, I set my shutter speed to the fastest possible (1/4000th second for my camera) and, with the cap still on, took 60 more photos. Finally, I used a device called an intervalometer designed for my camera and took 30 more pictures at 60 seconds. Using the combination of the 30 photos and these “calibration frames”, here is what I was able to create.

Why you should take calibration frames
Simply put, cameras and their sensors are messy. You might pride yourself in keeping lens wipes handy, but what happens when you get dust inside your lens? The sensor itself is subject to random noise that creates fuzzy patterns and speckles of color that don’t belong. Calibration frames are special images you take to isolate things like dust, vignetting (the round “circle of light” or dark effect like what I showed in my original Orion image), smudges, and sensor noise. Image processing software understands how to use these frames to compensate and produce a less noisy, dust-free image. Some cameras are great and don’t require much in the way of calibration, but most will benefit to some extent. The trick is know which calibration to take and how to take them.
What calibration frames to take
There are four common types of calibration frames: bias, dark, flat, and dark flat. Let’s tackle these one-by-one.
Bias
Bias frames are taken with no light on the sensor using the fastest possible exposure time. The temperature and ISO or gain setting should match that of your main images. If you used multiple ISOs, you should take multiple bias frames. Every sensor has built-in defects that can be captured with bias frames. A perfect sensor would create a completely black image in the absence of light. But sensors aren’t perfect, so here’s what their bias looks like:

Dark
Dark frames are taken with no light on the sensor using the same exposure time, temperature, and ISO or gain that you used for your main images. The same way a long exposure collects more light to capture the faint details of nebulae, it also picks up noise from current in your sensor. In addition, some pixels are defective and can appear darker (“cold pixels”) or brighter (“hot pixels”) than neighboring pixels. Darks isolate these pixels so they can be brightened or darkened during processing to match the rest of the image. Finally, some cameras leak light and produce what is called “amp glow.” In the following dark, can you spot the three areas of amp glow and see just how many “hot” red, green, and blue pixels there are in the magnified inset?

Flat
Flat frames are taken with a diffuse, uninform (evenly illuminated) light source. A common practice is to point the scope skyward in the early morning and cover the lens with white paper or a t-shirt. The ISO will match your target image but the exposure time will vary. You need to set the exposure so that your histogram readout is between 50-75%. This ensures you pick up artifacts the lens like dust and smudges without oversaturating them. This image saves my pictures but also reminds me to clean my image train.

Dark flat
Dark flat frames are usually taken when you, for whatever reason, don’t have or take bias frames. They are darks taken specifically for flats. These are easy to do because you simply repeat the exact same sequence of photographs you took for flats, only this time with the lens cap on.
See for yourself
It’s all good to talk about calibration, but what does it look like? In this interactive photo, you can toggle flats and darks to see what the difference looks like.
How to take calibration frames
Now you know what they are. How do you take them? I created a table to help know when and how.
- Dark technique is to cover the lens with the lens cap. Preferably run at night so no light leaks in, otherwise consider covering your scope or putting it somewhere dark like a closed closet.
- Flat technique is to take a picture of a uniform, white light source and adjust your exposure until the histogram reading is between 50 - 75% analog digital units (ADUs). You can use the sky, a white t-shirt and paper, or a flat panel. I use an app on my smartphone that turns the LED display white for smaller lenses. For larger lenses, I use an adjustable LED tracing pad. I point the telescope straight up and set the tracing pad on top, illuminated side facing the telescope.
TIP Considering using SharpCap’s Capture Flat Frame feature or N.I.N.A’s Flat Wizard to make things easier.
Imagine I have a session where I image with no filter using 60 second exposures at a gain of 200. I then switch to a narrowband filter and do the same exposure and gain. After awhile I decide the filter requires a longer exposure, so I take some 120 second exposures. I find it’s a bit noisy, so I drop the gain to 120.
In this session, I had four groups:
- Group 1 RGB 60s 200
- Group 2 NB 60s 200
- Group 3 NB 120s 200
- Group 4 NB 120s 120
Assuming everything was at the same temperature, my calibration frames would then look something like this:
- Bias 1/4000th second ISO 200 - usable for Groups 1 through 3
- Bias 1/4000th second ISO 120 - usable for Group 2
- Dark 60s ISO 200 - usable for Groups 1 and 2
- Dark 120s ISO 200 - usable for Group 3
- Dark 120s ISO 120 - usable for Group 4
- Flat RGB 0.3s ISO 200 - usable for Group 1
- Flat NB 0.6s ISO 200 - usable for Groups 2 and 3
- Flat NB 0.7s ISO 120 - usable for Group 4
- Dark flat RGB 0.3s ISO 200 - usable for Group 1
- Dark flat NB 0.6s ISO 200 - usable for Groups 2 and 3
- Dark flat NB 0.7s ISO 120 - usable for Group 4
Conclusion
Take calibration frames. Most software knows how to use it and your pictures will benefit. When your software creates a “master” dark or bias, save it with a filename like “Master-Bias-ISO-200” or “Master-Dark-180s-ISO-200”. That way you can reuse it when you shoot at the same exposure and ISO or gain. Finally, unless you have a cooled camera, having a sudden temperature rise or drop is a good reason to take a new set of calibrations.
Wishing you clear skies!