
September 27, 2021 1231 words 4 minutes to read
Astrophotography without a telescope
Summary
Lately, I’ve been learning how to take deep space pictures without a telescope. It turns out that ordinary DSLR or mirrorless cameras can, given a steady tripod, favorable f/stop and long exposure, capture detailed images of clusters, nebulae, galaxies, and stars. I’m very new to this and these are the first images I’ve successfully captured.
Here’s how I did it:
Setting up
I have a Sony Alpha 6300 (ILCE-6300) camera with a 55mm/212mm lens. I’ve tried taking images with the 35mm lens and they just don’t turn out. So, the first captures I made I chose the constellation Orion as my target. It is big, easy to spot, and contains nebulae and clusters that are visible to the naked eye. Of course, for me, it’s also right above an annoying street light that ruins the shots. I look forward to better results under darker skies.
The camera
For the camera, I purchased an intervalometer which is essentially a timing device. It allows me to control shutter sequences. There are a few rules of thumb for shooting stars. The first is to avoid too long of an exposure. The earth is rotating and the stars are constantly moving. Too long of an exposure will result in star trails. Here’s a five-minute exposure of Orion:

It turns out there are a few ways to determine the exposure. One is called “rule of 500” and simply means you can expose for 500 divided by your focal length. So, at the 55mm setting, I can theoretically expose for 9 seconds, while at 212mm only 2 seconds. I prefer the MFN rule which is too complicated to go into here but available at that link. The rule tells me I’m safe at 3 seconds for the 55mm and 1 second for the 212mm.
As a beginner I had no understanding of f/stops and was taking pictures at f/16. This is a ratio of the focal length to the aperture, and a high value means a closed aperture. The aperture lets in light for the photograph, so smaller aperture means less light. At 55mm the aperture is just 3mm wide at f/16 (55/16). Change that to f/4.5 and suddenly we’re at a 12mm aperture. Much better! I learned how to change the f/stop on my camera to ensure the widest aperture, which is f/4.5 for 55mm and f/6 212mm. It’s also important to note that different f/stops are available based on your exposure time.
The focus was set to manual. The camera has a mode that digitally zooms when you focus. I used this and centered on a bright star on Orion’s belt. I then carefully adjusted the focus until the star was a pinpoint of light. I took a test shot and zoomed in to see the shape of the star, and adjusted again if it was off.
ISO settings are one of those factors that vary from camera to camera. With a little experimentation, which means changing the ISO and finding the level that maximizes number of stars but minimizes noise and glow, I figured out that the longer exposure at 3 seconds worked well with ISO 800. The zoomed exposure at 1 second needed ISO 2000.
The intervalometer
Most of these devices are similar. For mine, you set the delay, the time of exposure, the total time of a “frame” and number of shots. The “frame” time requires giving the camera a break between shots. So, for this target, I set the delay to 2 seconds, the exposure to 3 seconds, the frame time to 4 seconds and the number to 30. This will set up a 3 second exposure, then wait the 1 second left for the frame, then start the next shot. The sequence is repeated 30 times. I picked the iterations based on how long it takes the target to move to the edge of the frame.
The tripod
A tripod is essential. Stars are small targets and long exposures are sensitive to the weakest vibrations. I have a few different camera and phone tripods. I used the Manfrotto 190 series because it is sturdy, flexible, and has a ball/trigger grip that makes it easy to make fine adjustments.
The shoot
Now it was time to shoot. I took a few sample shots at the 3” exposure and decided they were in focus. I tapped “start” on my intervalometer and the camera counted down and began to snap away. After 30 shots, Orion would start to move out of frame. I readjusted the camera to center Orion and ran the script two more times. I then disconnected the intervalometer and put the lens cap back on. I switched the mode to 5 images, or lights, per shot and clicked the camera five times. This generated a set of images that represent the bad pixels in my camera sensor. It can be used to remove pixel defects in the final photo. Because they are taken with no light, these images are called darks. I also changed the exposure to the maximum speed at 1/4000th of a second and shot a set of bias frames to help reduce defects caused by the camera’s lens.
💡 Tip: if you are hunting a hard-to-see target like the Andromeda galaxy, here’s a trick I use: I start with the widest field of view possible and a long (10 or 20 second) exposure time. I pan the sky until my target appears, then estimate the center spot. Once it’s centered, I’ll zoom and switch to my planned exposure and ISO settings.
Processing
I loaded the various image sets into AstroPixel Processor. I kept most of the defaults, only changing:
- In the calibrate tab, I checked Cosmetic Correction for hot pixels and hot and cold columns.
- In the integrate tab, I bumped the number to stack down slightly (from about 100 to 91) to automatically reject the worst lights.
- In the integrate tab, I set integrate mode to Bayer/X-Trans Drizzle and set the scale to 3.0 to produce an extremely large and detailed image.
I clicked integrate and waited a few hours for the images to stack. This is what came out:

I worked through a typical PixInsight workflow:
- Crop
- Rotate
- Automatic Background Extraction
- Background Neutralization
- Color Calibration
- Deconvolution
- EZ Soft Stretch
- Curves Transformations
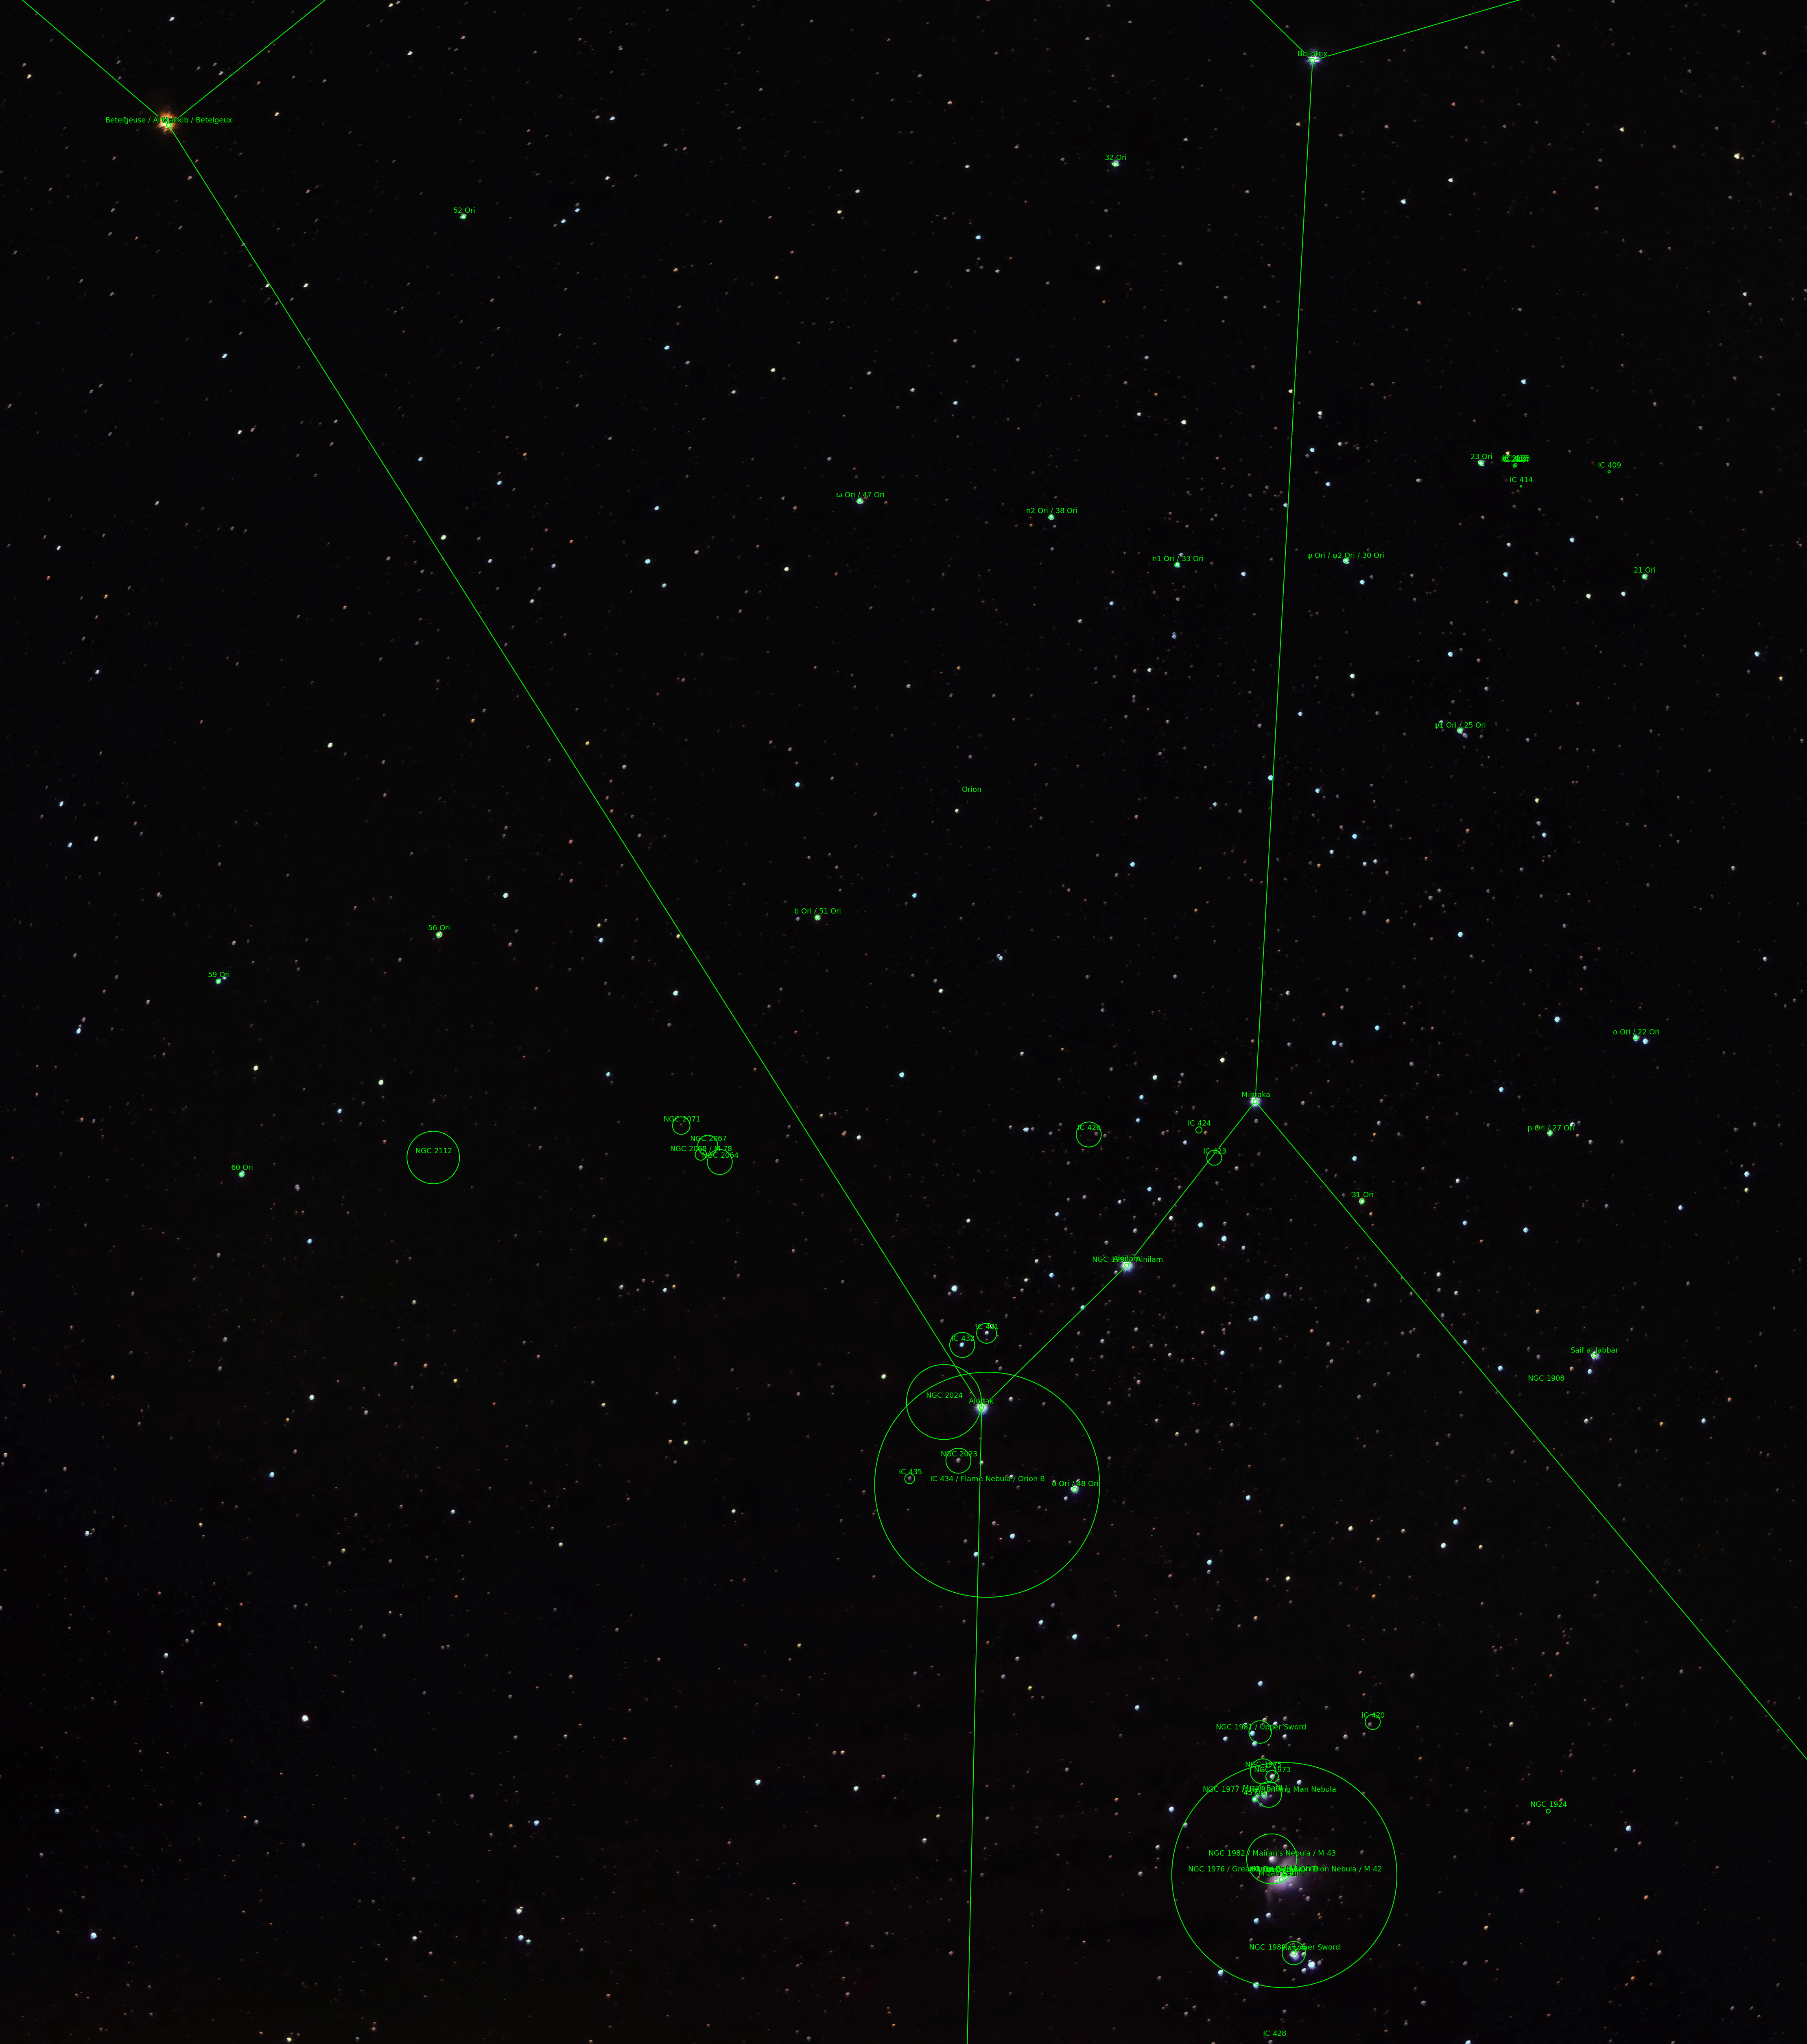
The end result is this:

Zoom
Happy with the Orion effort, I tackled the sword next. I zoomed to 212mm and refocused. I changed the exposure time to 1 second, with 2 second frames and 50 images. I re-aligned and repeated for a total of 250 images to stack. Here is the sword:

Those are my tips and results so far taking astrophotos without a telescope. What are your tips? Feel free to link to your photos in the comments below.
Post categories: Related tags: