February 20, 2022 4441 words 17 minutes to read
To the Moon! Processing lunar images
Summary
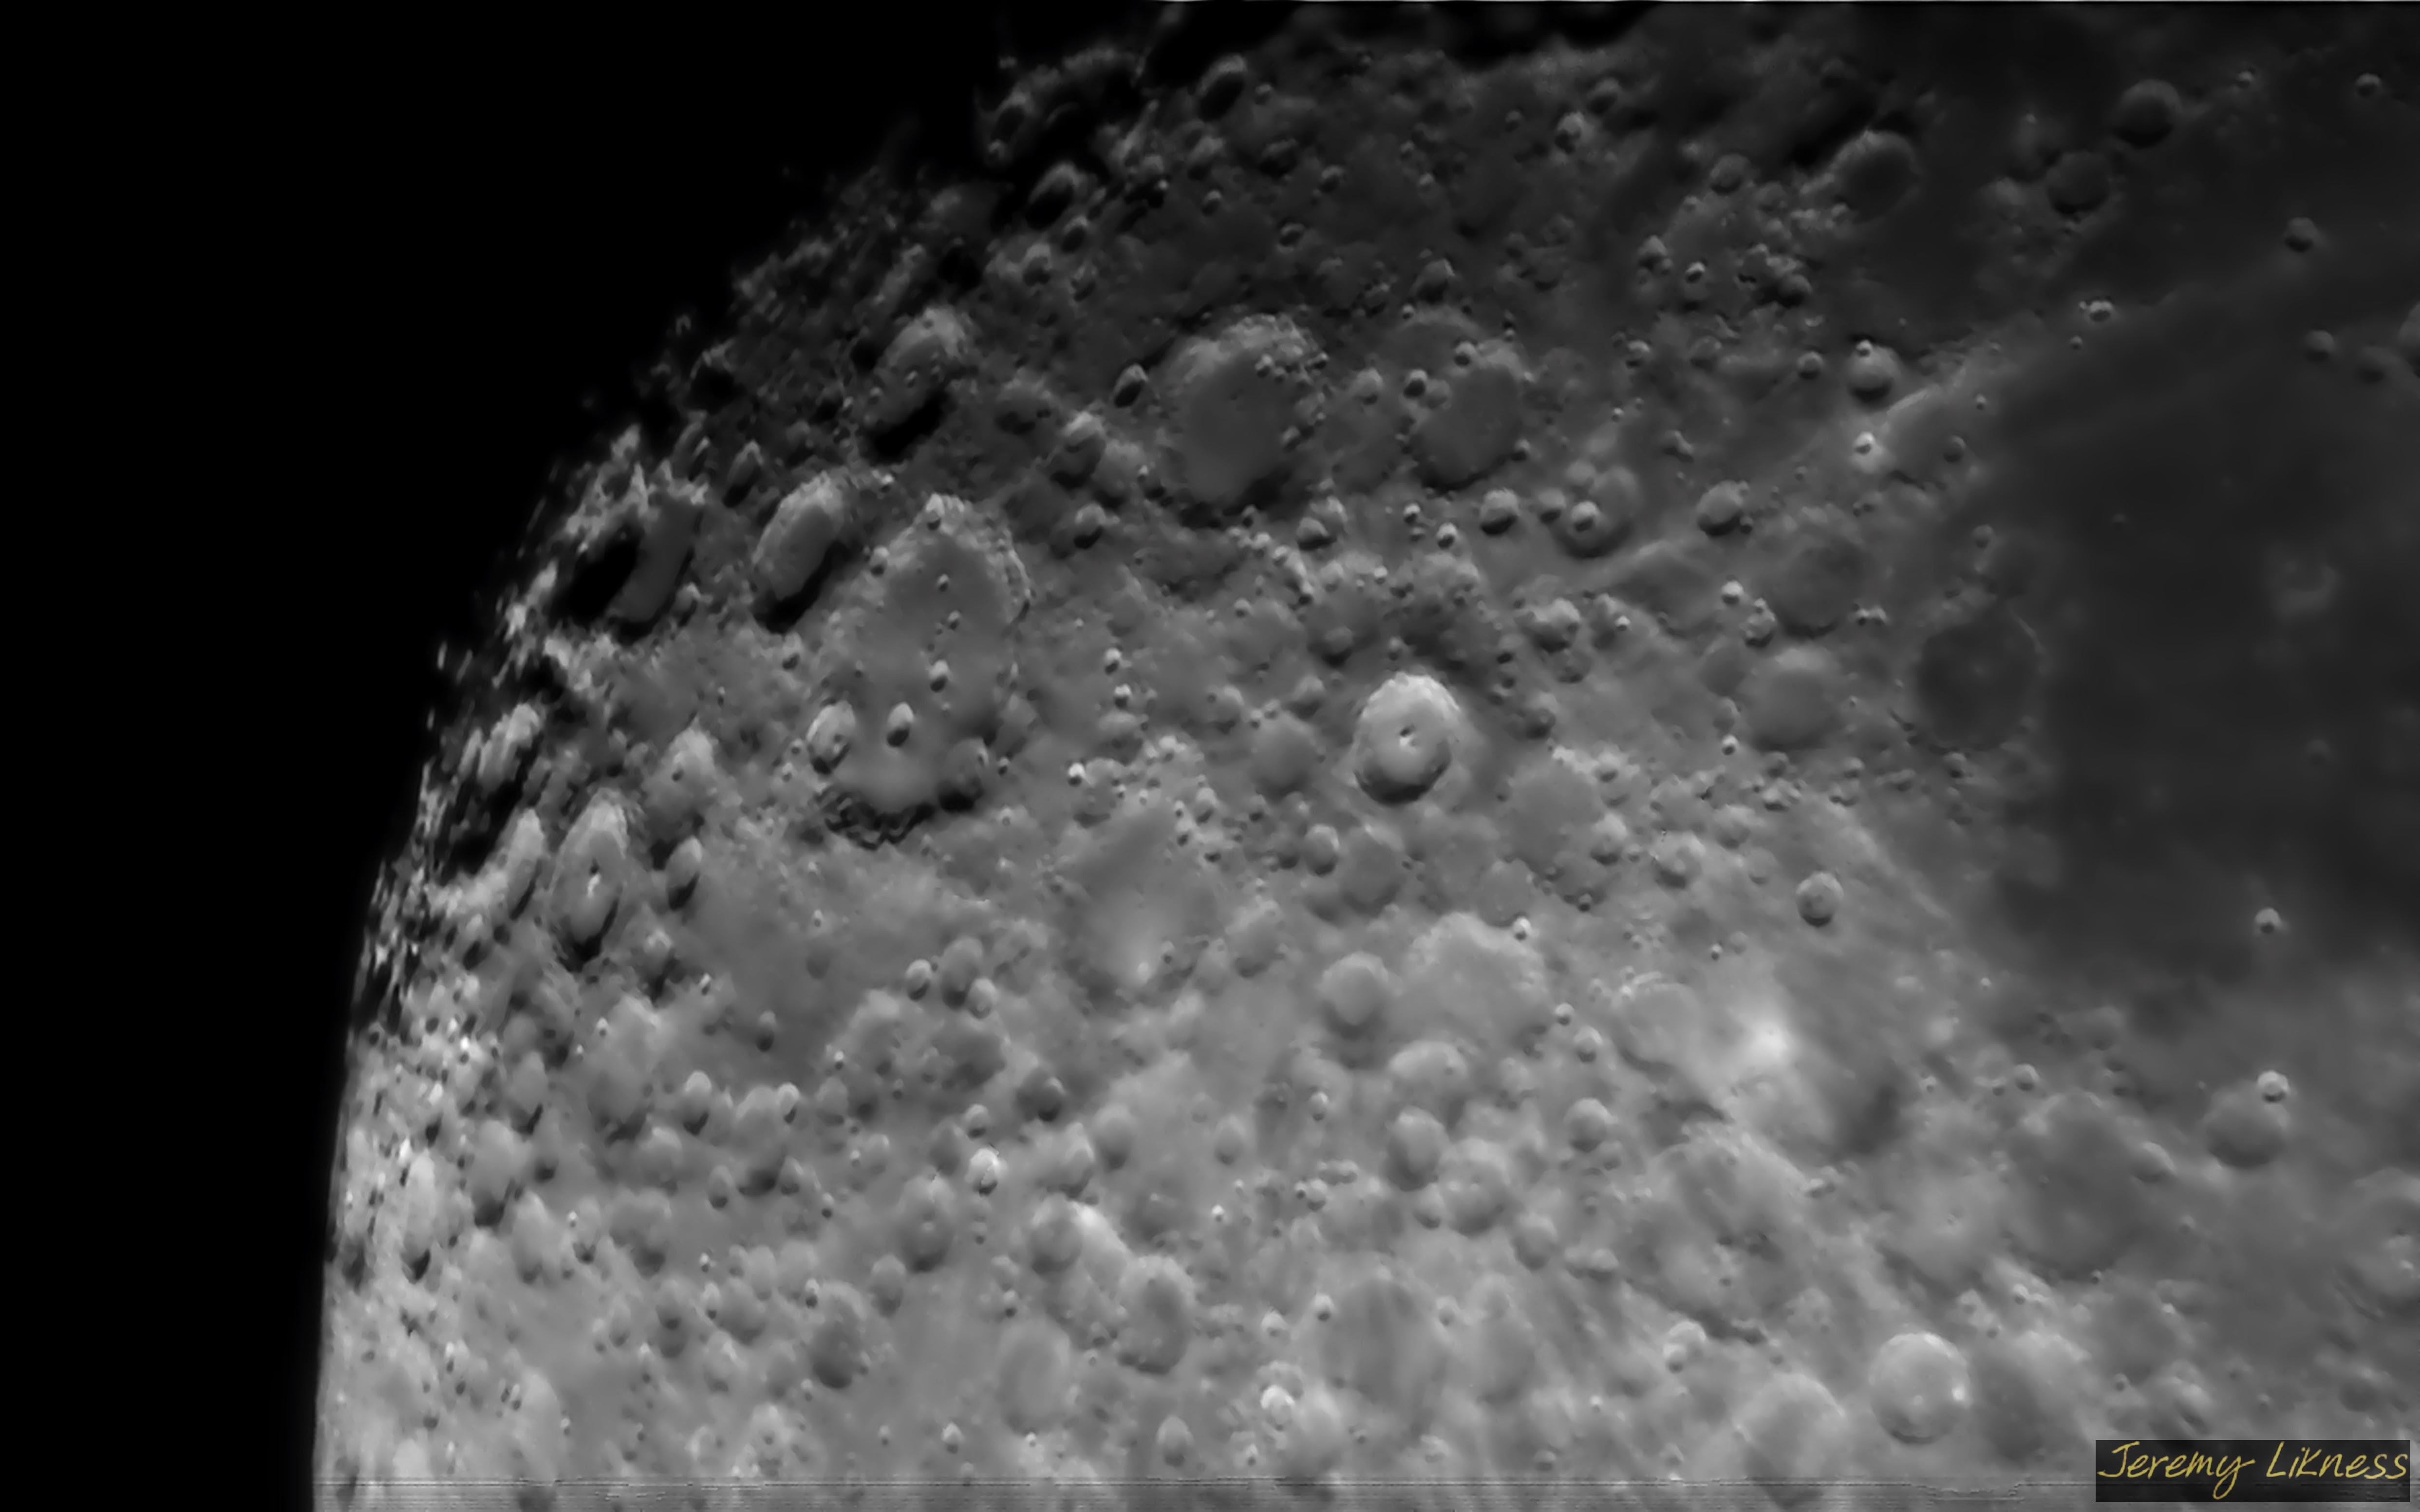
To date, I’ve taken perhaps thousands of images of the moon. Some are dramatic like the cloudy moon, some are detailed like this crescent moon and others are close-up.
I take pictures with my phone, mirrorless camera, Stellina observation station and a doublet refactor. In all cases, I follow a similar set of steps that lead to the final image. These steps are, at a high level:
- Acquisition - the set-up and capture of the images
- Pre-processing - organizing and filtering the images
- Stacking - accumulation of multiple images to increase the detail and signal
- Post-processing - tweaks to finish the composition
Most of my workflows involve 100% free software.
💡 TIP Although this post is focused on the moon, the same concepts apply for most planetary photography as well.
Also, as an Amazon affiliate I earn from qualifying purchases made from links in this post. The money helps me fund this website and production. I only link to products I’ve personally purchased and used.
OK, let’s break down the approaches.
Acquisition
Acquisition is the planning stage and involves several steps. Questions to ask include:
- When will the moon be visible?
- What phase will it be in?
- Is it in conjunction with any planets?
- What composition am I going for?
Let’s answer these questions with some free software.
Stellarium
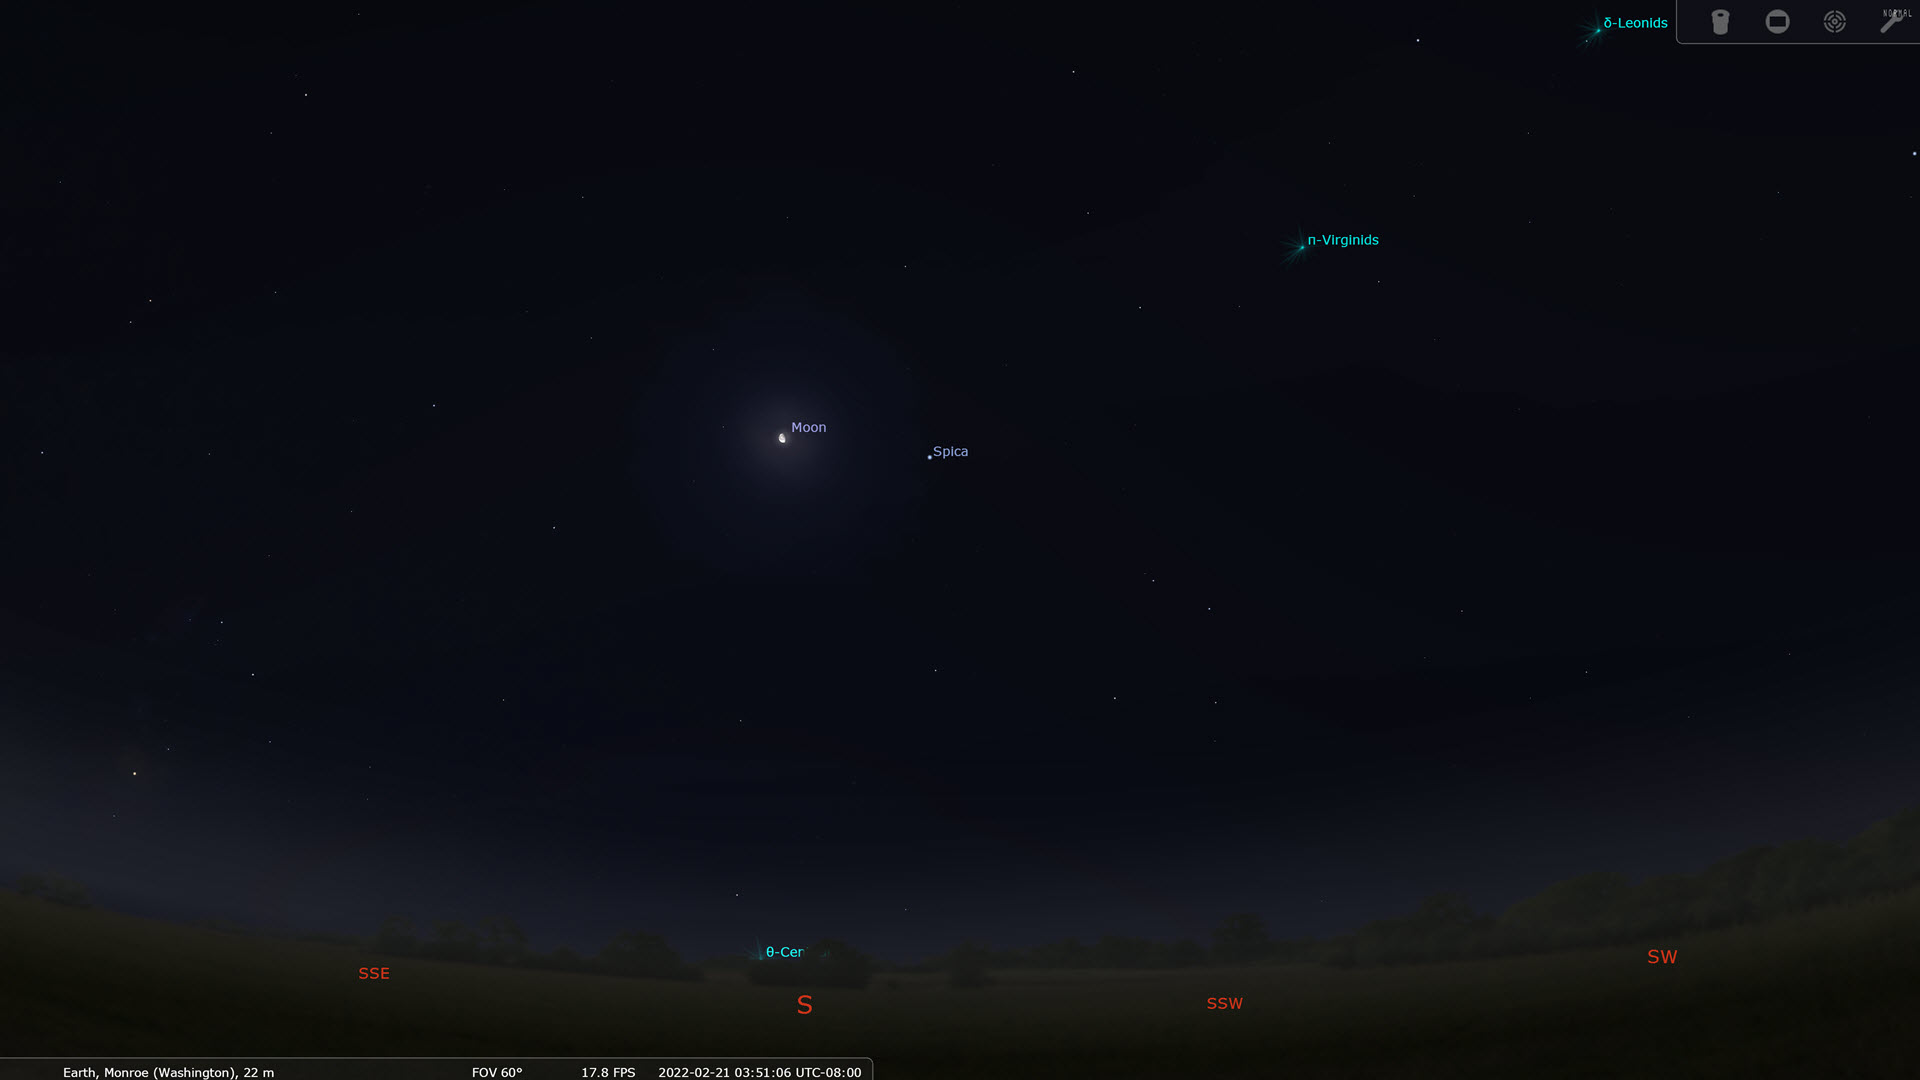
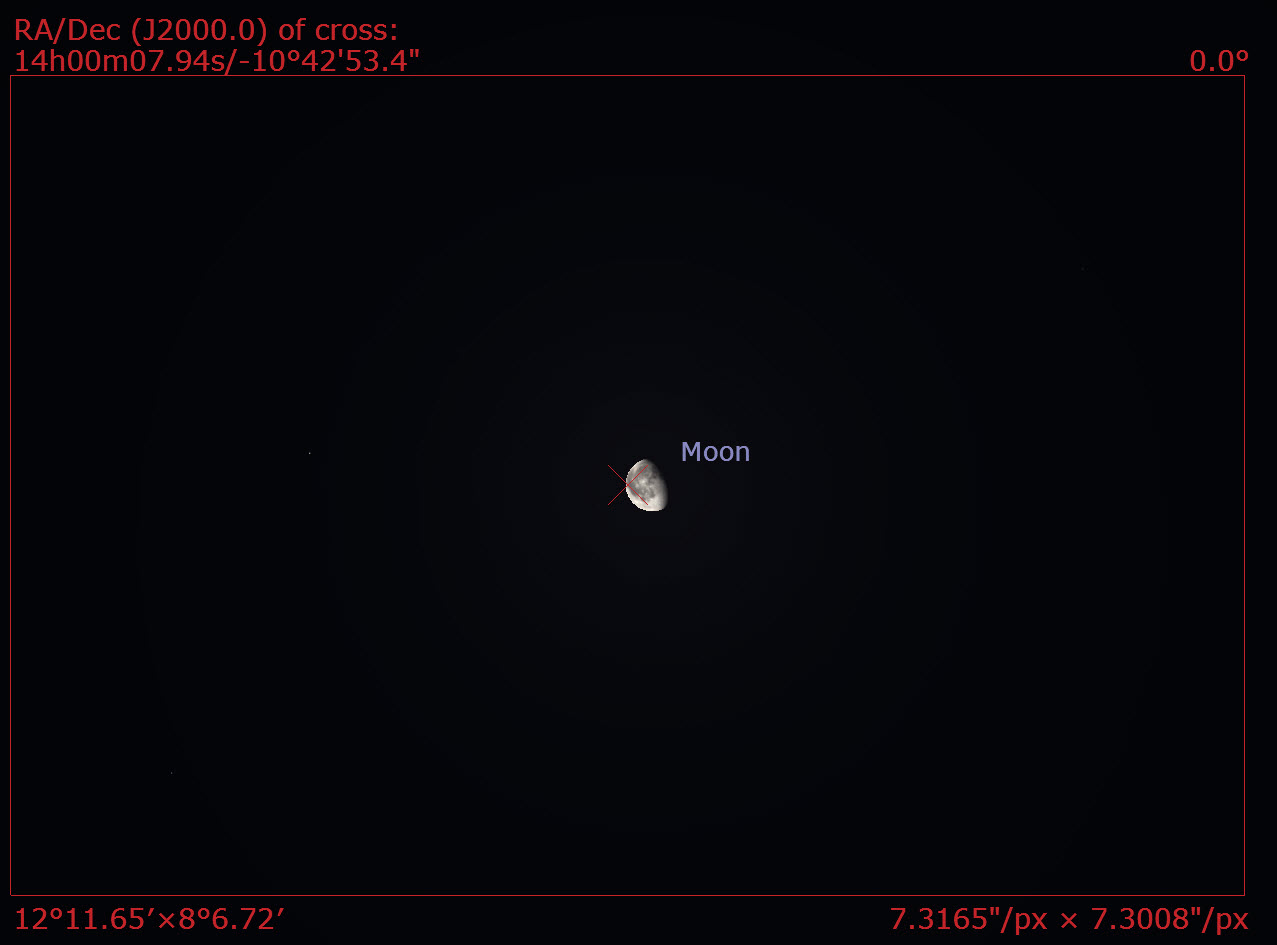
Stellarium is one of my most commonly used pieces of astrophotography software. The reason is simple: it allows me to look at the stars even when it’s cloudy outside! It has a lot of great features built-in. For example, you can choose to view the sky as it will be at a future date. Here, I can see the moon will be fairly high in the sky at 3am tomorrow morning.
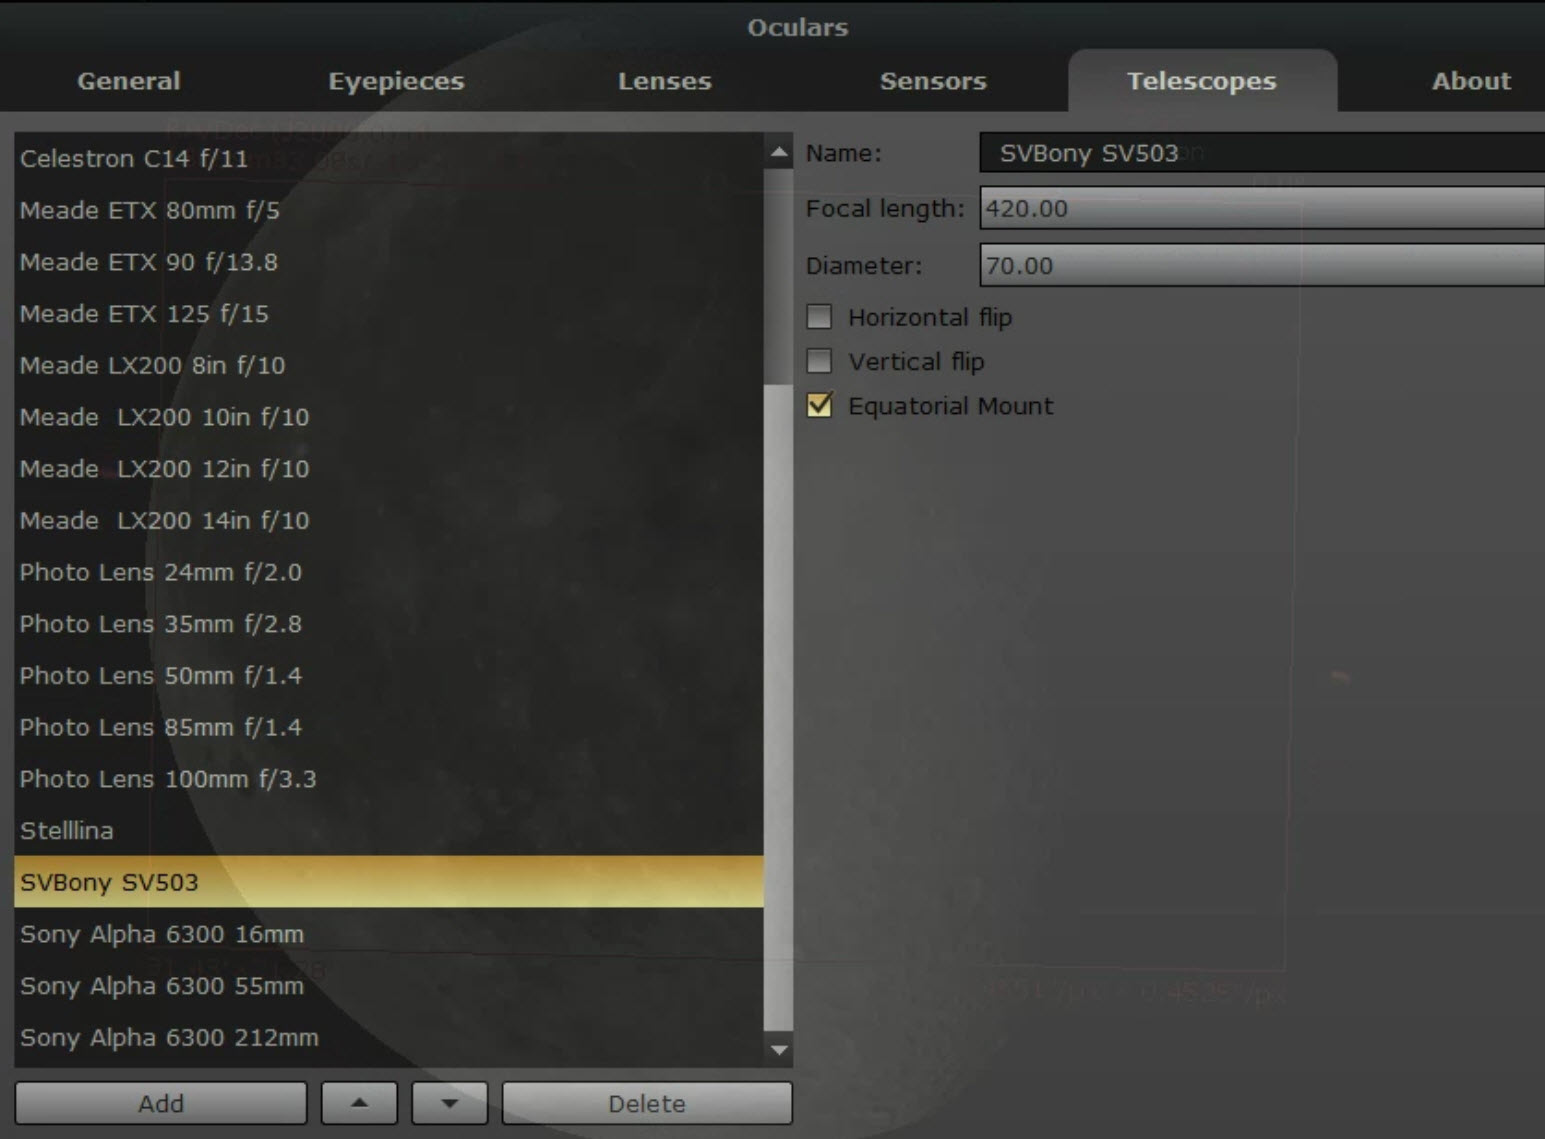
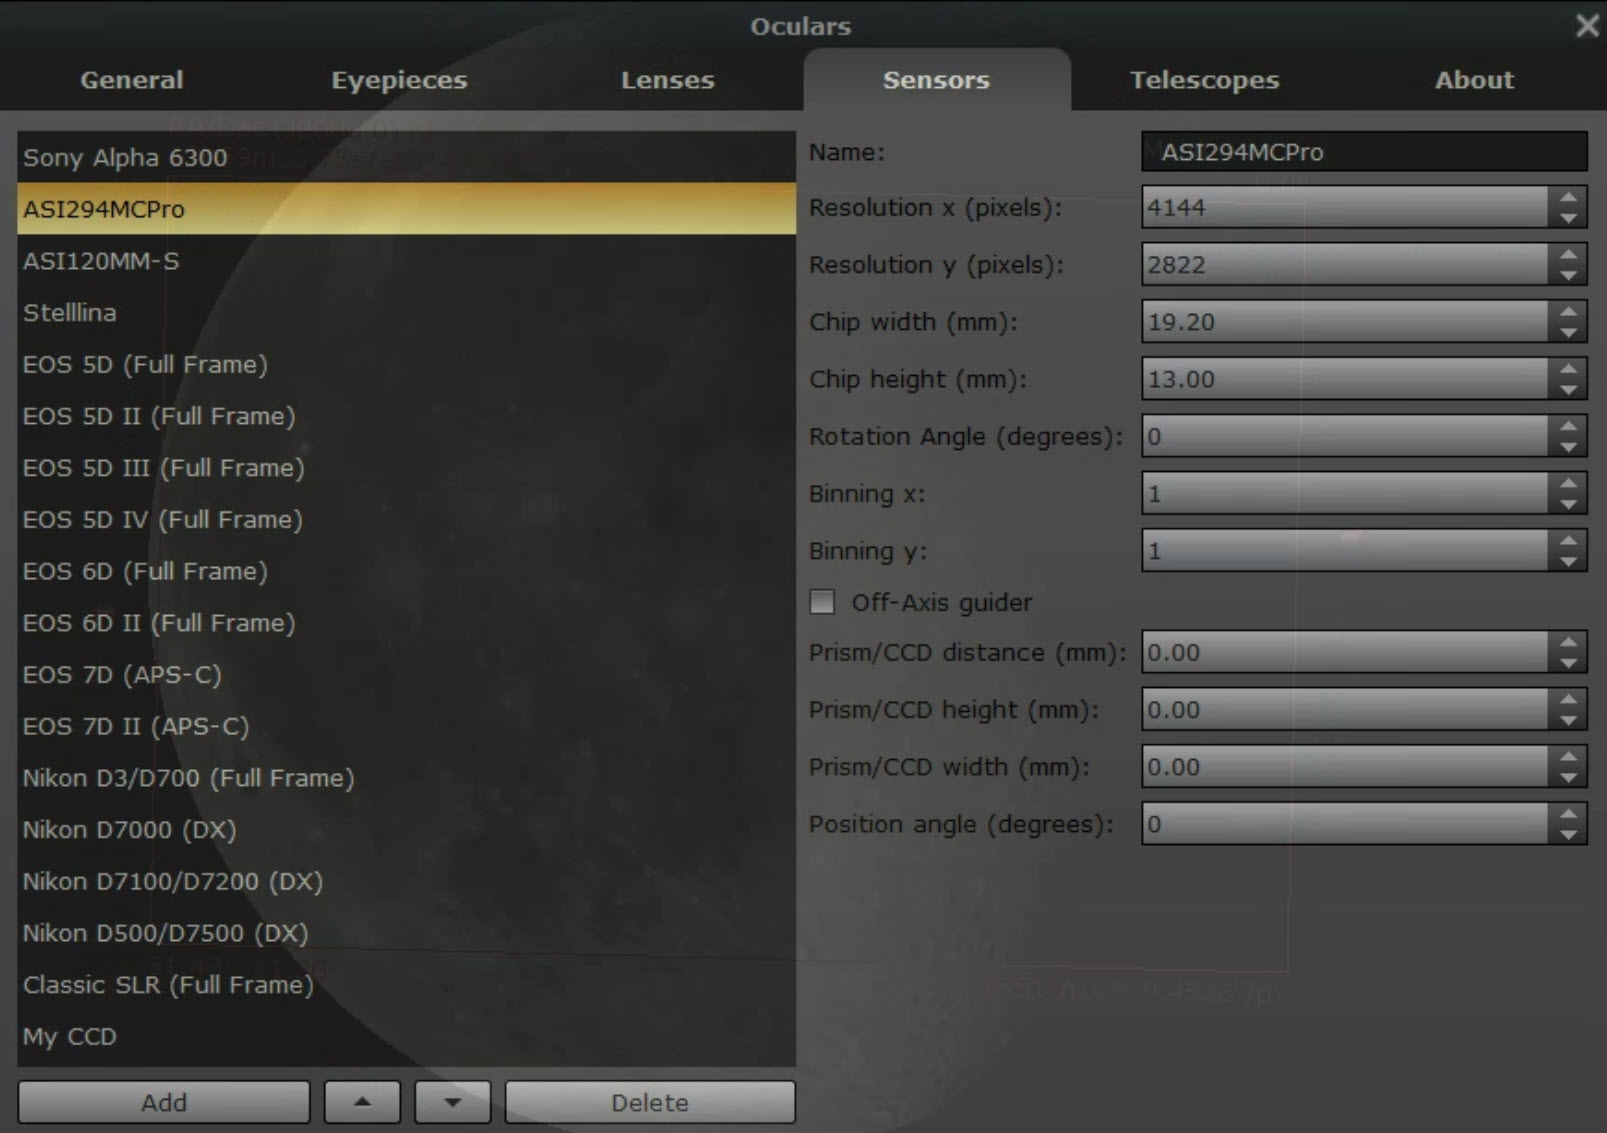
What I really love is the ability to enter information about your equipment. For example, this is my set of entries for my Svbony doublet refractor with a ZWO ASI294MC Pro camera.
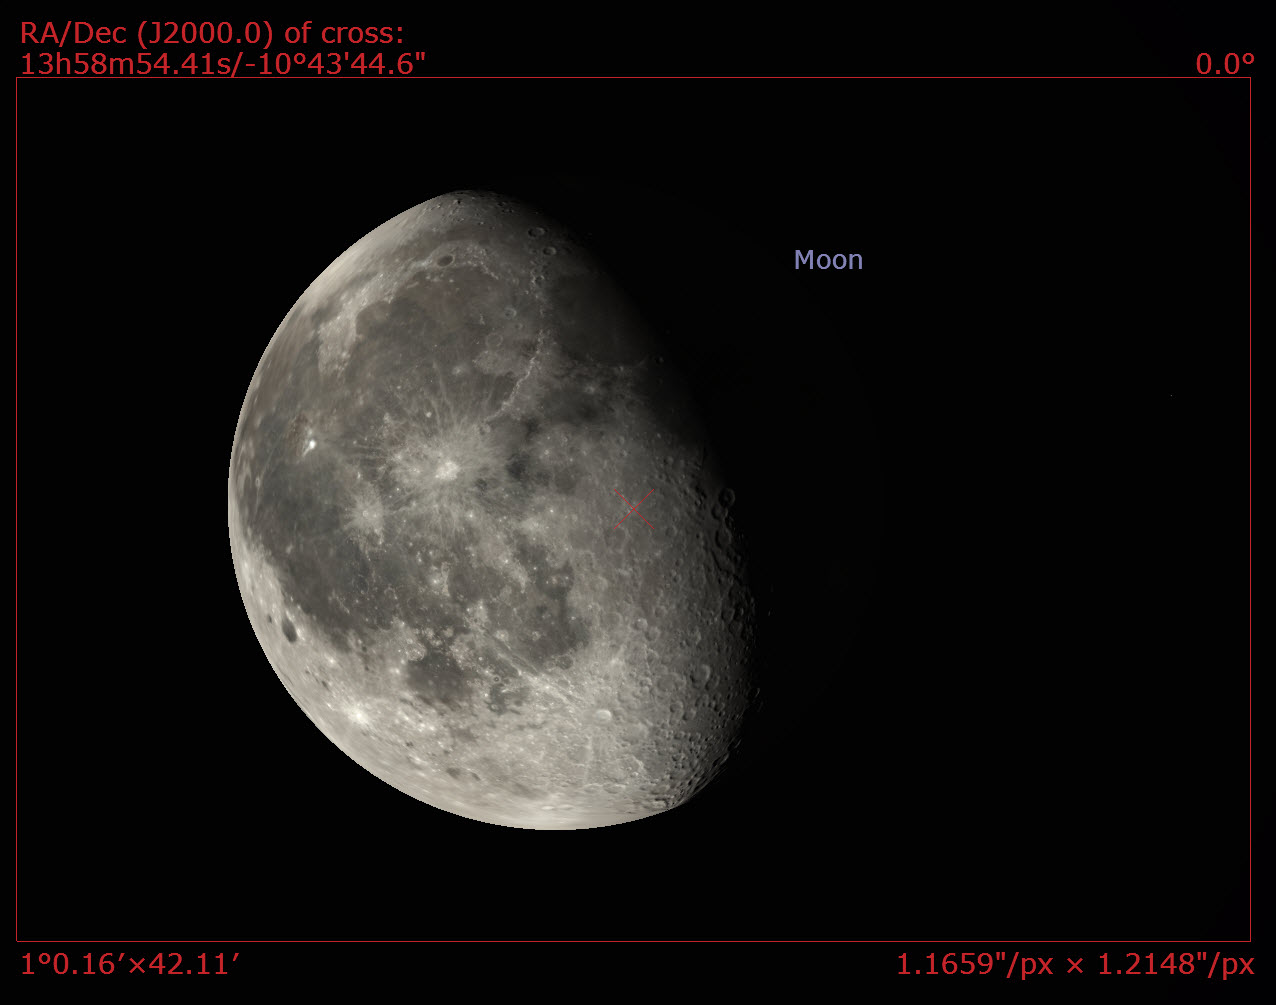
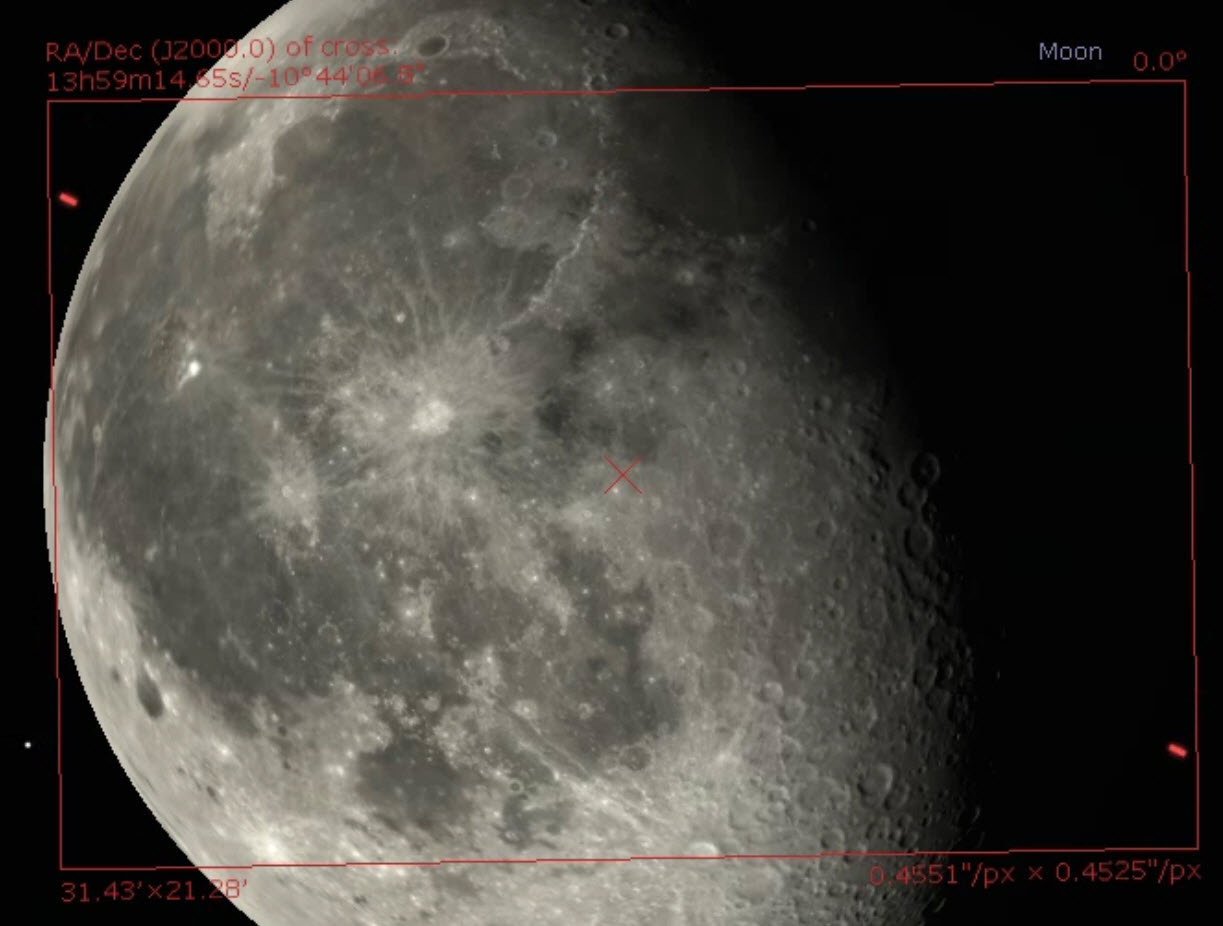
This configuration then lets me check “framing” or how the image will appear. This is the moon tomorrow morning as framed by different pieces of equipment I have.
As you can see, I have a few options!
Barlow lenses
It’s worthwhile to mention a quick note about Barlow lenses. These are special lenses you can add to your setup that will magnify the image more. You’ll often hear people say you lose a lot of light, but modern lenses are highly efficient. The lenses come with an optimal magnification. Mine is 2x. What some people don’t realize is that, independent of focus, magnification is a function of how far the sensor (or your eye) is from the lens. For example, the extreme close-up shots I took of the moon were with a 2x Barlow. I intentinally used spacers to distance my camera sensor from the Barlow lens so I could get extra magnification. My best guess is that I achieved about 5x.
Telescopius
Another great tool is the Telescopius website. Here you can search “moon” and find a chart of phases as well as a plot to see what height it will be by time of day and which direction. The tool is good but I prefer the site for more deep sky objects (DSOs) than planetary targets.
It also allows you to enter lens and sensor information to generate previews.
Astrospheric
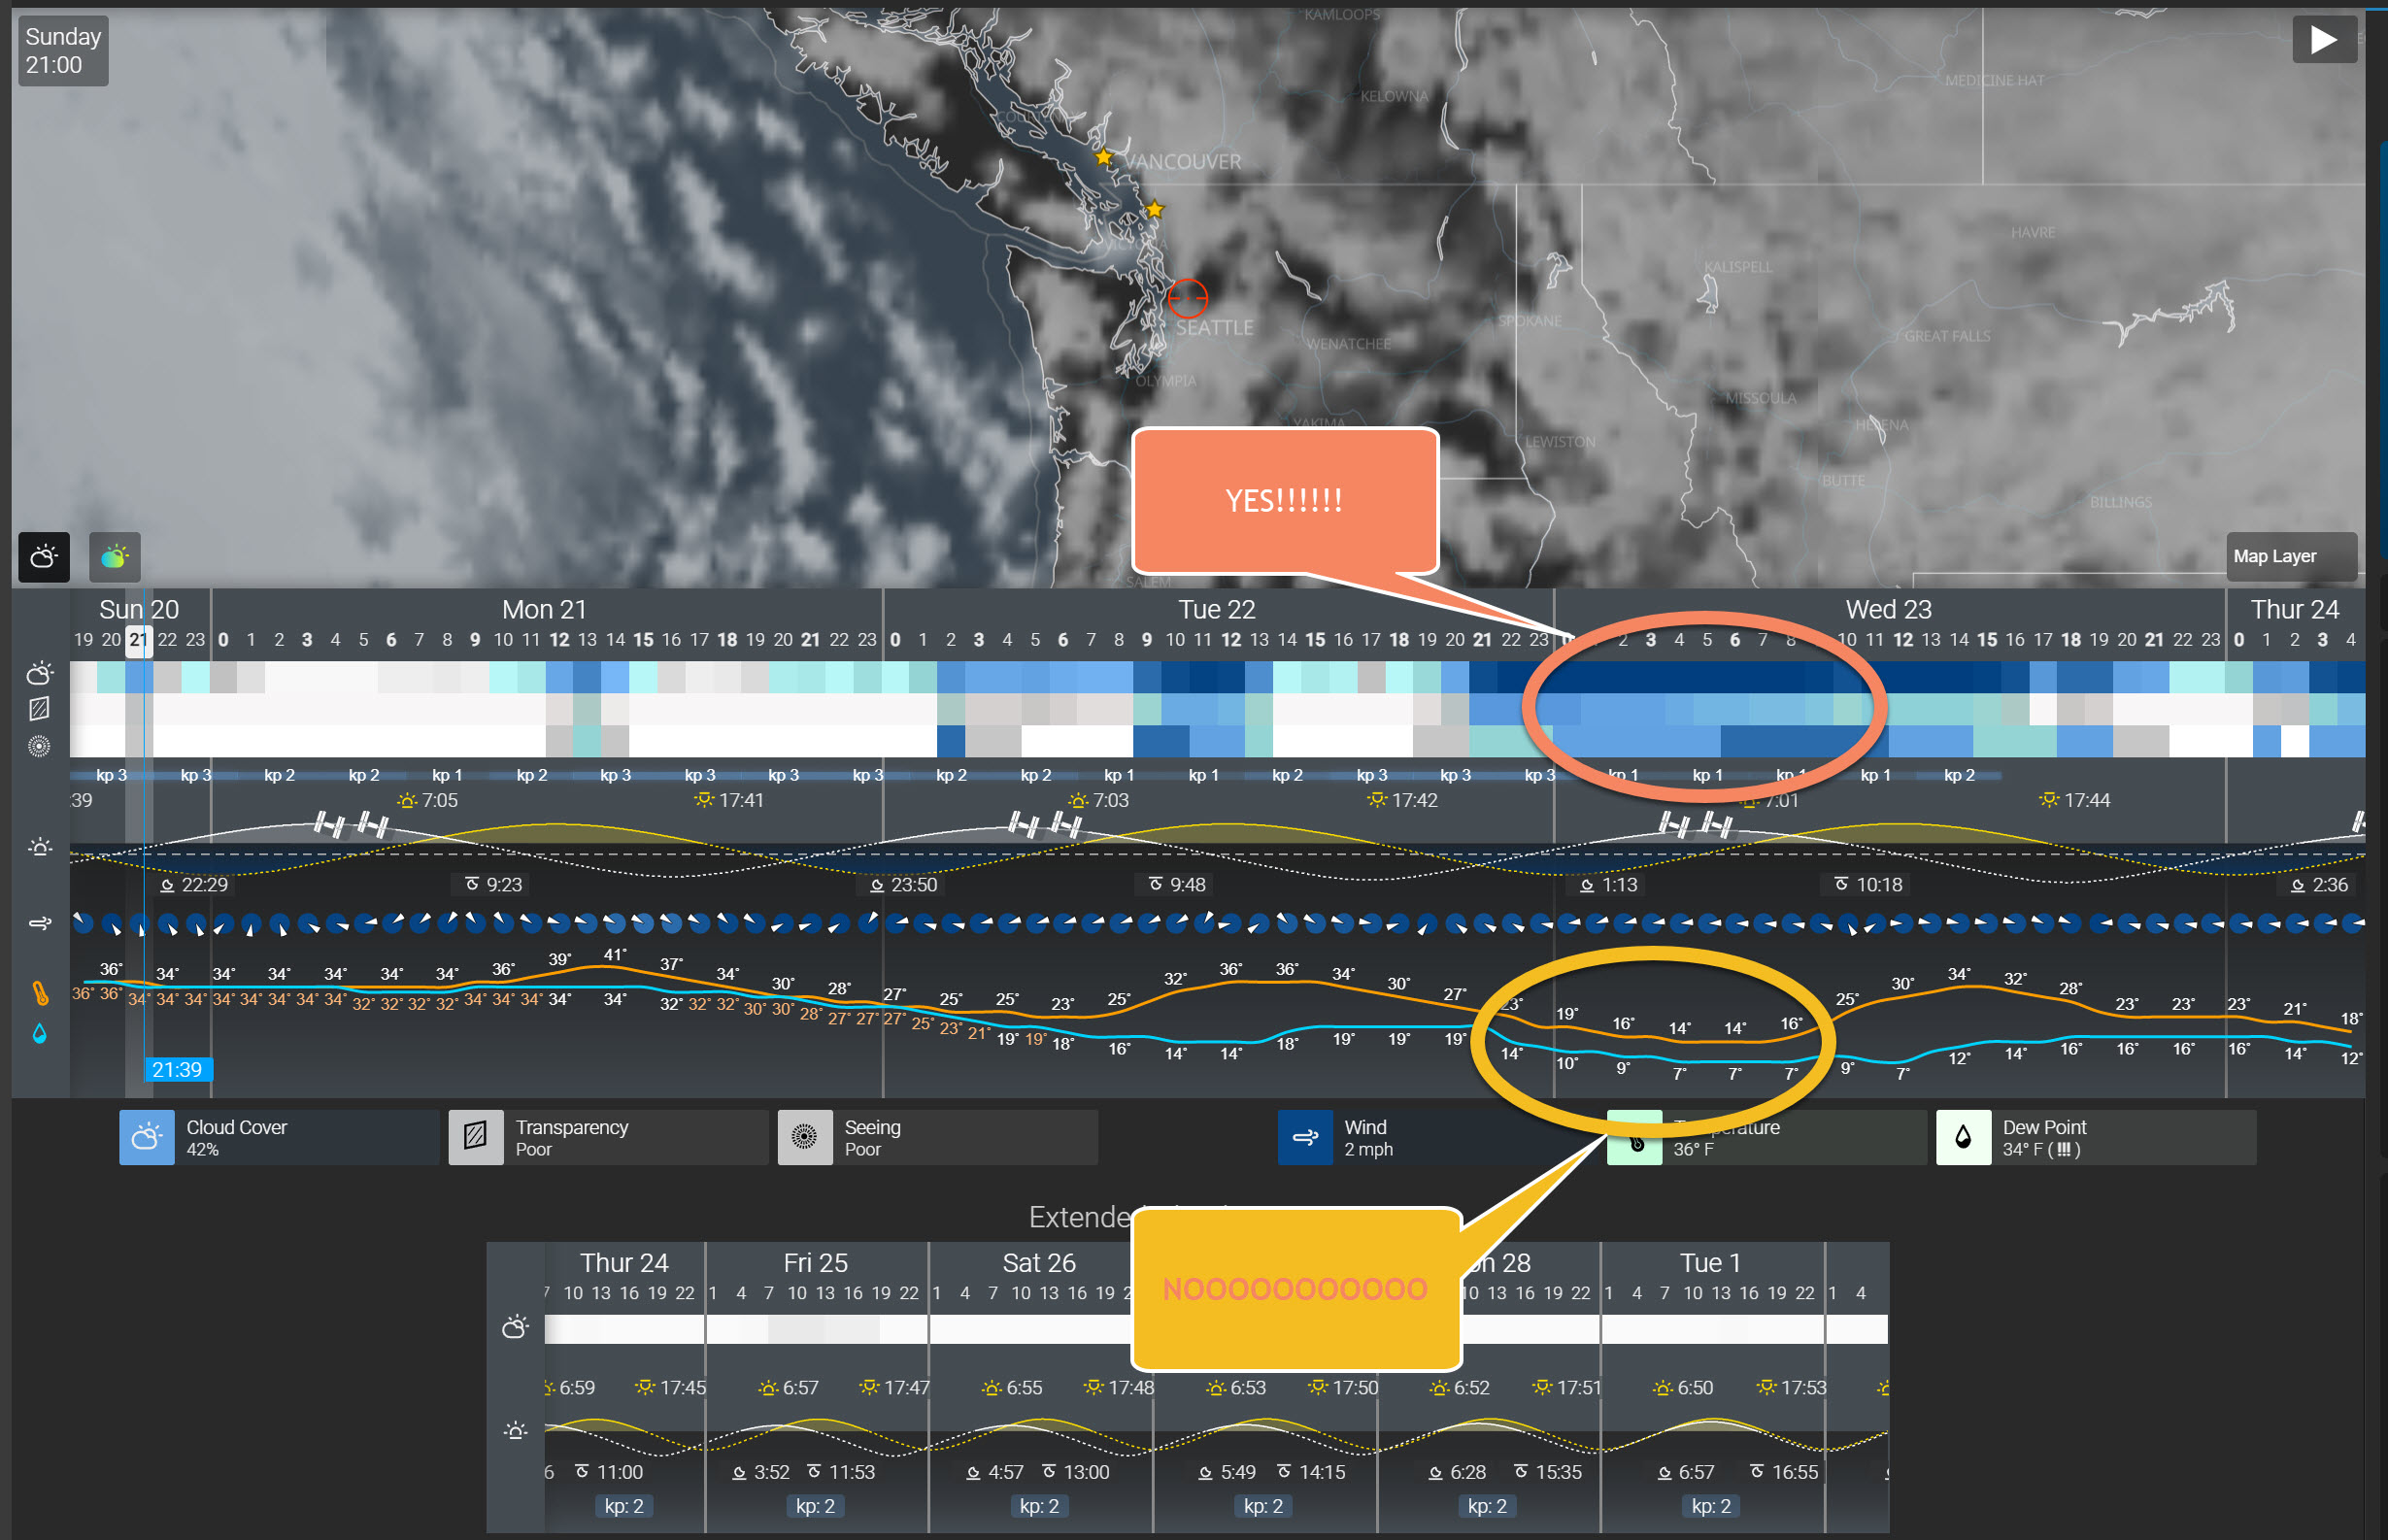
Of course, knowing where the moon will be is only half the battle. The other is anticipating weather. Fortunately, there is something better than your average phone weather app. You want precision. I’ve spent hours setting up a rig under cloudy skies just because the forecast showed a window of a few hours to image! That’s because I use a free service called Astrospheric that gives you everything by the hour:
- Cloud level
- Seeing conditions
- Transparency
- Sunrise/sunset
- Moonrise/moonset and phase
- ISS flyby schedule
- Dew point (not just to stay dry, but helps predict fog)
Here’s an example forecast.
I marked in red the spot that immediately caught my eye. I was almost ready to shout out loud in joy when my eyes scanned down to the area I circled in yellow. Just as I’m dismissing the idea out of simple survival instinct, that other voice says, “Wow, your new telescope should be here Wednesday and, gee, we haven’t had the chance to really test the rig in 14 degree weather!” Oh, and hey, I just noticed the dew point and it’s going to be a dry and fog-free night, so… yeah, it’s an addictive hobby.
Phases
Just a quick note on phases: the phase of the moon can dramatically alter the type of image you are able capture. A crescent moon means the angle of the sun casts long shadows from the ridges of craters and mountains, so the detail is in high contrast. A full moon, however, receives direct sun and casts fewer shadows, so you end up with more contrast due to different minerals rather than terrain. I’m planning a project to assemble a full moon from phased moons to compare against a direct full-moon shot.
Monochrome or one-shot color
There is a lot of debate around what’s best for imaging when considering camera sensors. Personally, I’ve seen great photos from both sources so there is no debate. You can grab a one shot color with good resolution, pixel size and speed and capture stunning images. However, it is true that no camera sees color. In the case of a one shot, you really just have a bunch of small filters covering individual sensors so the intensity of that color channel is measured. You use more of the sensor if you just use every cell and place a single filter over the whole thing. This requires swapping out filters or using a filter wheel, potentially refocusing for each filter, and therefore is a more complicated approach.
I’m still waiting to test drive my multi-filter setup with a monochrome camera. My other images are either in color, or taken with Stellina that images the moon in grayscale. It may be beneficial to use a filter from light-polluted areas because good filters will block out some of the wavelengths known to make up light pollution. I’ll let you know how it goes when I have an evening or morning I can both see and survive.
Focal length and magnification
The framing step is important because it helps visualize the appropriate focal length and sensor size to take the picture you want. The typical camera range of 50mm-200mm is great for landscape shots that feature the moon, while 400mm gets closer to drawing out detail in a close-up of the disk. 1000mm and longer are in the territory of surface detail and targeting specific craters, ridges, and even landing sights. You can even piggyback equipment and take shots at different focal lengths to find what works best.
Exposure and gain
When you look at the moon or a planet, you are observing reflected sunlight. The moon can be extremely bright and defies traditional night time settings. When I target the moon, I typically set my ISO/gain to 0, back off the stops to partially close the aperture and let less light in, then expose at millisecond or microsecond intervals. Most software comes with a live preview mode and some even have algorithms to automatically adjust exposure and gain to take the ideal photograph.
Lucky astrophotography
I learned about lucky astrophotography after I wrote my first articles on planetary imaging. The telescope I was using at the time was already doing it. Conceptually, it’s easy to think of filming videos and taking pictures as two entirely different processes, but technically, they are the same. A video is just a rapid accumulation of photos taken one after the other. Using video mode can be easier, however, because you can worry about framing, lighting, and focus and tweak these settings in real-time while your camera worries about taking pictures.
Lucky astrophotography refers to taking a lot of captures, usually with video, then processing only the best to get your “lucky shot.” More captures means more likelihood of having quality photos in the batch, and more exposures means more signal and less noise. I can easily capture thousands of frames in just a few minutes of filming a target like the moon.
Don’t worry, these processes work equally well on individual photos as they do film.
💡 TIP Some software will save captures in a special astrophotography format called
SERor the “Lucam video format.” This is a special format that stores metadata about each frame in the file that is useful to image processing programs. You can play these files back by installing a free SER player.
So, how do I capture my images? There are four pieces of software, all free, that I may use.
Imaging Edge Desktop
Imaging Edge Desktop is free software specifically designed for owners of Sony mirrorless cameras. There are three main parts to the software. The remote application provides full remote control of your camera, including all settings a modes needed to shoot your targets. While it’s really great is the live view that is zoommable so that you can easily frame in focus on your targets. The viewer not only makes it easy to review your photographs, but also has some built-in utilities, such as creating a time-lapse movie from a set of exposures. The editor is unique to the camera with capabilities like turning on dynamic range settings, managing lens distortion, correcting for over- and under-exposure, and more. Although I occasionally take photographs, the most common approach I take to imaging the moon is to record video.
💡 TIP If you plan to create a time-lapse movie, one technique you can use is to open a single frame in the editor and tweak settings like saturation and contrast so that the image is clearer to see. You can save the settings in an XML document. In the viewer, when you highlight the time-lapse option you can refer to the settings document so that each frame is modified before being inserted into the movie. This can produce some amazing results.
ASICap
ASI Studio is another application specific to a line of cameras. It is available for ZWO’s line of ASI cameras. There are several applications in the suite, including a great (and fast) FIT file viewer, but the main one I use for imaging the moon is called ASI Cap. Not only does the software easily connect to the cameras and automatically set exposure and gain, it also connects to my electronic filter wheel. This makes it easy to plan color sessions because I can set up a sequence that moves through each filter as part of the capture. I can set the output to individual images, an AVI or an SER file. This is my preferred software to use for lunar and planetary capture.
SharpCap
SharpCap is a very versatile and specialized software application. I like to think of it as astrophotography algorithms all rolled into a single program. I use SharpCap to ensure I get the best focus possible for my images, and also for polar alignment. It will also analyze your camera sensors and help you determine the best exposure and gain for an observation session. These are all pro features but after using the software for just a few days I knew it was worth investing in the pro version. It connects to most cameras, has an automatic exposure and gain feature, and gives you full control over the settings you wish to capture. It will even connect to and control your mount. Although I don’t use it for capture, I know many photographers who do everything they need from within this app.
N.I.N.A.
Nighttime Imaging ‘N’ Astronomy (N.I.N.A.) is a free and open source application designed to handle everything you need for an imaging session. I use it exclusively when capturing deep sky objects. It works with various cameras, mounts, filter wheels and even automated dome systems. Some of the really powerful features include being able to pull a target from Dtellarium, then take picture with the camera and figure out the angle of rotation so that you can perfectly frame and center your target for imaging. It has an advanced scripting feature for automating your image captures including changing filters and exposures, slewing your telescope to the target ensuring it is properly centered, and handling things like flats and darks.
Because I don’t need precise framing for planetary and lunar targets, I prefer to use ASI Cap for those sessions, but I use N.I.N.A. for everything else.
Pre-processing
I’ve captured my moon images and have three files to deal with:
- A 41-second
.mp4movie of the moon from my Sony Alpha 6300 - 101 grayscale
.jpgimages of a crescent moon from Stellina - An extremely turbulent close-up image of the moon’s surface from my Svbony refractor with an ASI camera. This is a SER file format and takes up about 3 gigabytes of disk space.
This video shows some of the raw footage. For this blog post, I’ll focus on the first part of the video that pans over the Copernicus crater.
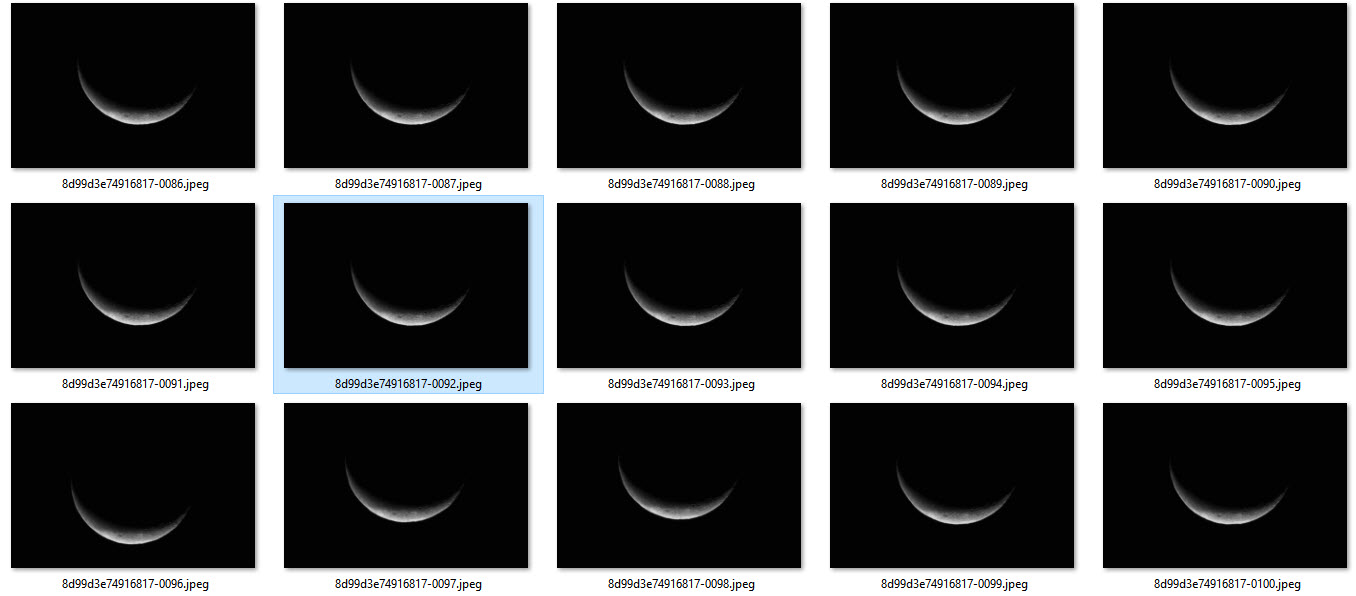
Here is a screenshot of several Stellina images. Notice how the moon is in different positions within the frame. Pre-processing will address that.
There are two ways I pre-process images. First, let’s explore the tool created specifically for the job.
Blink
“Blink” is the name of a process in the not free PixInsight application that I use for most of my post-processing. You can “blink” without it. The manual way to approach pre-processing is to scan your images and toss the ones that are cropped, blurry, deformed or just not as crisp. For the remaining images, you might want to scale and crop them so they are all roughly the same size and in the same area of the frame. There are ways to automate this, but I prefer to use a piece of software designed specifically for the job: PIPP.
Planetary Imaging Pre-processor
My main “go to” for planetary and lunar pre-processing is the venerable and free Planetary Imaging PreProcessor (PIPP). It can take either videos (including the SER format) or individual images. You specify the type of image you’re after (such as the full planet, a close-up of its surface, or an animation) and tweak some other controls, and PIPP goes to work prepping your images. Let’s take a look using our three sources.
Full moon: camera video
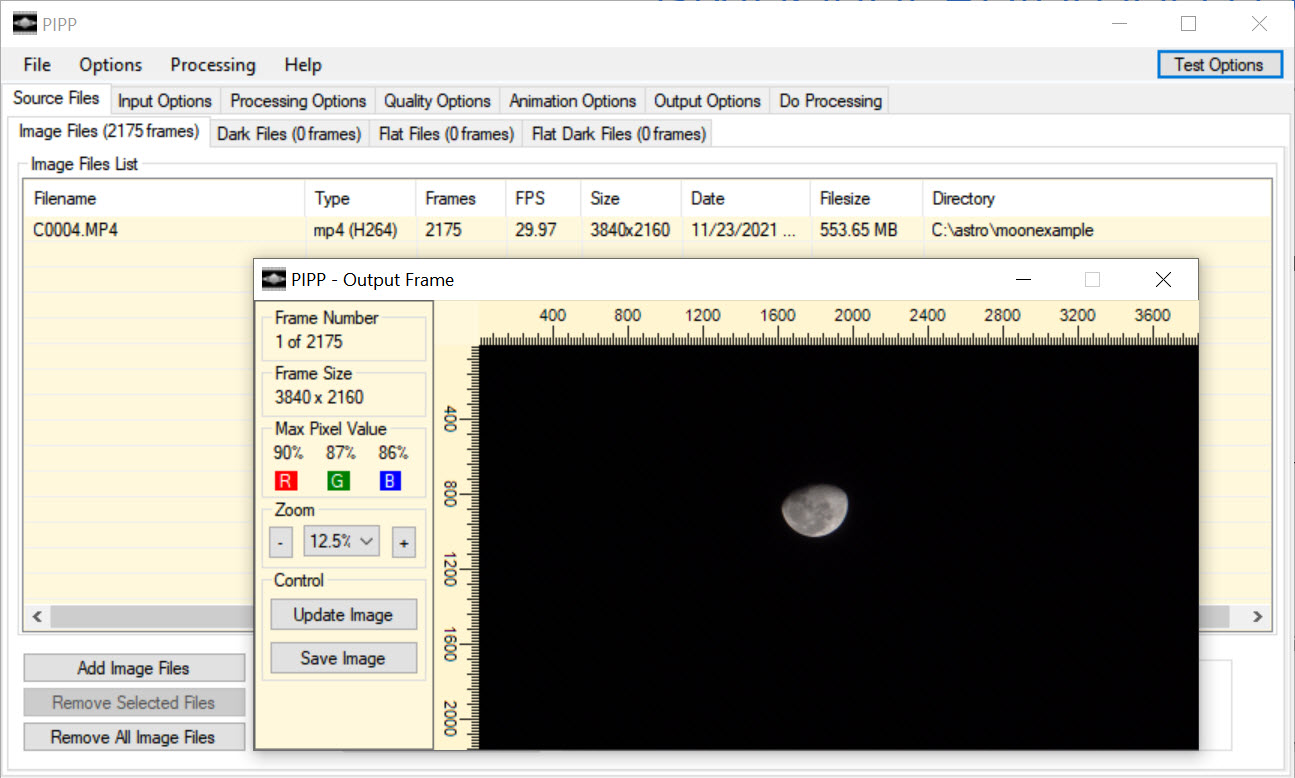
After launching PIPP, I simply drag my video onto the app and it immediately pops up an “output frame.” This is a preview of what to expect. You can see info about the file as well. Notice how small and off center the image of the moon is.
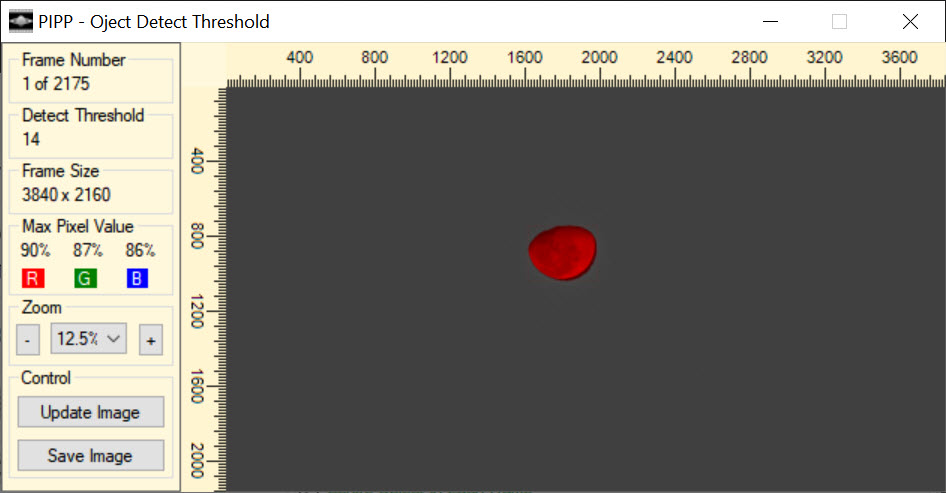
The first tab has a dialog “optimise options for…” and I choose “Solar/Lunar Full Disc.” This will change some defaults for me. I leave the “Input Options” as is and move on to “Processing Options.” Here there is a bit of work to do. Because I filmed in color, I uncheck “Convert Colour to Monochrome.” Under “Object detection” I click “Test Detect Threshold” and make sure the moon, and only the moon, is highlighted in red.
If the moon is not completely red, or if the red bleeds into the area around the moon, I’ll uncheck “Auto Object Detection Threshold” and tweak the value until it detects it properly.
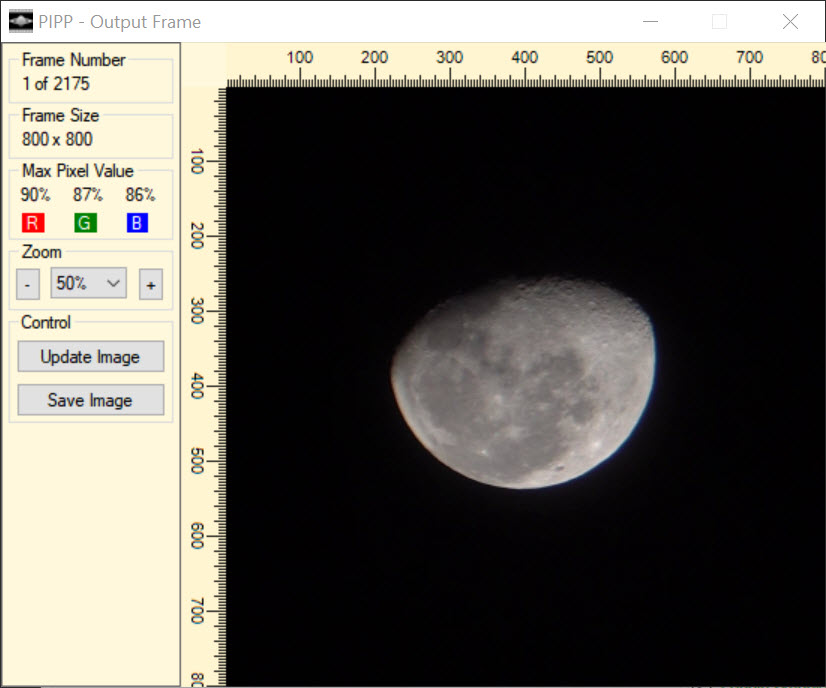
Under cropping, I tweak the sizes and click the “Test Options” button until I like what I see. Here I’ve settled on 800 pixels by 800 pixels. Notice how the moon is now large and centered.
On the “Quality Options” tab I usually check “Only Keep the Best Quality Frames” and for this I’ll set it to 500 (there are over 2,000 in the source file). I skip the “Animation” tab and go to “Output Options.” I prefer to have a single file so I usually output as an AVI unless I know my stacking software only accepts images. We’re going to stack this with AutoStakkert! so an AVI is fine.
Now all that’s left is to go to the “Do Processing” tab and click “Start Processing.” Less than five minutes later, I have an AVI that is about 16 seconds long (compared to the original 41) with the moon large and centered. We’ll stack this in a minute, but first let’s pre-process our other files.
Full moon: Stellina captures
For the Stellina captures, the process is similar with a few changes. Instead of dragging a movie file onto the PIPP app, I drag the individual image files or use the dialog in the application. Note that the app is old and thinks it doesn’t recognize jpeg files. A quick rename to jpg makes it right as rain. I have fewer frames so on the “quality” tab I make sure that “Only keep the best quality frames” is not checked. For “Output Options” I’ll be stacking with software that doesn’t recognize movie formats, so I choose TIFF as the output file format.
I click “Start Processing” and in just a few seconds have a directory neatly populated with cropped and centered crescent moons.
Terrain: Copernicus crater
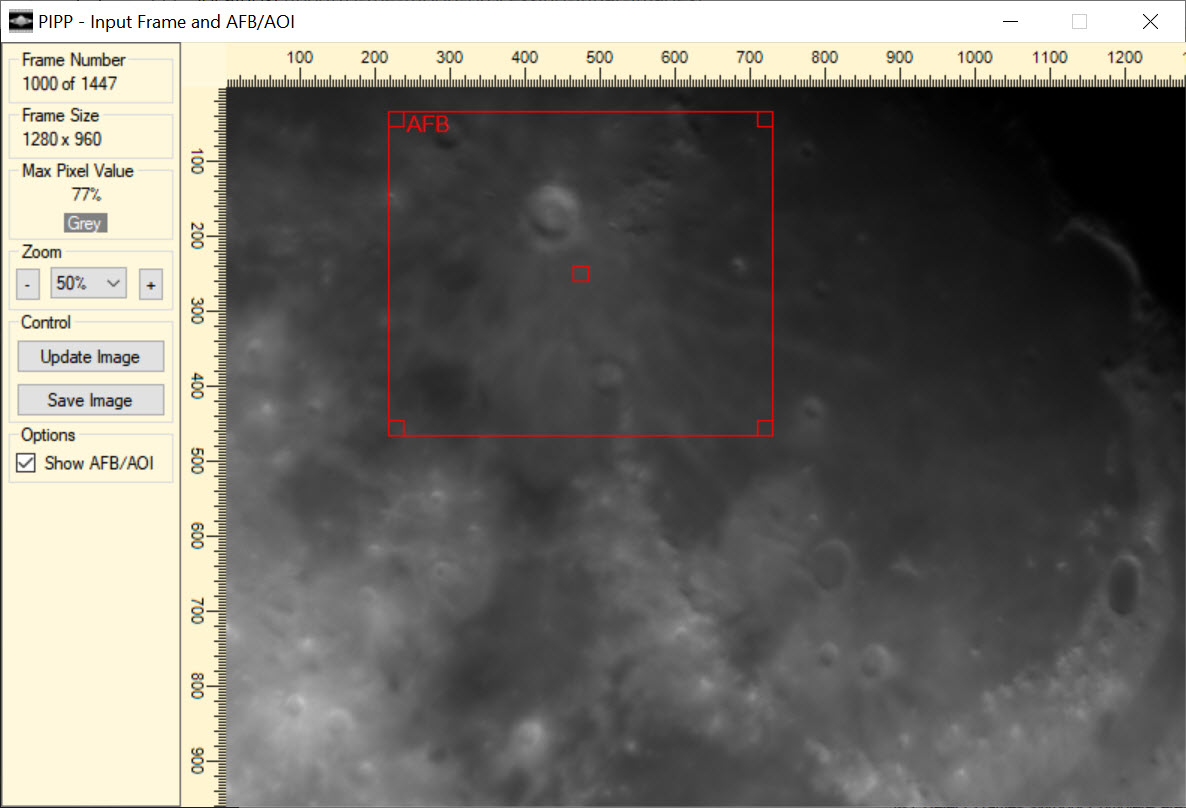
Terrain is a little more involved, especially because my video didn’t focus on the target area but panned across the moon surface. On the main tab, I check “Solar/Lunar Close-Up” for my settings. The next thing I do is choose “Limit frame range” on “Input Options” and tweak the start frame until I can see the crater. On the “Processing Options” tab, the “Anchor Feature Box” has been checked along with “Reject frames without Anchor feature.” When I click “Test Options” a red box appears that I can place over the crater for tracking. I picked a few surrounding caters too.
I leave the output option as an AVI. I click “start processing” and a few minutes later have a video showing all of the frames that entirely contain my anchor feature box. It turns out to be 327 frames.
Stacking
Now our moon images are preprocessed and ready to stack. For the observations that captured the entire moon, stacking raises signal and reduces noise to provide a crisp, sharp image to finish processing with. For the terrain video, stacking averages the points over multiple frames to reverse the wobbly effects of vibrations and turbulance to provide a clean final image. I usually use Autostakkert! but will resort to the other methods on the rare occasion I get a bad result from the stack.
Autostakkert!
Another older but effective (and free) tool, Autostakkert! is optimized to stack planetary and lunar images based on features the same way other software uses stars to align deep sky objects. The UI may seem a little outdated and confusion, but the app literally walks you through the process step-by-step.
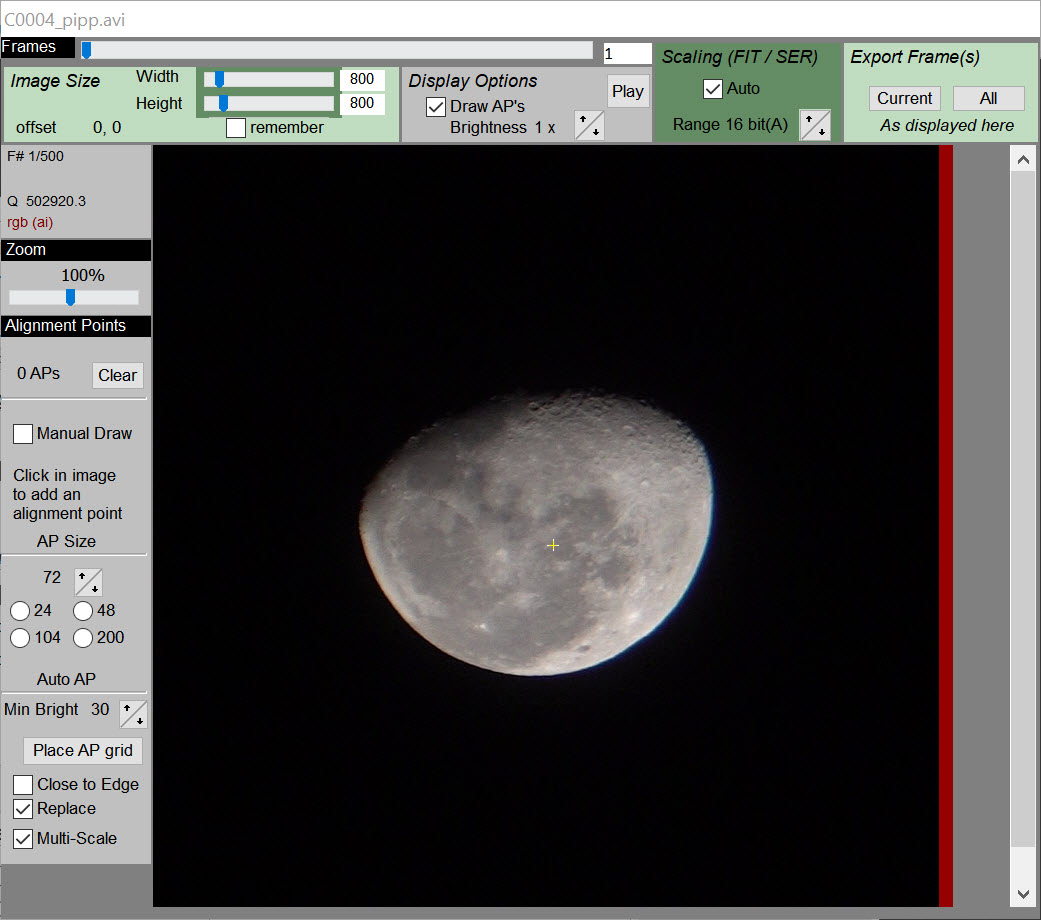
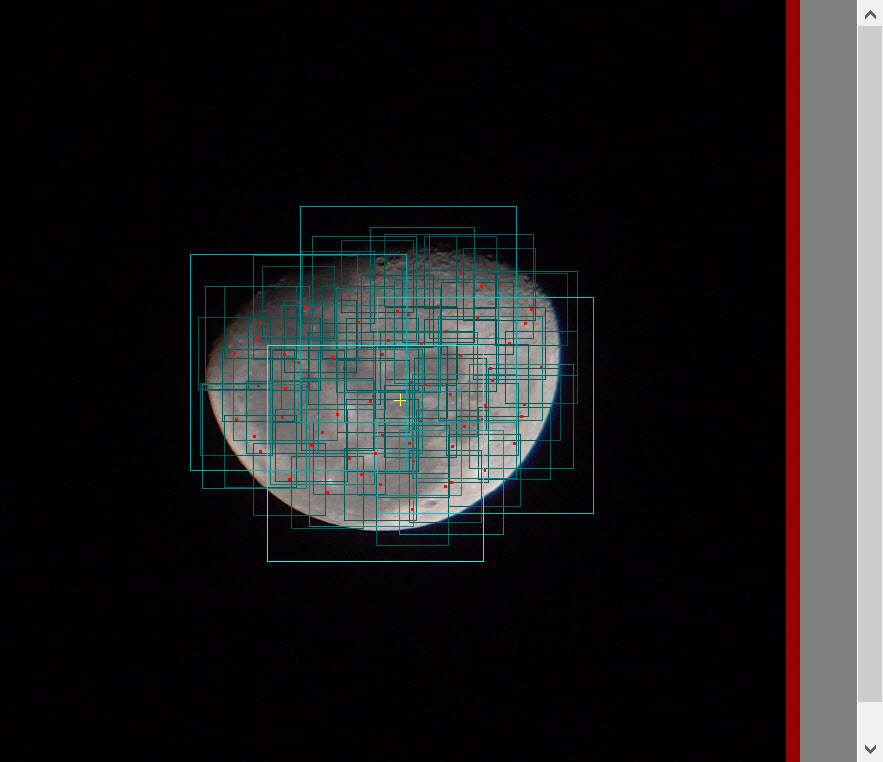
First, we open the source. For this example, I choose the AVI file that was processed from my camera video. A new window pops up with a single frame. The purpose of this step is to draw boxes around features that will help align the various frames together for stacking.
You can click on areas to draw boxes, but it’s easier to simply click the radio button next to the number of points desired (I’ll pick 200) and then click “place AP grid.” This will automatically generate the alignments and coverage looks good.
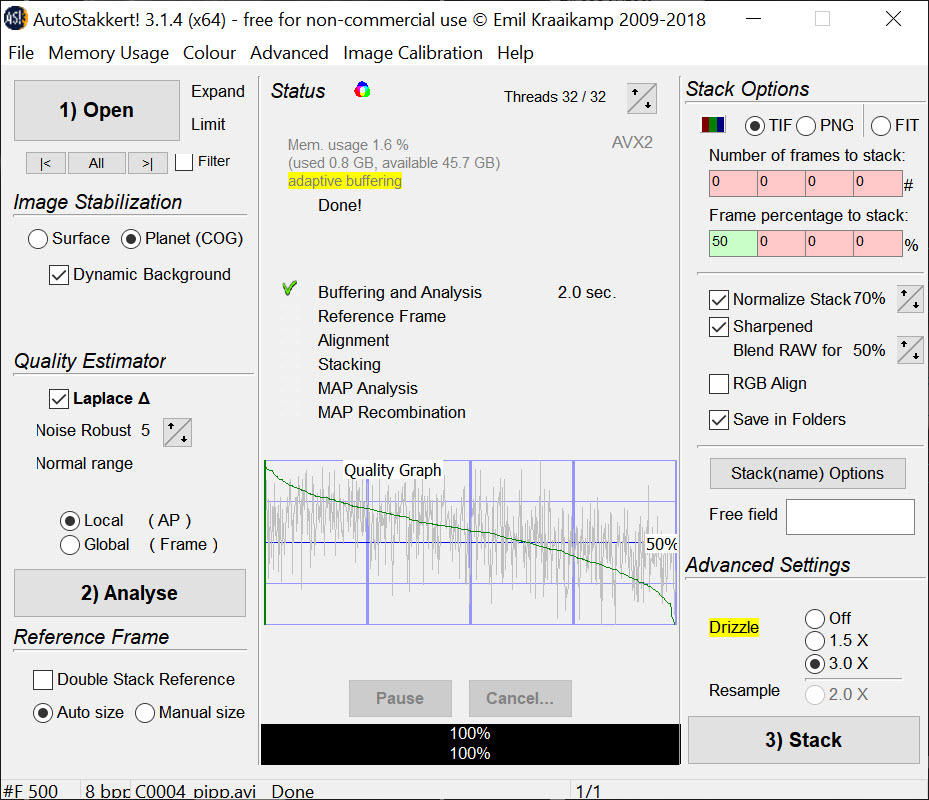
In the original window, you can now click “Analyse” to get a quality graph. I already trimmed the bad images pre-processsing so the graph looks good. I’ll stack 75% of the remaining images and normalize the stack. Because the image is so small, I’m going to beef it up using a 3x drizzle. This will work well because I used video that moved around to shift or “dither” the pixels. Here is my dialog just before clicking “Stack.”
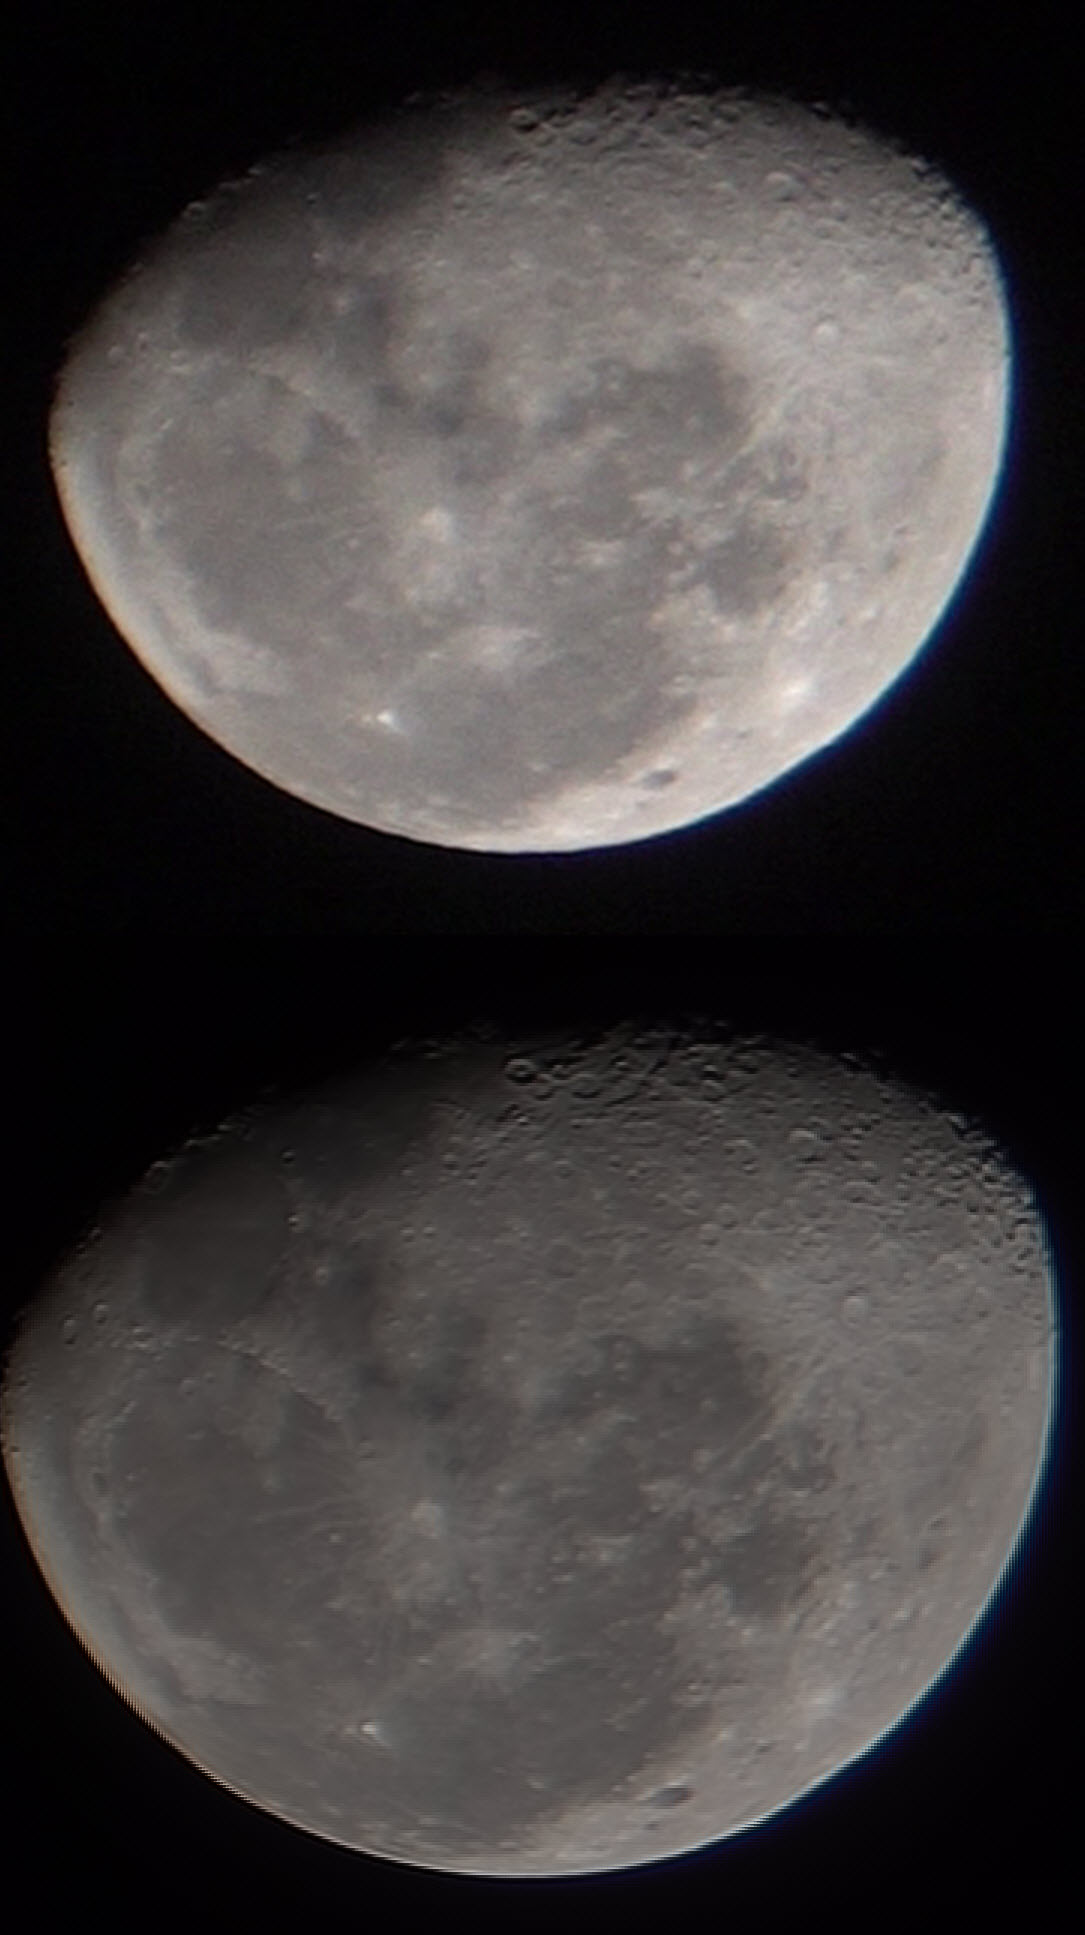
After stacking, a new file is generated that is ready for processing. Here is a comparison with a single frame from the camera on top and the stacked version on the bottom.
Can you see a difference in the clarity and sharpness of detail?
PixInsight
PixInsight is paid software that is in my opinion the ultimate photo processing tool. I’m a huge fan and use it daily. I’ve even built and contributed a set of DeepSkyWorkflow scripts that help me fix out-of-whack colors, generate support files to use deconvultion and fix distorted stars, and even help reduce noise. Sometimes the stacking tools I use don’t work, and when that happens I usually switch over to use a specifc PixInsight script called “Fast Fourier Transformation Registration” or “FFTRegistration” on the Script => Utilities menu.
PPIP sorted images from highest to lowest quality, so I can pick the first image output by PPIP as the reference image. I also click “correct for rotation” but leave the other options on their defaults. I tap “Add” and select all of the output moon files, including the one I used for a reference frame. Clicking OK kicks off a registration process that takes about 5 - 10 minutes on my machine and generates the stacked crescent moon.
RegiStax
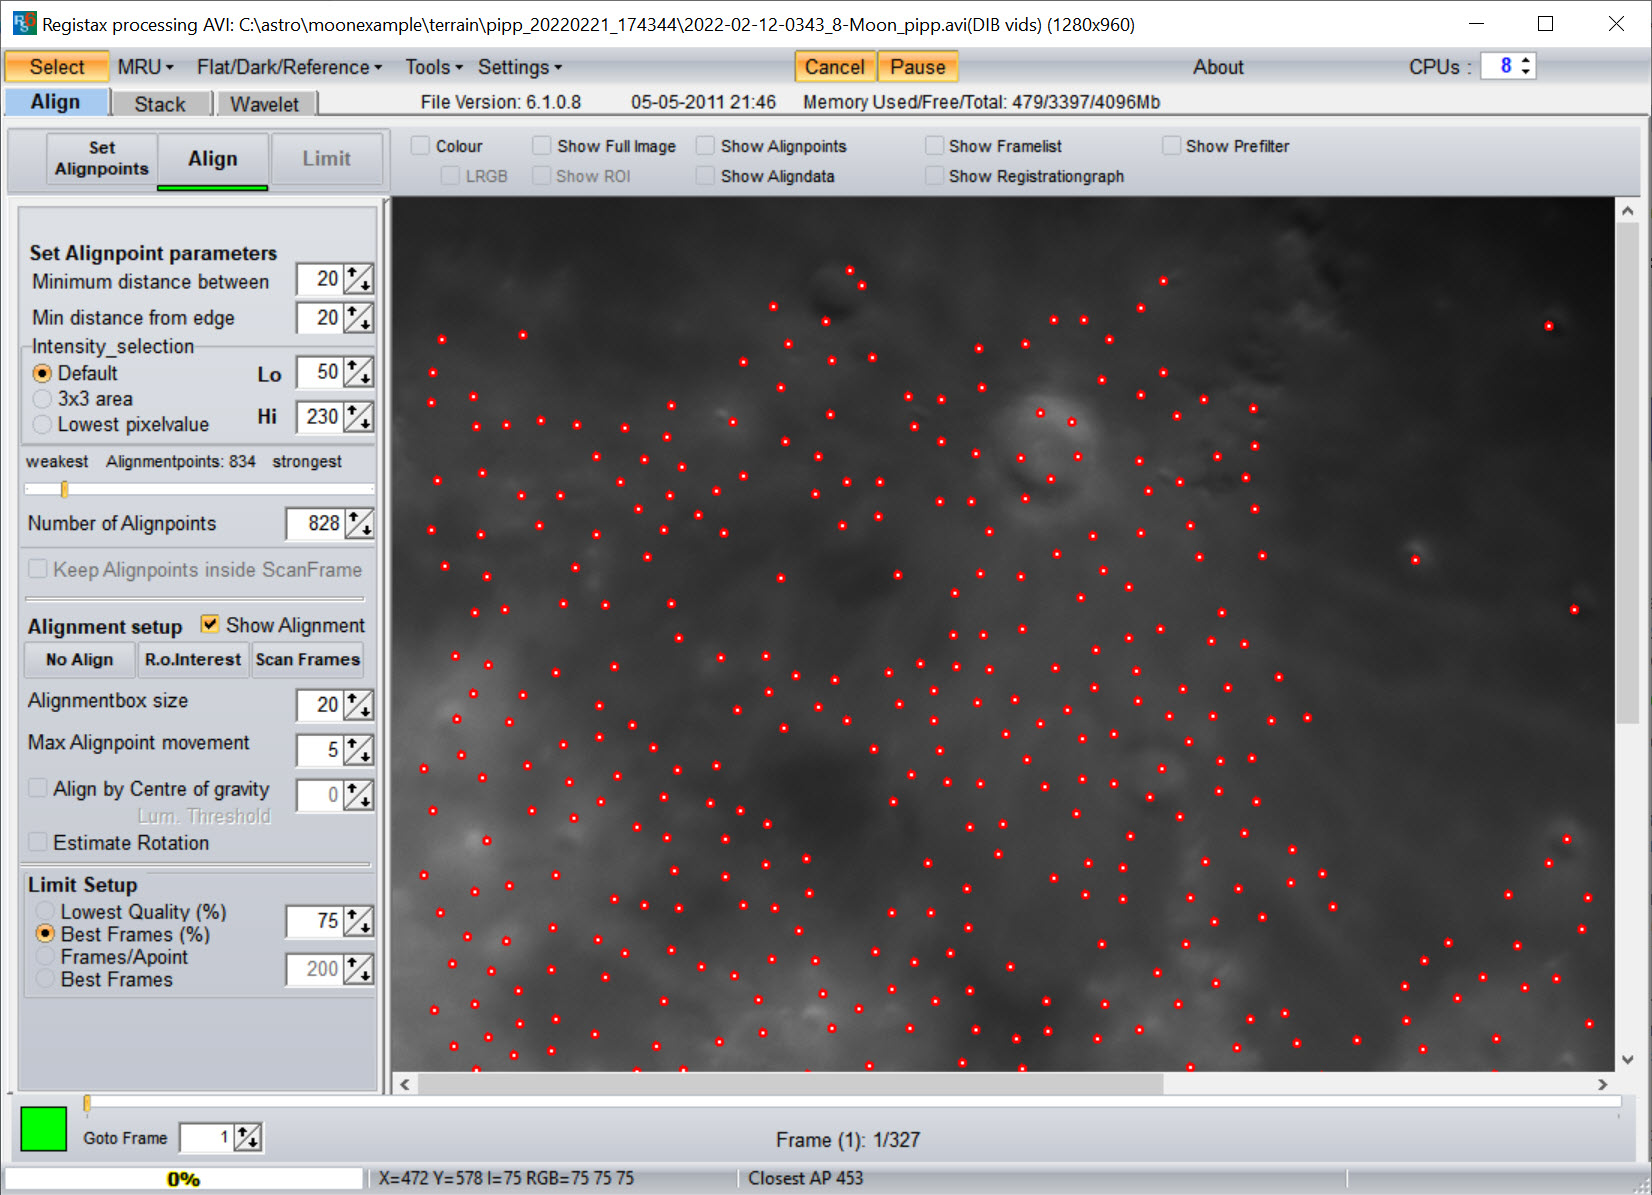
AutoStakkert! can handle terrain just fine, but there’s another free application that many users swear by so I’m sharing it here. It’s been aroud a minute or two (check out the RegiStax6 website). The interface is very similar to AutoStakkert! I’ll go ahead and drag the moon onto the app. Here, the steps aren’t as intuitive, but next I’ll tap “Set Alignpoints”. The result missed a few craters, so I add them by clicking on points in the photograph.
When I tap align, it appears to do nothing. If you look at the bottom left of the dialog, however, you should see a bar with percentages that highlights the process. Once the bar hits 100%, click “Limit” and then “Stack.”
Multi-channel processing
The workflow so far makes sense for either one-shot color or grayscale. But what about the option to use a monochrome camera with filters? How do you stack and combine then? For that, I made a video. Check it out:
Post-processing
Now you’ve got a stacked image. What’s next? The main thing to do is sharpen the image and remove noise. This is possible through a variety of software offerings from the free Gimp and FastStone to the paid PixInsight. I share one way to do this in my processing video.
Conclusion
I’m in the process of learning, but happy to share what I learn, as I learn it. I’ll write more as I learn new techniques and hope you will share your own thoughts, comments, and resources below. Thanks!
Post categories: Related tags:
