December 10, 2024 1378 words 5 minutes to read
Back to the Basics: Camera-only Astrophotography
After a day of amazing Oregon Coast wave photography, I returned home and noticed the sky was clearer than I’d seen in a very long time. On a whim, I decided to practice “portable astrophotography” with my camera and the new lens I recently purchased. I love taking wide field shots of targets I know are bright enough to be captured with an ordinary, unmodified camera and lens.
I’ve been using my Sigma FE 150mm-600mm for quite some time now, but mostly for daytime (waves, whales, eagles) photography and the moon. A few initial experiments failed miserably. I either completely missed focus, or ended up with a gradient too severe to correct.
So, I decided to go back to the basics.
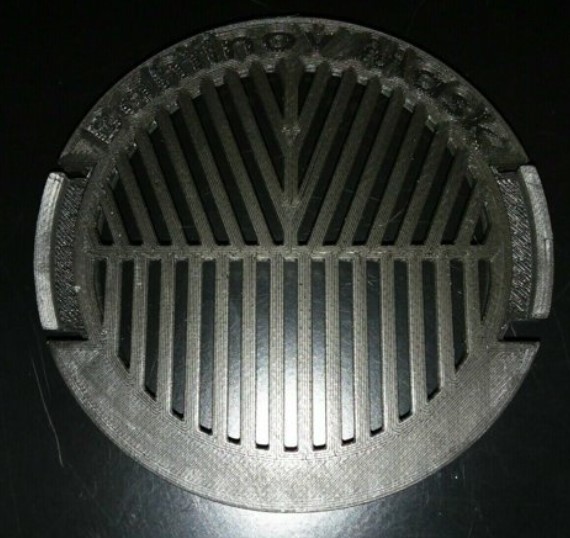
First, to focus, I ordered a 3D-printed 95mm threaded Bahtinov mask. The link goes to Amazon, however, I found much more variety and competitive prices on eBay. Be sure to shop around for your best deal. If you have a 3D printer, you should be able to find an existing model for the thread size that fits your camera lens.
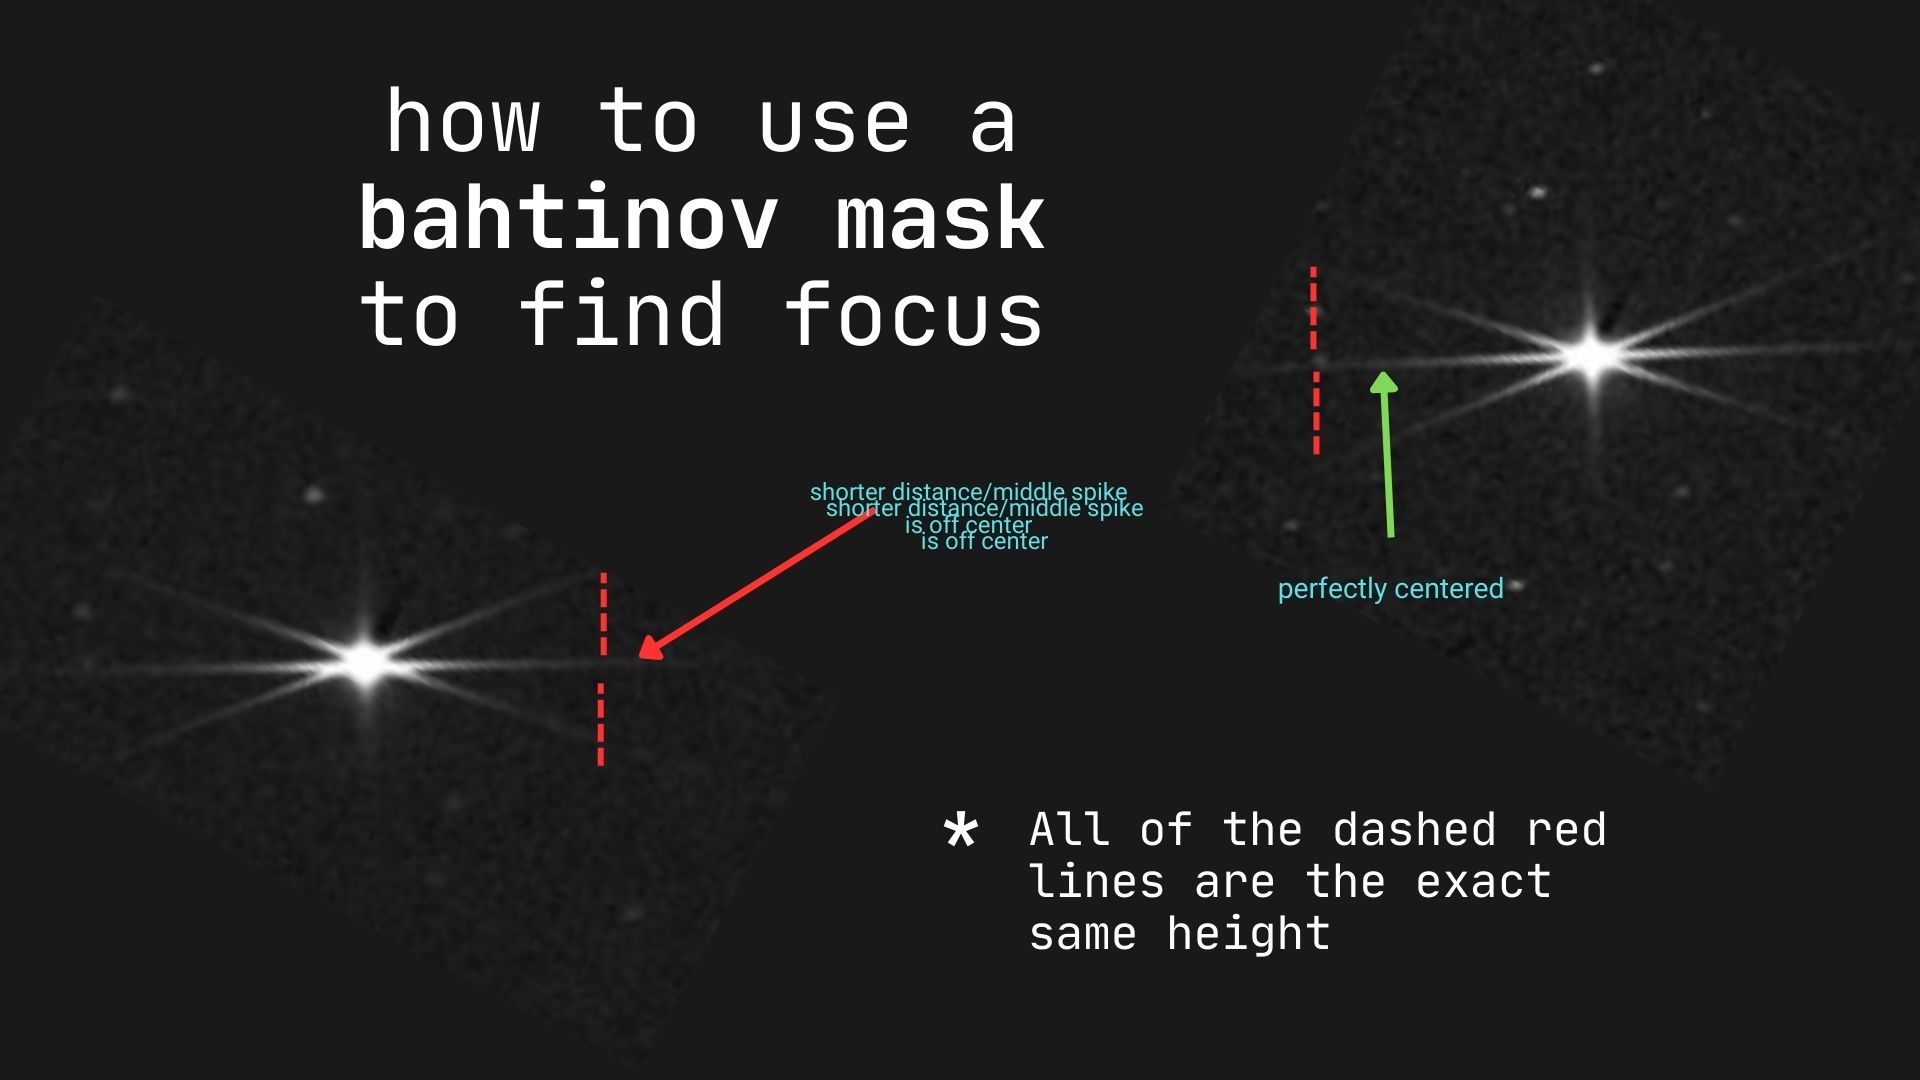
A Bahtinov mask contains a special pattern that creates diffraction spikes in your image. The spikes move as you change the focus. Perfect focus happens when the central spike is positioned in the exact center of the other two spikes. If you are like me, you might have tried to find focus by “zeroing in” on what looks like the sharpest image. This technique is much easier to visualize and guarantees sharp focus if you are able to align the spikes.
I used the mask on Jupiter to focus. It only took me a few seconds and I had no issues.
The next step, to address the gradients, was to take calibration frames. I don’t even think twice about calibration frames for telescope-based astrophotography, but in the past I’ve had issues trying to produce the right calibration frames for camera sessions. For some reason, my “flats” always seemed to come out wrong and make the image worse, not better.
I don’t know what I might have done wrong in the past, but this time it all worked perfectly for me. To set up, I placed my portable tracker/mount, the SkyWatcher Star Adventurer GTi, on my camera tripod with a counterweight.
After balancing the camera and counterweight, I turned the tripod so that the mount was facing North using Polaris (the North star) as a guide. The mount comes with a built-in scope for polar alignment. I cover the process to polar align in my article about camera astrophotography with tracking hardware. Although the mount is different in the blog post, the process is the same.
Next, I calibrated the mount using 3-star alignment. The app that comes with the mount allows me to select three different bright targets. I chose Jupiter, Castor, and Saturn for my alignment. The process works like this:
- The mount starts at “home” which is the position it is in after I polar align.
- It slews to the first target, in this case, Jupiter. For the first target, I typically use my ball head adapter to move the camera until the target is mostly centered in the field of view. I only do this for the first target, all other adjustments are done with the mount itself.
- I tap a button to let the mount know it is aligned. If I had to use the mount for any adjustments, the mount will store the delta between what it slewed to initially and where I eventually pointed it.
- The mount slews to the next target, in this case, the star Castor. Usually the star is within the field of view and only slightly off center. I use the mount controls to center it.
- The mount slews to the last target, in this case, the planet Saturn. This time it ended up centered without me having to do anything, so I simply tapped “confirm” for the alignment and now the mount was ready to go.
There are two ways to test how well aligned the mount is in the field: first, with the tracking set to sidereal, take a long exposure and see if there is any stretching of stars. When I properly align my mount, I can easily capture up to 5-minute exposures without the stars deforming. Second, use the “go to” feature to find a target. I initially chose “M45: the Pleiades” as a test, and it centered the beautiful cluster of stars perfectly. I then decided to use the widest field of view (150mm) to target the Orion constellation.
With everything in place, I used a built-in feature of my Sony A7R IV to set up an interval shoot. I programmed it to take continuous 30-second exposures at ISO 320 for about an hour. These main exposures are referred to as lights. Here’s a sample light:
Next, I put the cap on the lens to block any light so I could take darks. The darks should have the exact same settings as your lights, including exposure and ISO. It is important that they are taken under the same conditions, specifically the camera temperature, as the lights. Darks provide a signature of thermal noise and will vary depending the temperature of your gear, so its always best to take your darks during the same session. Here’s a sample dark:
Next, I took several bias shots. A bias shot should also block light from the lens (so take bias shots with the lens cap on) and have the same ISO as the dark. For exposure time, choose the fastest shutter speed available on your camera. For me, that meant 1/8000th second (0.125 milliseconds) at ISO 320.
Here is a bias frame:
The final calibration set is the one I have had the most difficulty with in the past, the flats. Flats should be taken with a “neutral, uniform” light source. People do everything from aiming at a portion of the sky during twilight to aiming at the sun with a white t-shirt wrapped across the lens.
I use an LED panel. I picked up a simple tracing panel from Amazon big enough to cover my biggest aperture (9.25” for the Celestron telescope) with variable brightness. To use it, I turn it on and place the camera so the lens is face down on the LED panel. I then using my camera’s histogram display to adjust the brightness until it is about 75%. Then, I take several exposures. Here is my flat:
Next, I use software like PixInsight or Astro PixelProcessor to calibrate and stack the images. Most stacking software, including the free options you can find on the astrophotography resources page, allows you to specify the files for your lights, darks, bias, and flats.
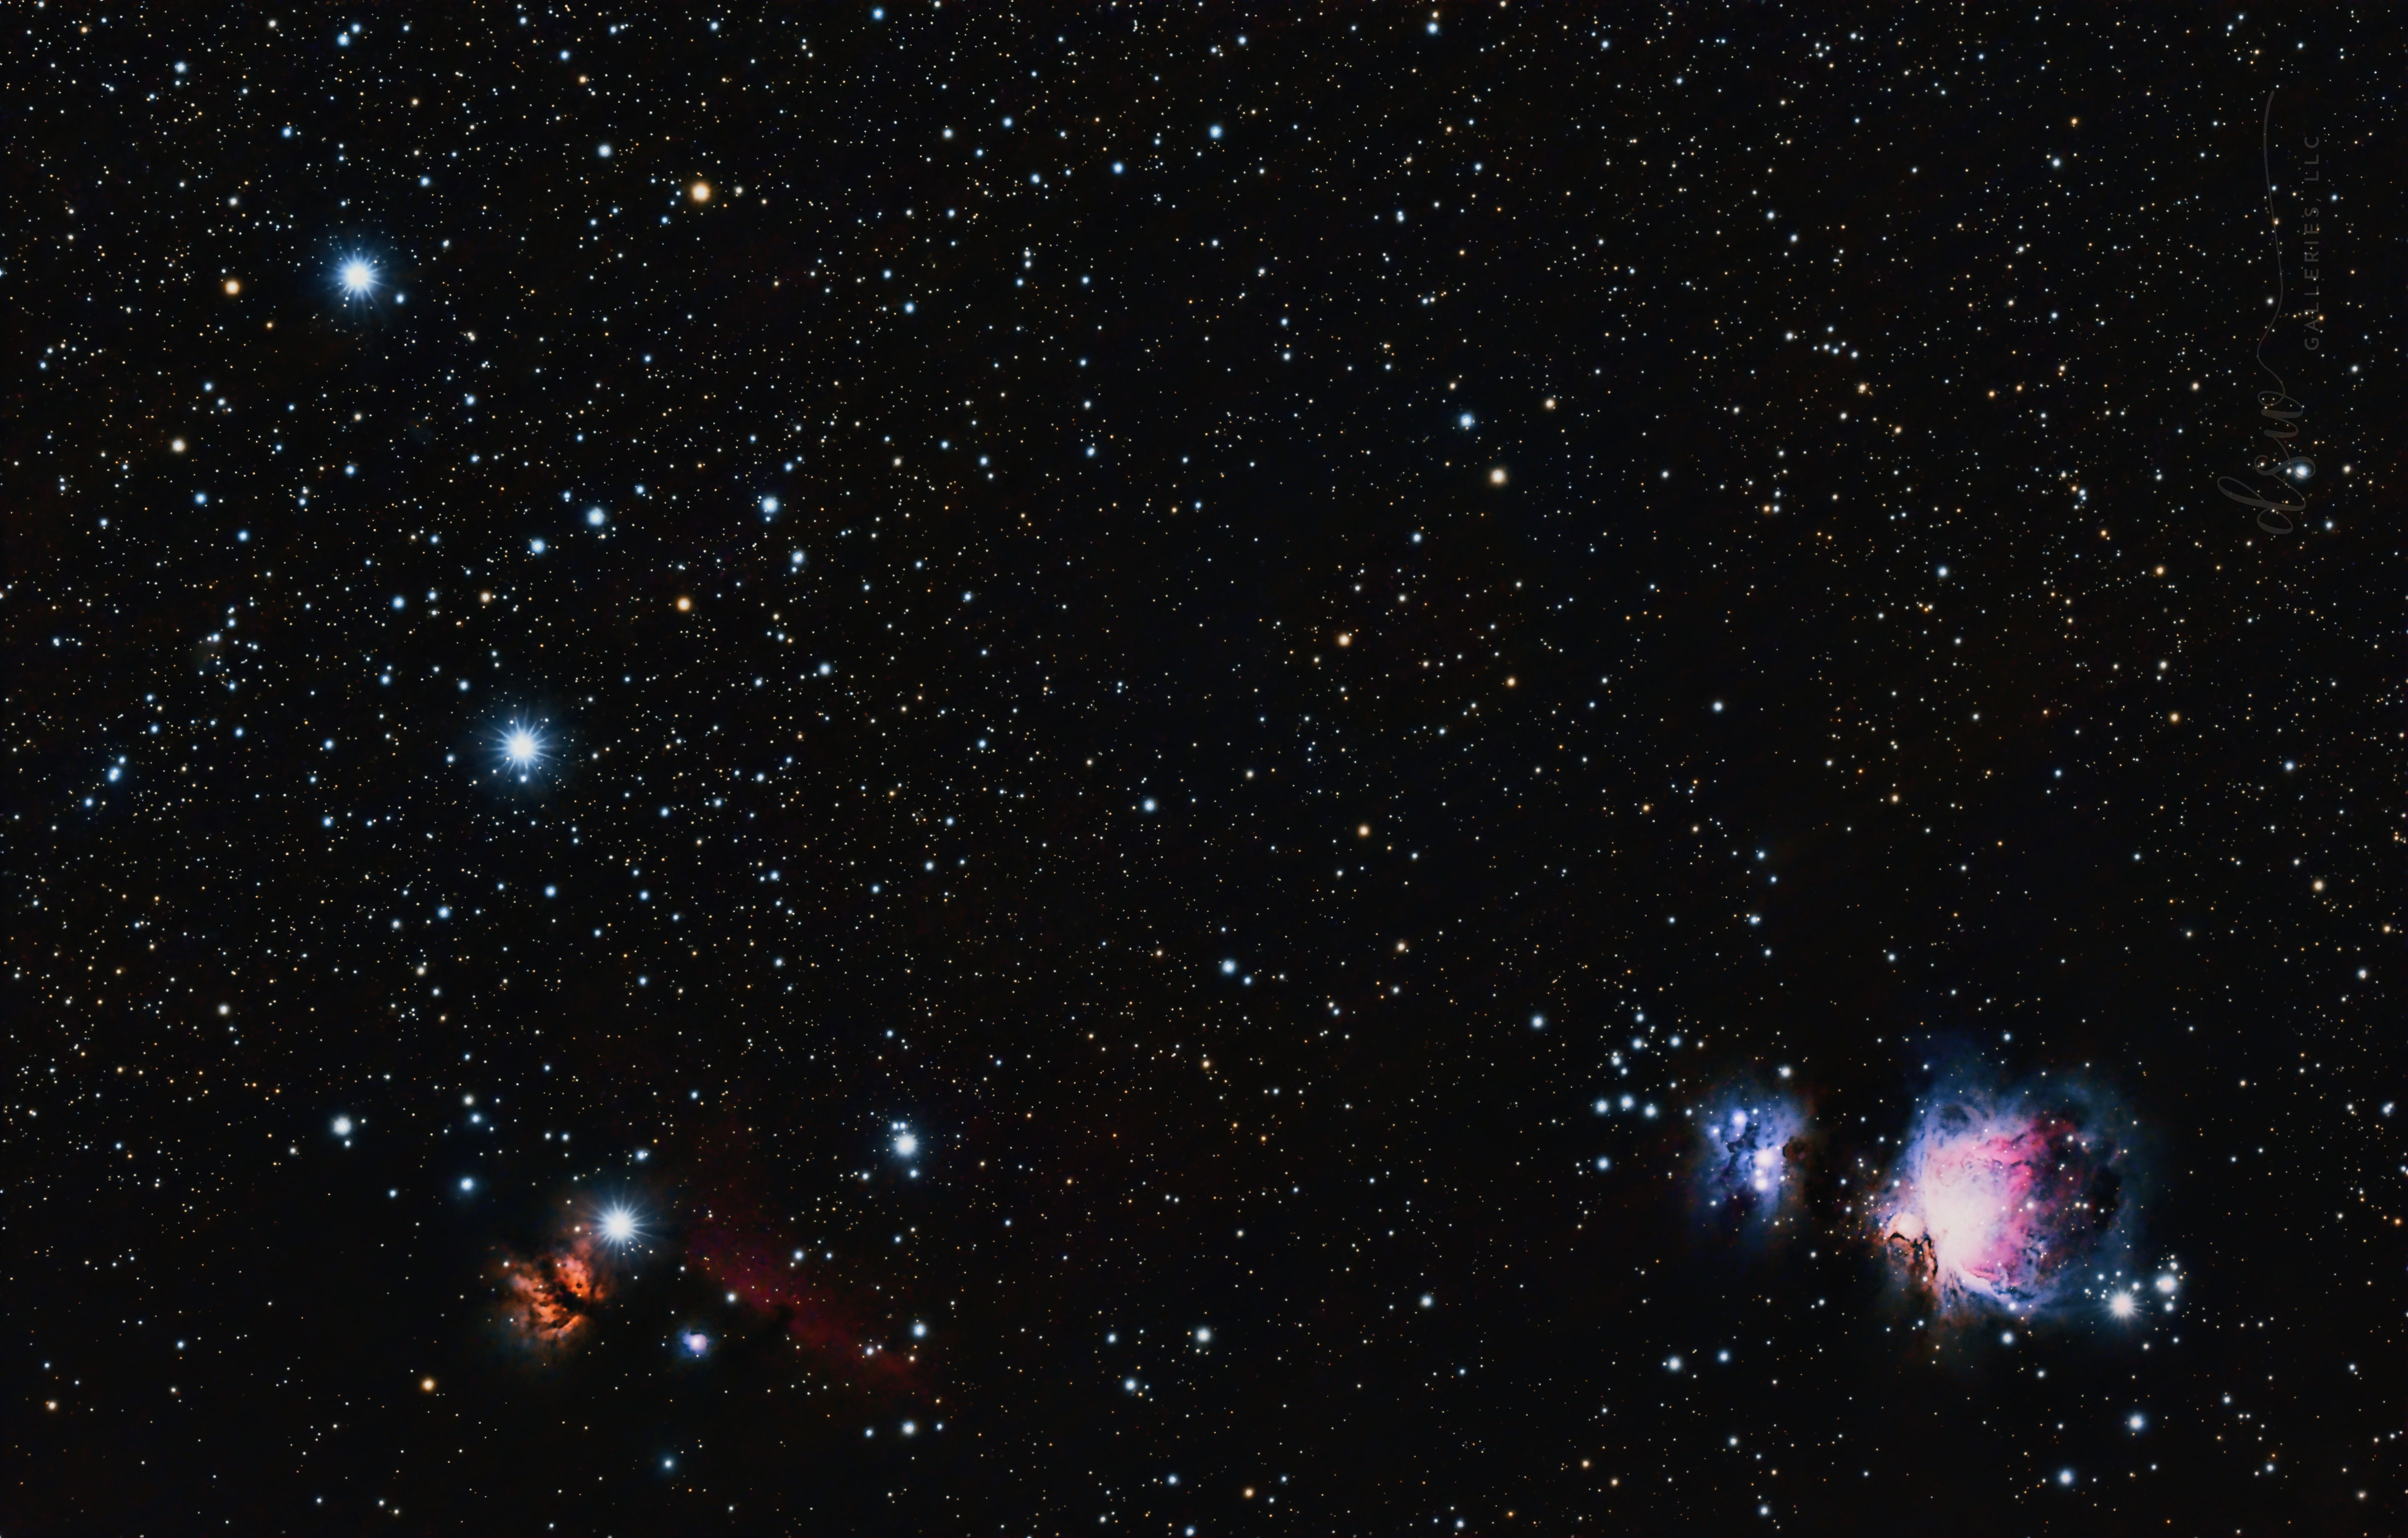
After stacking and calibrating the images, the result was a very clear image with only slight gradients in the background that were easy enough to deal with. I am very happy with the result. I love the way this lens diffracts the brighter stars but is also able to capture the rich detail and color of the nebulae.
I’m excited to try out other targets now!
Post categories:Calibration Imaging Session Learning
Related tags:
