March 18, 2023 2573 words 10 minutes to read
The secret to choosing ISO, exposure, and F-stop for astrophotography
Summary
- The highly scientific and complicated super-secret formula
- The exposure triangle
- F-Stop
- Exposure time
- ISO
- Interactive playground
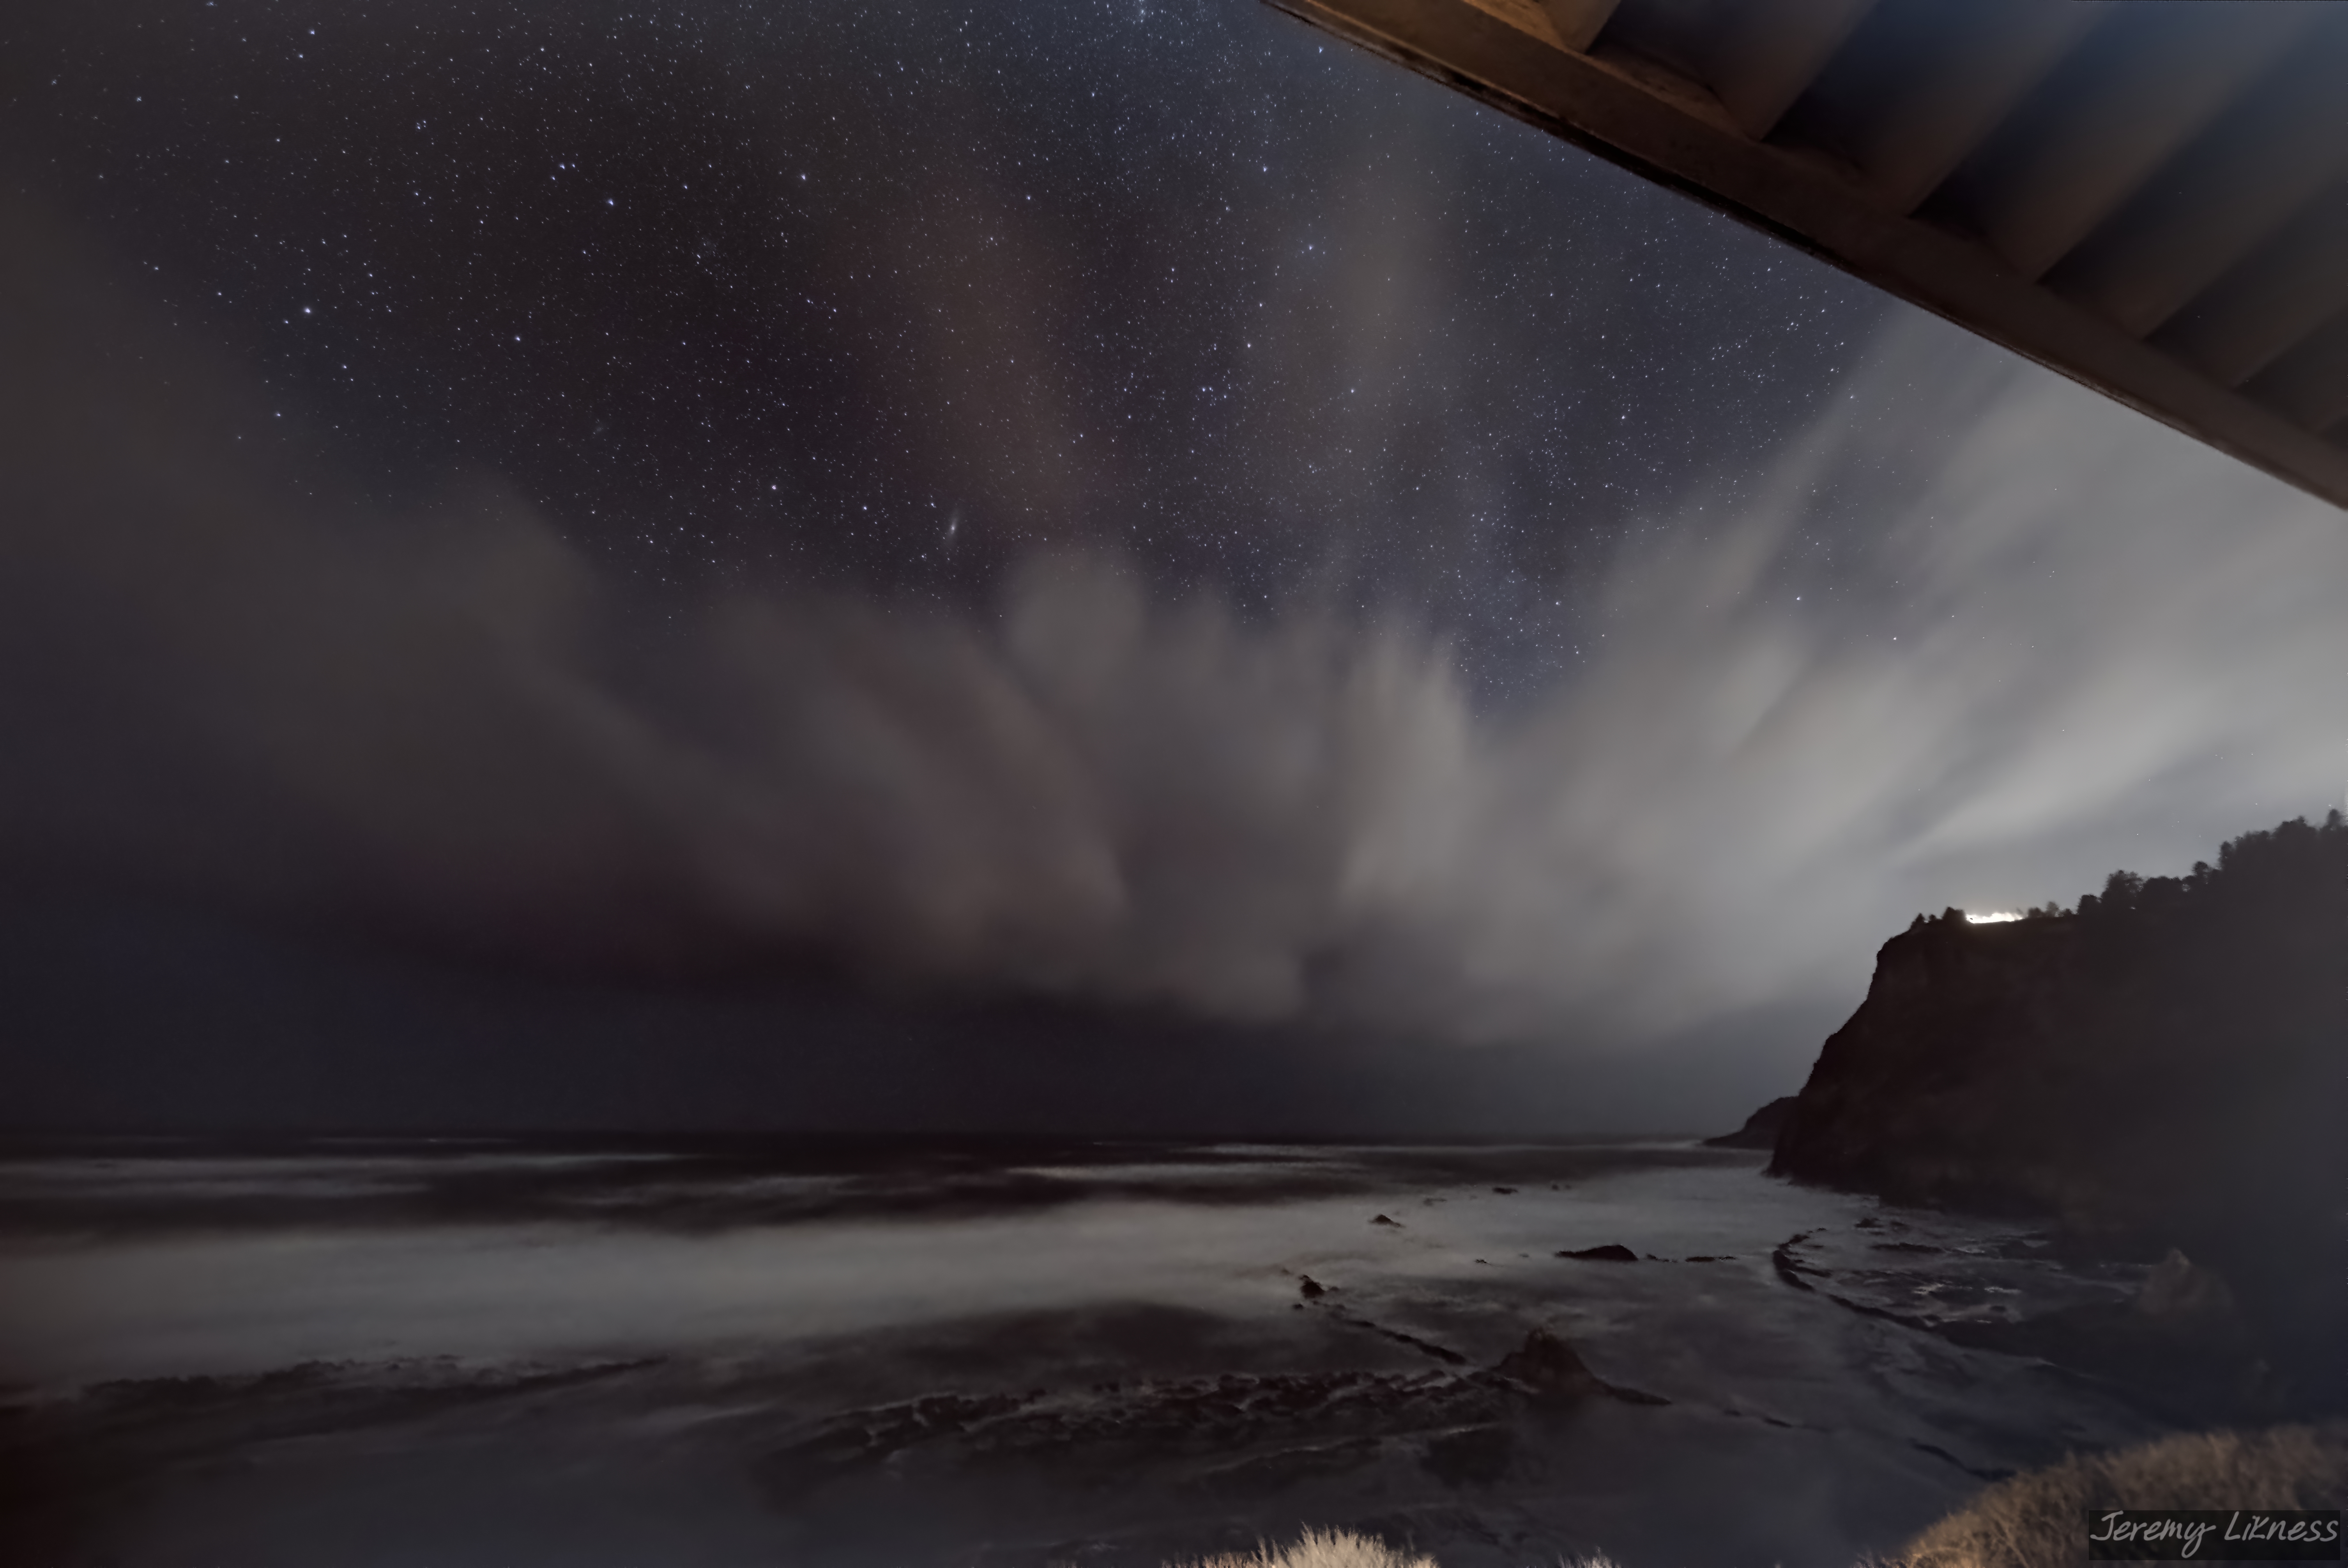
As much as I love looking through a powerful telescope, my astrophotography hobby began with a camera and I’ve always enjoyed taking wide angle shots as much as observing deep space objects. Taking pictures at night requires nothing more than a camera and a bit of knowledge to choose the right settings. A mount that tracks the stars may be ideal but is not necessary. For example, this shot of the Andromeda galaxy peeking above storm clouds on the Oregon coast was taken with a Sony Alpha 6300 mirrorless camera mounted on a stationary tripod.
One night during a trip to the Cayman Islands, our friends invited us to a beach bar next to the spot where they dive. We were at a table next to the water in a very well-illuminated space, so astrophotography was far from my mind. When we were introduced to the divemaster, he pointed out over the water and said, “That direction is nothing but ocean for thousands of miles.” He was thinking of the vast expanse of unexplored ocean. I immediately thought, “no light pollution!”
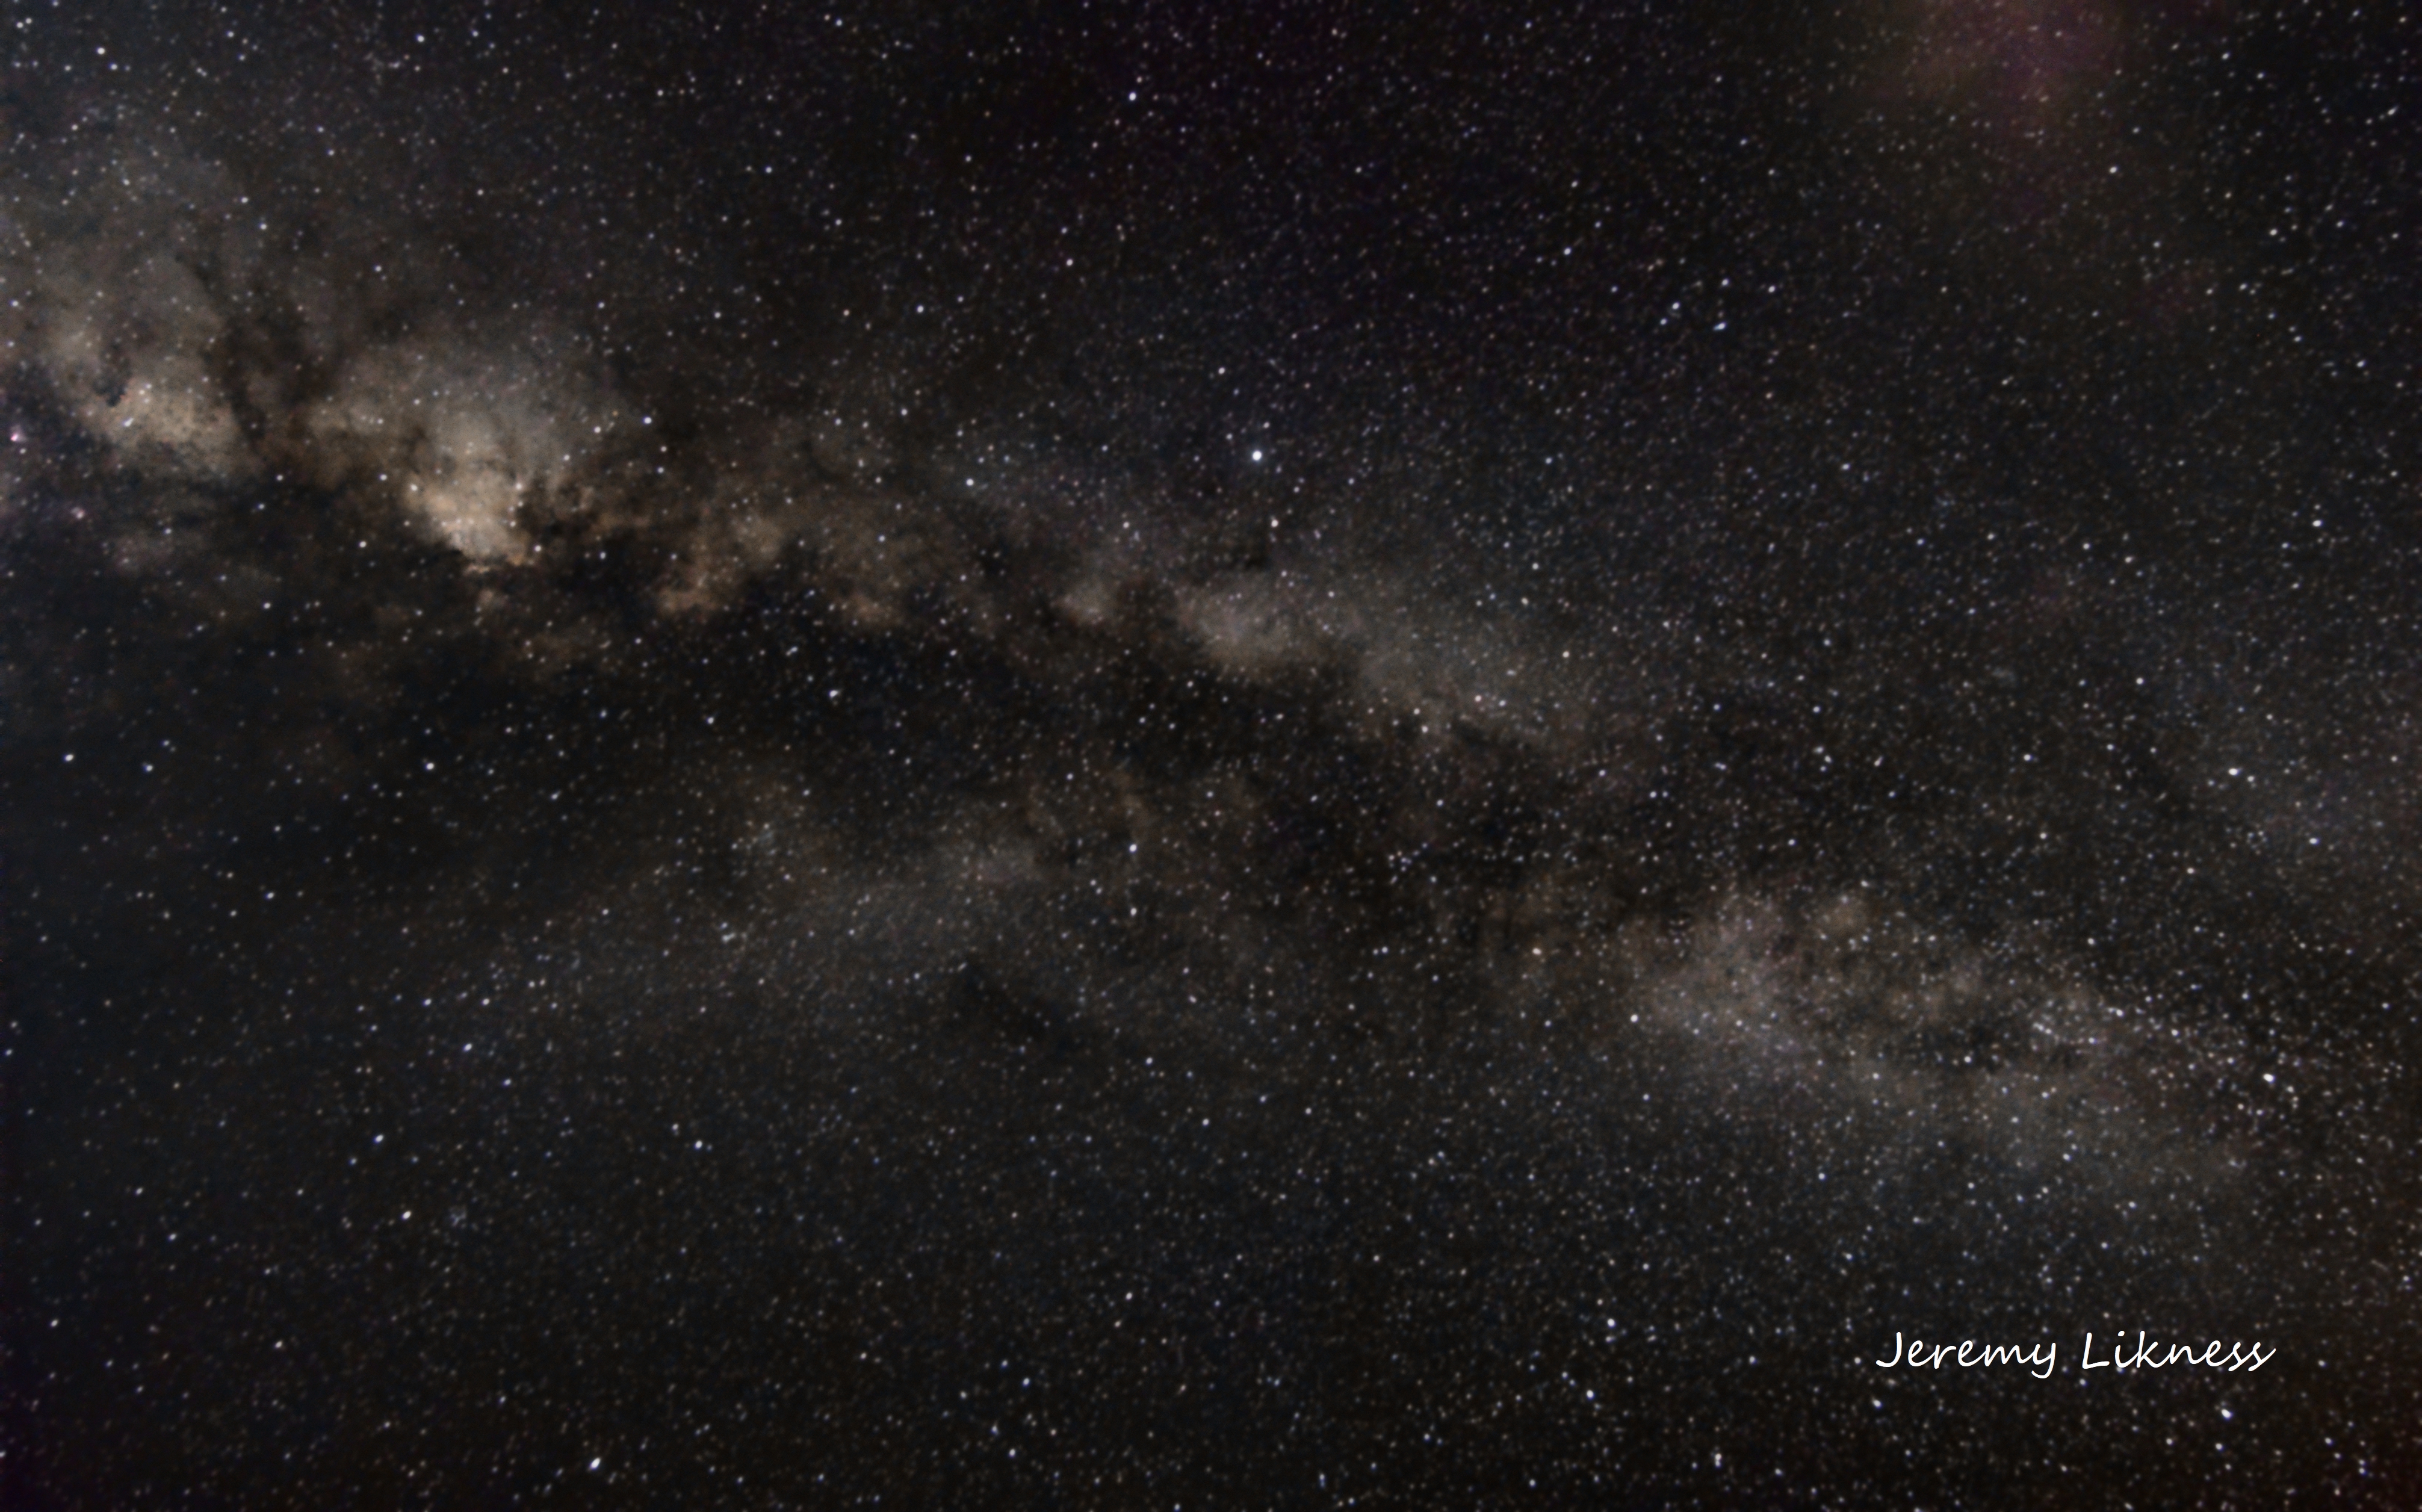
We were at dinner, so although I had my camera, I left my tripod behind. So, I improvised. I stacked my lens cap on top of a few coasters and a plastic case for memory cards then leaned my camera against this precarious “stand” so it was pointed at an angle where I thought the Milky Way might be. I took a test shot, looked at it, and smiled. I followed up with several sets of 20-second exposures and stacked them on my laptop that evening. This is how the “Milky Way over Macabuca” turned out.
It was a really great trip. If you have a few minutes, check out the Cayman collection, a behind-the-scenes look at the trip and the photos I took on the island.
This post is really about the very straightforward way I figure out the right settings. I’ll share the formula now, and explain the ingredients after. When I’m taking star photos with my camera, this is the process I follow.
The highly scientific and complicated super-secret formula
You may have heard of the “500” rule. It suggests you take 500 and divide by the focal length of your camera to get how many seconds you should expose. A 12mm wide shot should allow for 500/12 = 41 seconds, which in my experience is way too long. A 200mm shot comes out at 16 seconds which is about 4 times more than what I typically use. So, what do I use instead? It’s really a quite simple process.
- I always start with a long exposure test shot at 30 seconds exposure with moderate ISO (1200 or so). It’s almost guaranteed to have star trails, but it also gives me a glimpse of what is in the frame. If you are pointed at any galaxy or cluster or bright nebula, you’ll know it by looking at that test shot.
- Next, I dial ISO all the way down (100 on my camera) and set the exposure to something “reasonable” to start with (at 12mm I can push 20 seconds, but at 200mm I might drop down to 8 seconds). The point is, it’s at the upper end of what I think is possible for a clean shot.
- I check the picture. If the stars are points, I’m done. Otherwise, I…
- Halve the exposure and double the ISO. Back to step 3.
I even made a diagram if you’re more of a visual person:

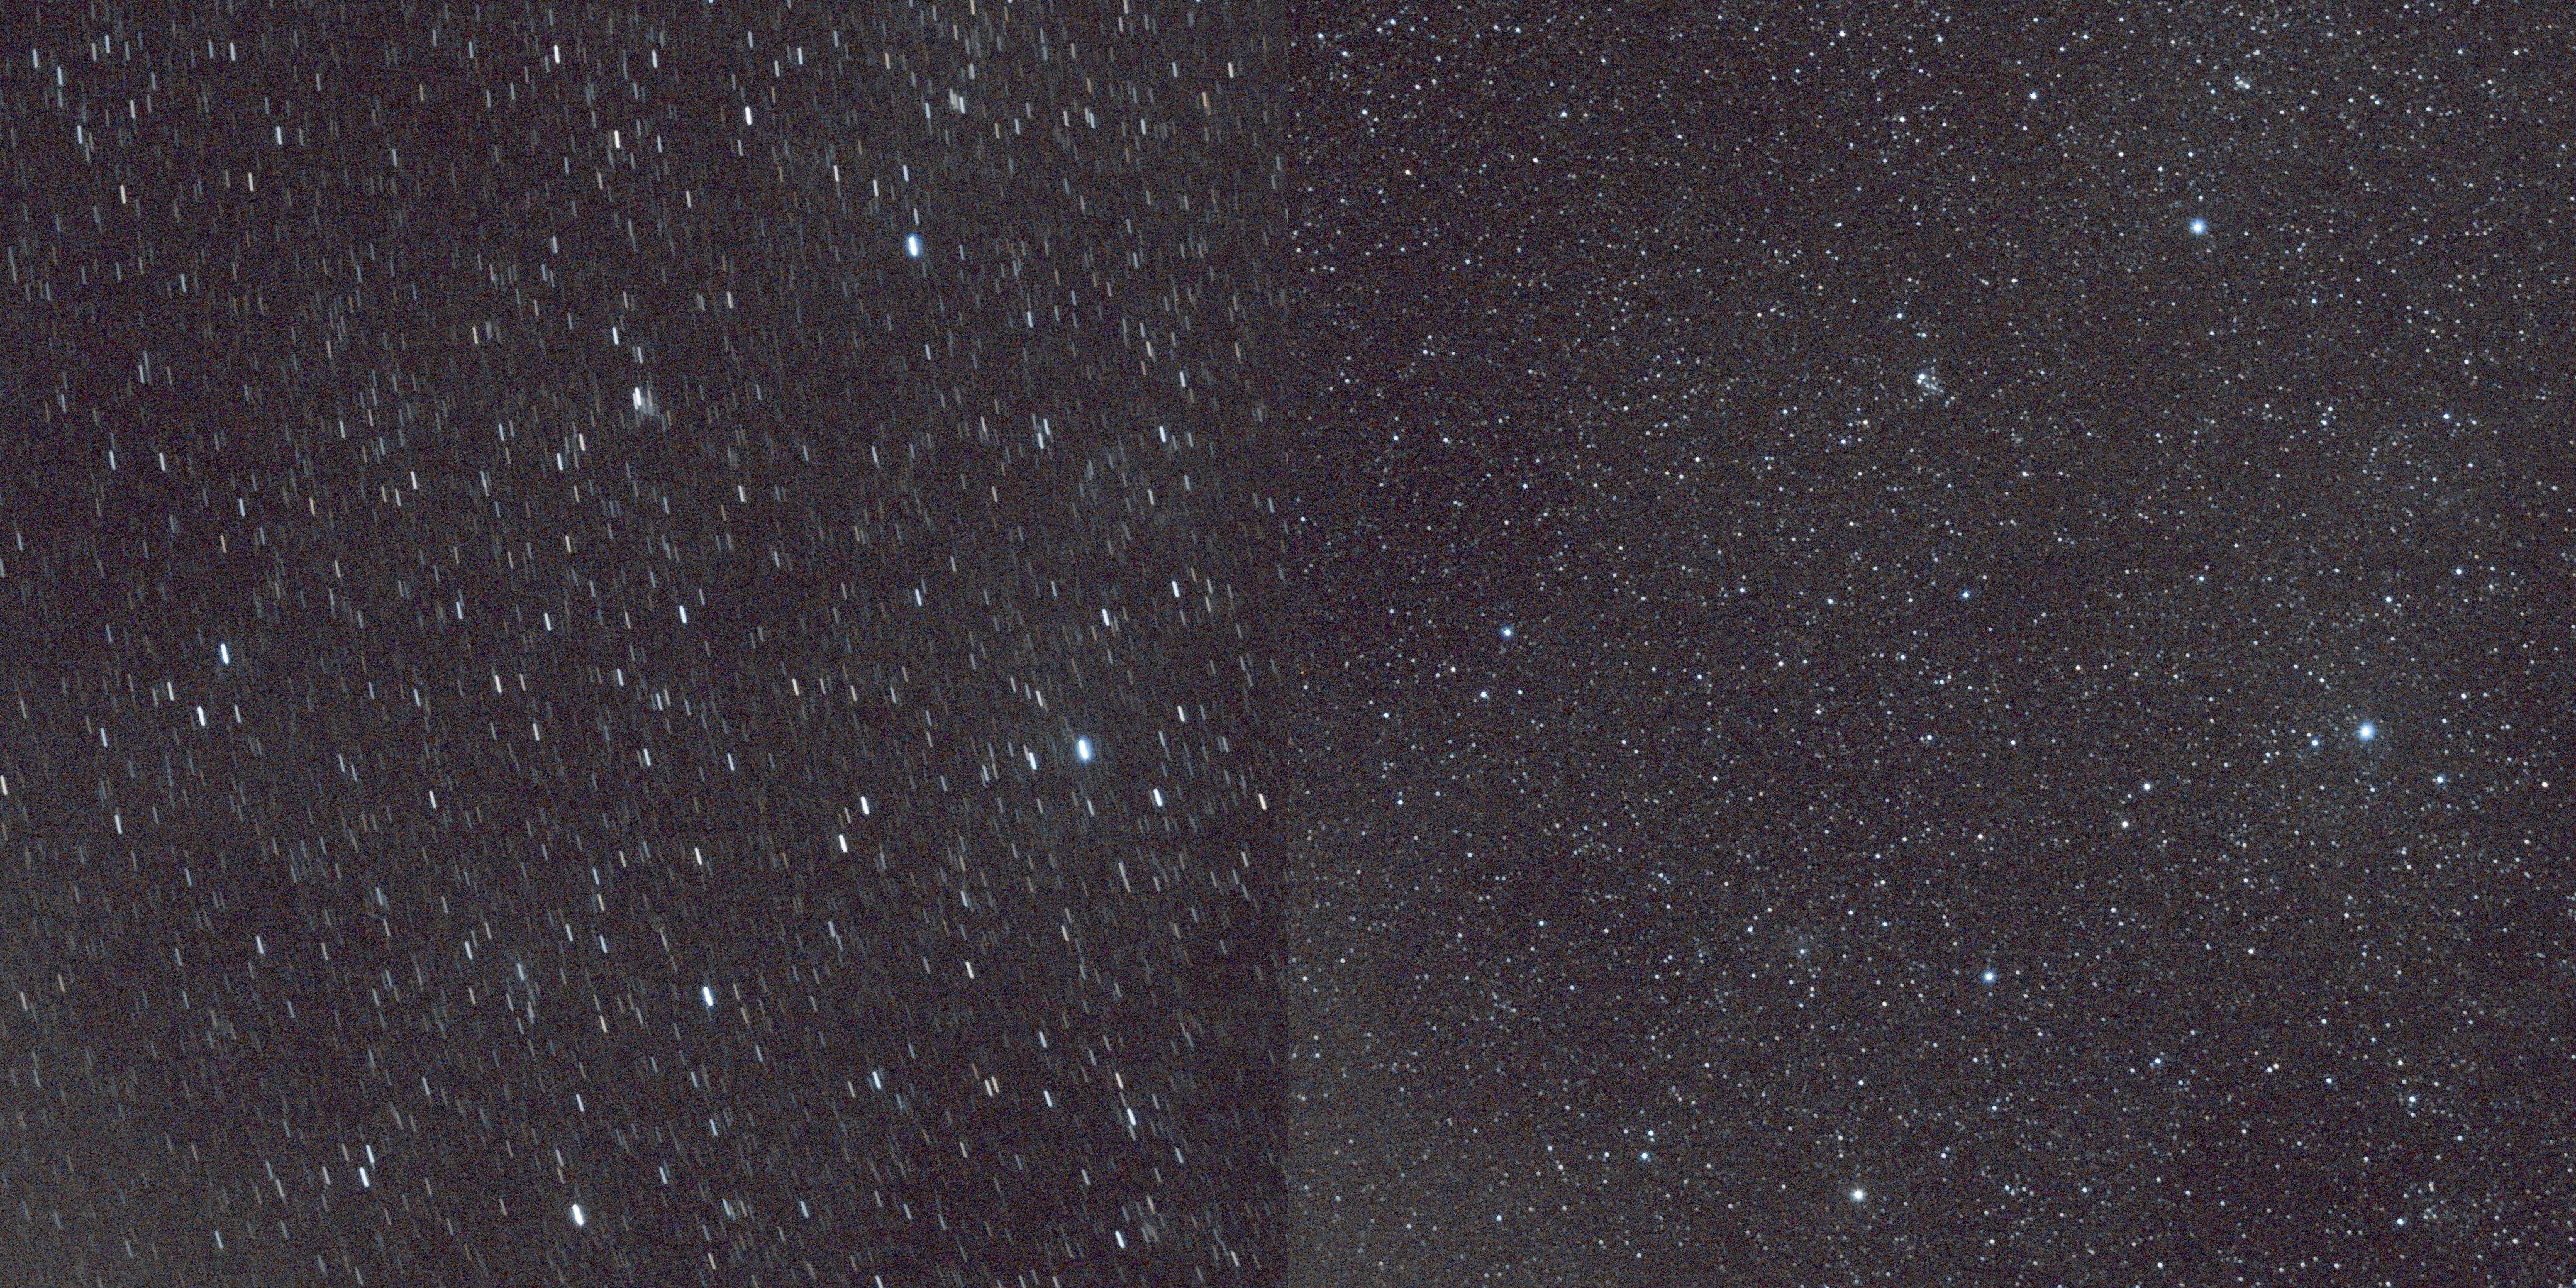
Here’s a comparison between a shot with the exposure set too long vs. a shot that’s “dialed in.” This is a processed image, so it has far more definition and brightness than what you’ll see in your camera preview.
That’s it. In short: dial down exposure until stars are points, and increase ISO to bring out more details. This may bring up the question: if I know lower exposures reduce the chance of star trails, but ISO brings the detail back up, why wouldn’t I just use low exposures and high ISO? That’s a great question. If you’re interested in the answer, keep reading!
The exposure triangle
Photographs are a way to capture light, so it makes sense that all of the important settings for a proper exposure also relate to light. The exposure triangle refers to three variables you are able to adjust in most scenarios: the amount of light that can enter at any given moment (aperture or f-stop), the amount of time you gather that light (exposure or shutter speed), and the amount you amplify the light from your sensors before you process it (ISO or gain).
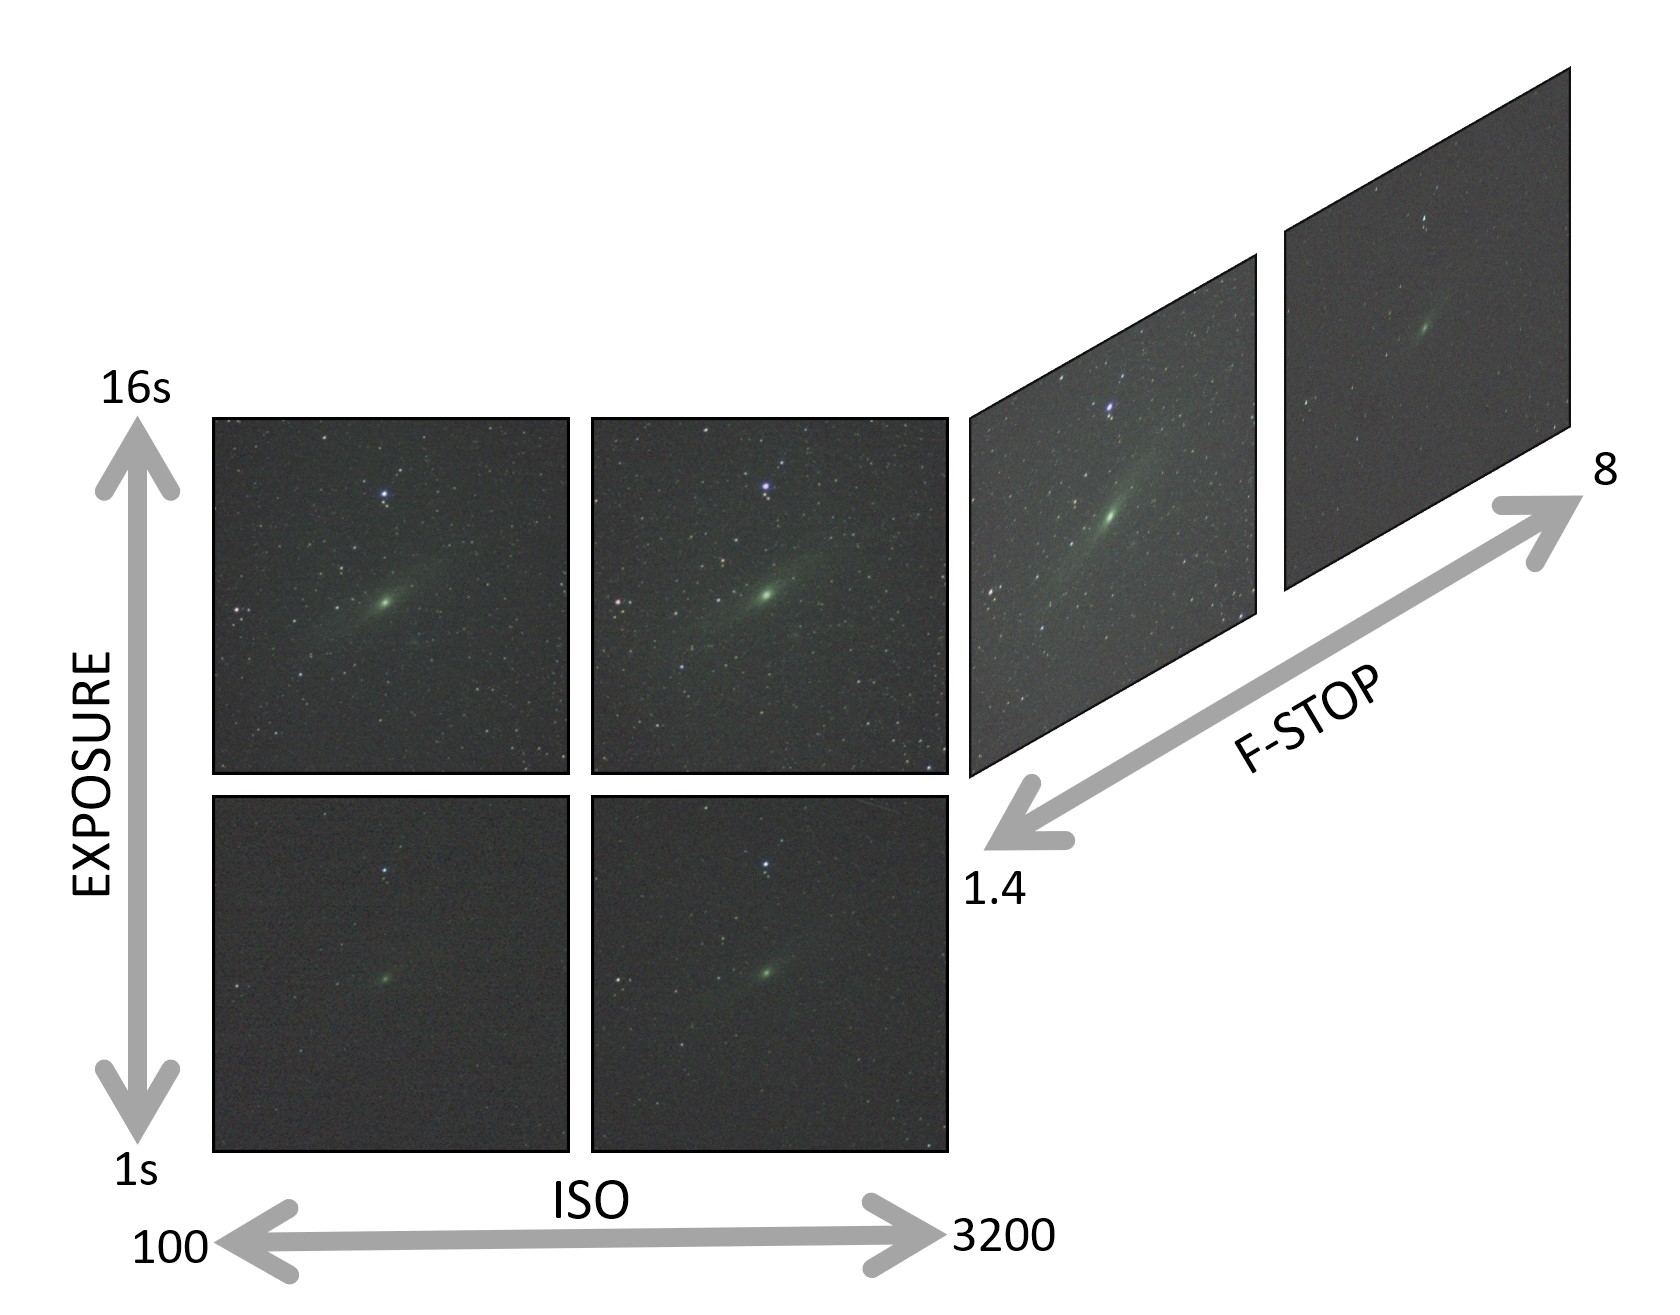
Although it is presented as a triangle, I like to visualize it as a cube. This is a set of photographs I took of M31: the Andromeda galaxy.
Going up is higher exposure, going right is higher ISO, and moving back is a higher f-stop.
What makes the triangle interesting is this: doubling exposure time, doubling the size of your aperture (or decreasing your f-stop), or doubling your ISO all double the amount of light that your camera will capture. This “doubling of light” is referred to as a “stop” and generally each scene has an ideal stop. That’s where things get interesting: depending on what you’re after, you can achieve the same stop in multiple ways. If I see star trails at eight seconds and ISO 100, I can gather the same amount of light without the trails at four seconds and ISO 200 or two seconds and ISO 400.
F-Stop
The f-stop is simply the ratio of your aperture to your focal length. The focal length is controlled by your lens and determines magnification and field of view.
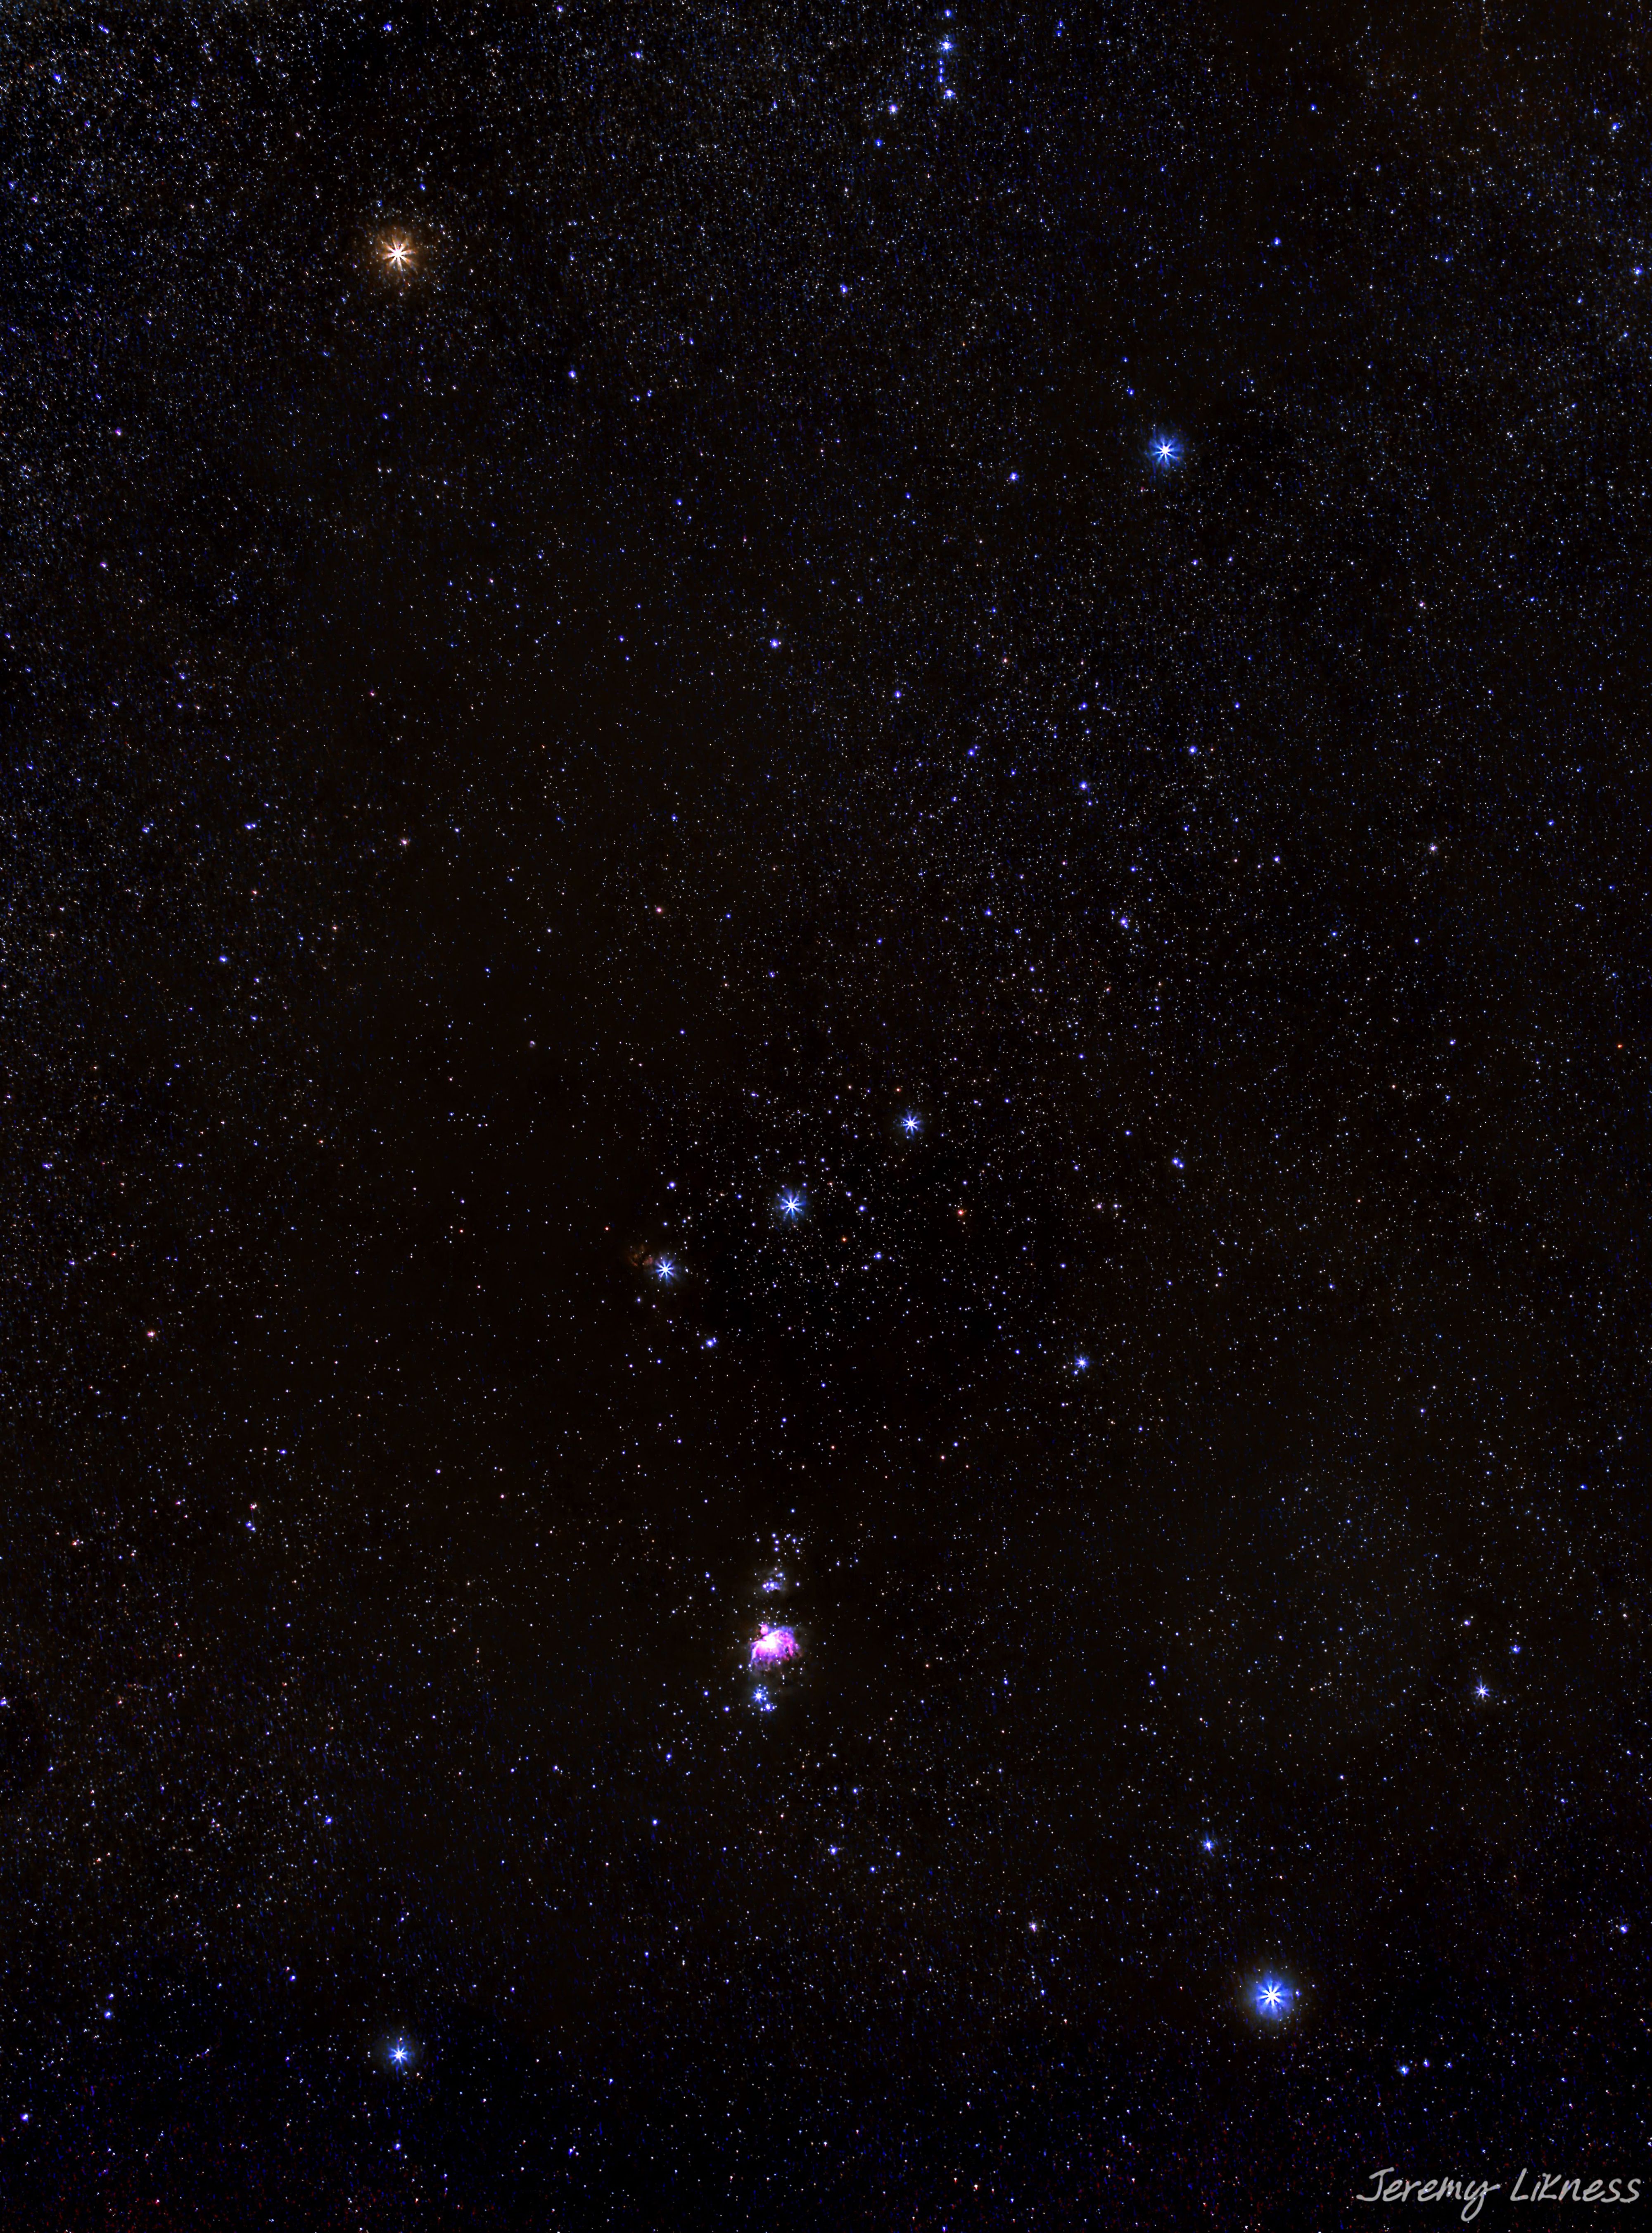
For example, this photograph of the Orion constellation was taken at a focal length of 50mm and has a field of view of 13 degrees. Near the bottom center you can make out the purple outline of the Orion Nebula but there’s not much detail.
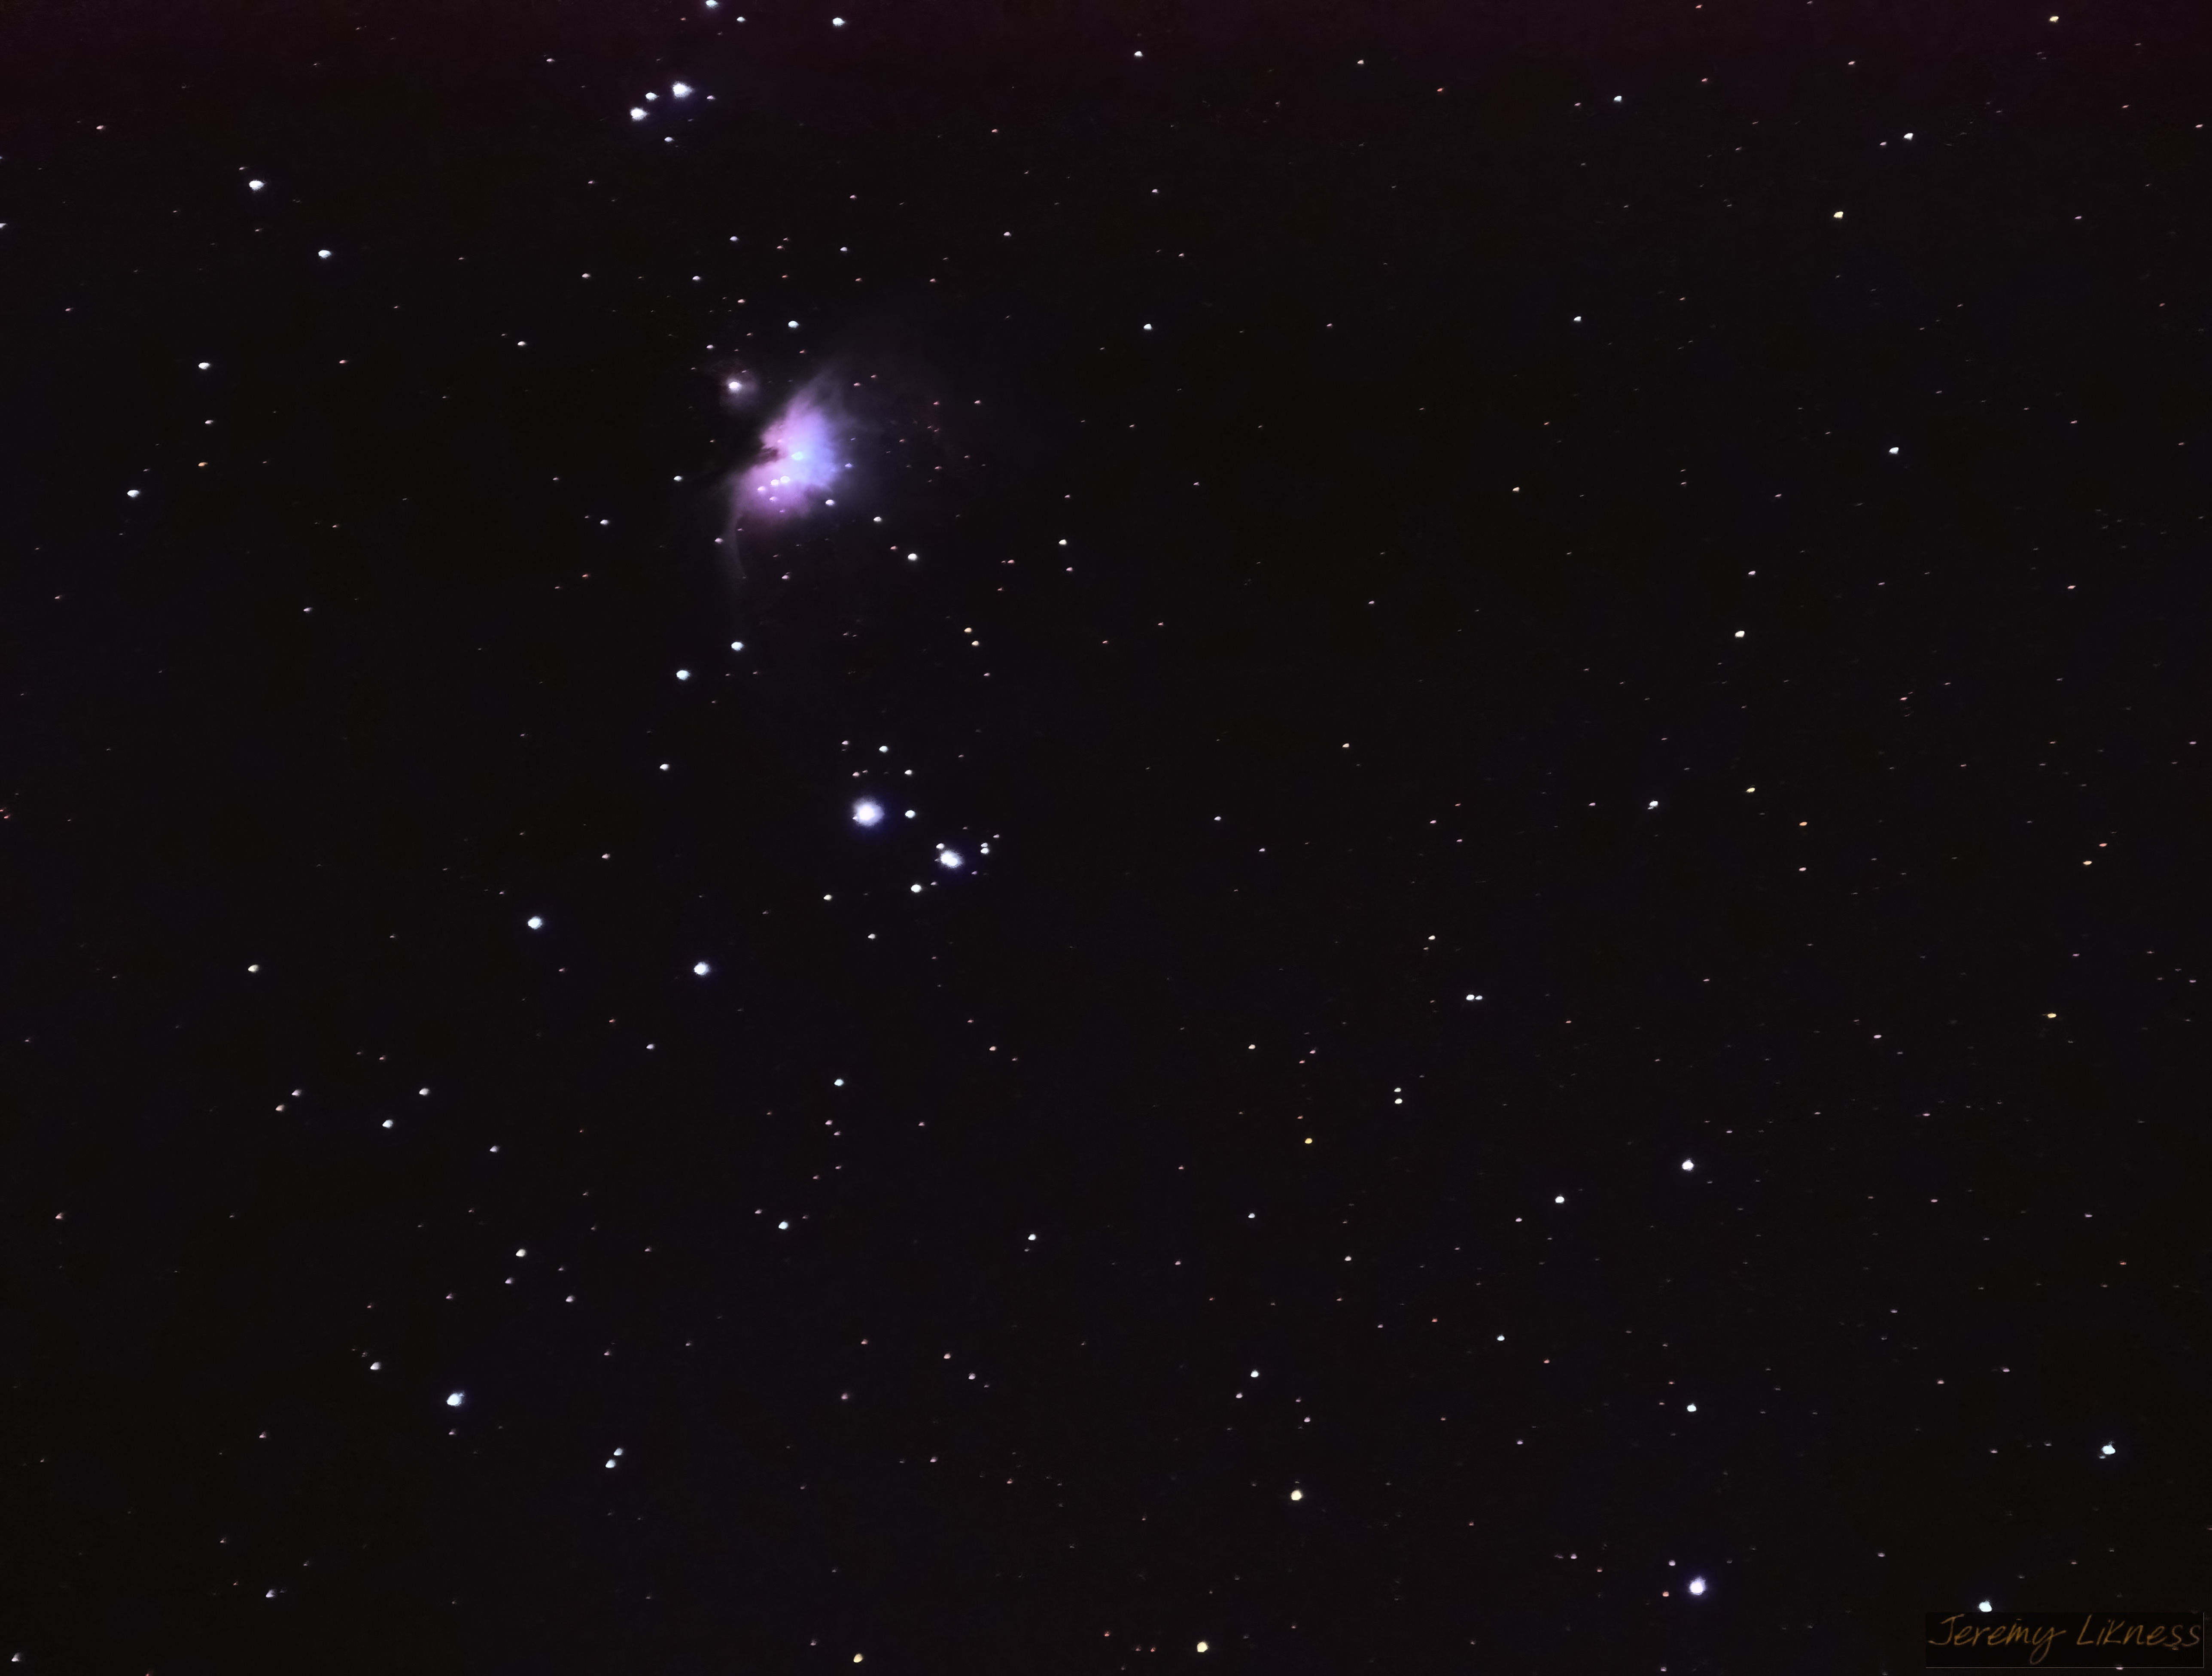
At 210mm the field of view drops to two degrees and we can see details in the Great Orion Nebula, part of “Orion’s sword.” This image was taken with the same camera as the previous one.
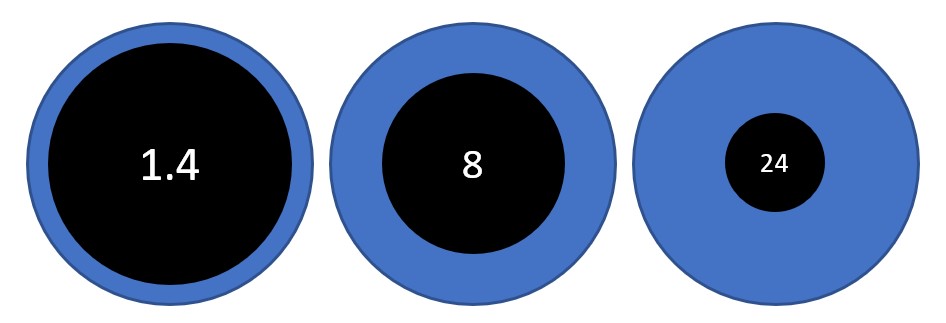
The other component of the f-stop is aperture. Most cameras have a set of adjustable “blades” that combine to create an expandable diaphragm that can open or close to adjust the amount of light that enters the camera. Here are a few f-stop settings for my 50mm lens (not drawn to scale, just illustrating the smaller opening):
Because f-stop is the ratio of aperture size to the focal length, we can compute both the diameter of the aperture (focal length/f-stop) and the area of the opening (π(D/2)^2). You can see the differences in this table:
| f-stop | aperture | area |
|---|---|---|
| 1.4 | 35.7mm | 1000m^2 |
| 8 | 6.25mm | 30.7mm^2 |
| 24 | 2.08mm | 3.4mm^2 |
Dedicated astrophotography cameras provide the sensor and rely on the telescope for the focal length and aperture. Because telescopes have a fixed aperture size, you might think the f-stop is fixed. In reality, you might use a focal reducer that uses a lens to reduce the effective focal length of the telescope and increase the field of view to provide a higher quality image. Planetary observations typically involve the use of “Barlow” lenses that can double or triple the effective focal length, providing a narrower field of view with higher magnification.
My Celestron EdgeHD 9.25” telescope has an aperture of 235mm and a focal length of 2350mm so it is effectively f/10. With modifications, however, it can be any of the following:
| extra lens | focal length | f-stop |
|---|---|---|
| none | 2350mm | f/10 |
| 0.7x reducer | 1645mm | f/7 |
| 2.5x Barlow | 5875mm | f/25 |
Unlike landscape photography, astrophotography almost always benefits from having the most light possible. That’s why I purchased my 50mm f/1.4 lens, because it can gather light many times faster than the f/4.5 that came with the camera (3 stops = 2^3 = 2 * 2 * 2 = 8 times faster). This allows me to use faster shutter speeds and minimize trails.
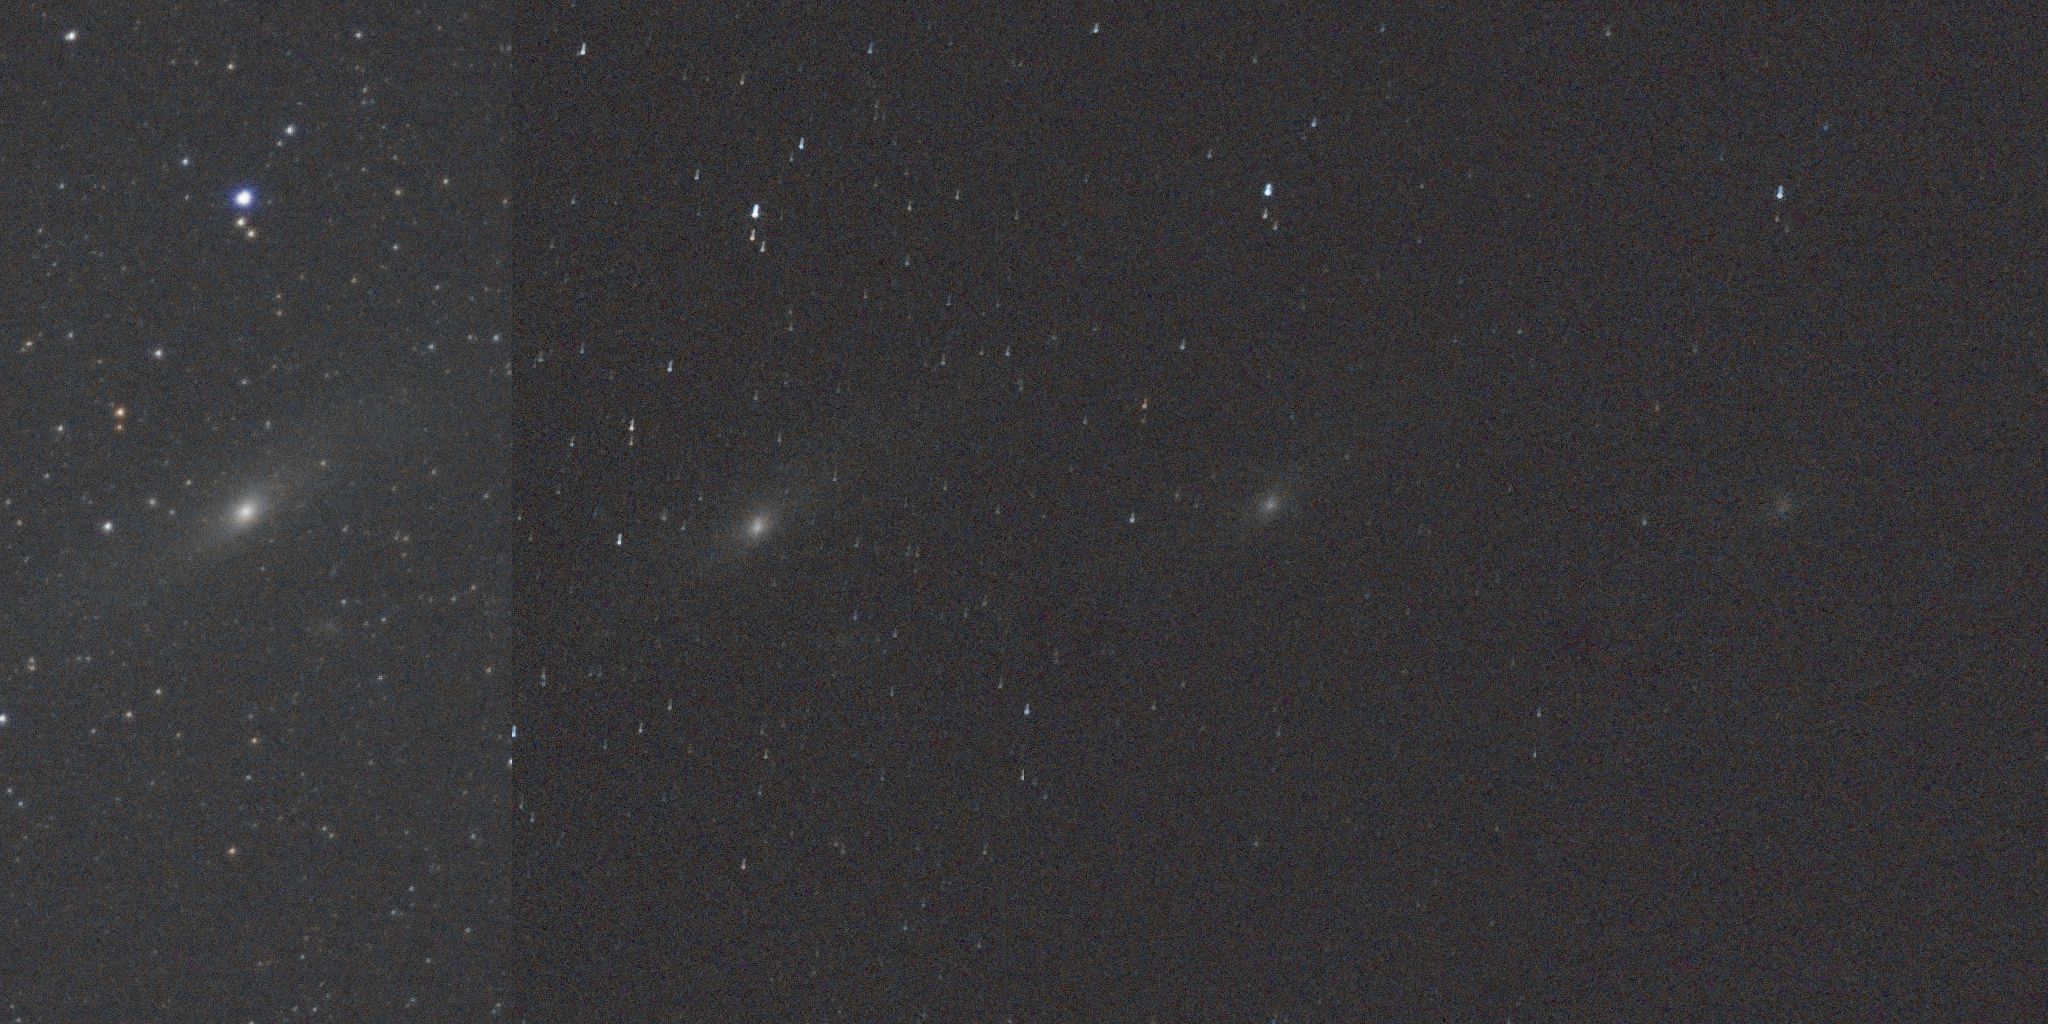
Here is the Andromeda Galaxy with a 32-second exposure at ISO 640. The stops increase left to right from f/2, f/4, and f/8 to f/22.
There are only a few times I use anything other than the fastest (lowest) f-stop on my camera. Sometimes the moon is so bright that I need to lower the f-stop to take a picture that isn’t oversaturated. If I’m purposefully shooting star trails, a higher (slower) f-stop allows me to use longer exposures to capture the trails before the image gets “washed out.” The problem with combining shorter exposures is that this produces gaps in the trail in between shots while the camera saves the image. Finally, some cameras have aberrations at the edges of the lens that distort the stars. Slightly closing the diaphragm (making the f-stop higher) can produce a cleaner shot at the expense of a longer exposure or higher ISO.
Exposure time
Exposure is perhaps the easiest setting to understand. Longer exposures grab more light and increase the signal-to-noise ratio of your images. The trade-off is that even with a good star tracker, longer exposures also increase the risk of not being able to use a single shot. If your tripod is bumped or your tracker isn’t perfect, the image will distort. There is also more chance of being photobombed by a cloud, plane, satellite, or meteor, although the latter isn’t always a bad thing.
The largest advantage to longer exposures is less processing. For a four-hour imaging session, you might collect nearly 4,000 images at a three second exposure compared to 48 with a five-minute exposure. The latter is far easier and faster to stack, not to mention weed out bad photos.
I highly recommend getting a portable star tracker that allows you to take longer exposures. To learn more, read camera astrophotography with tracking hardware.
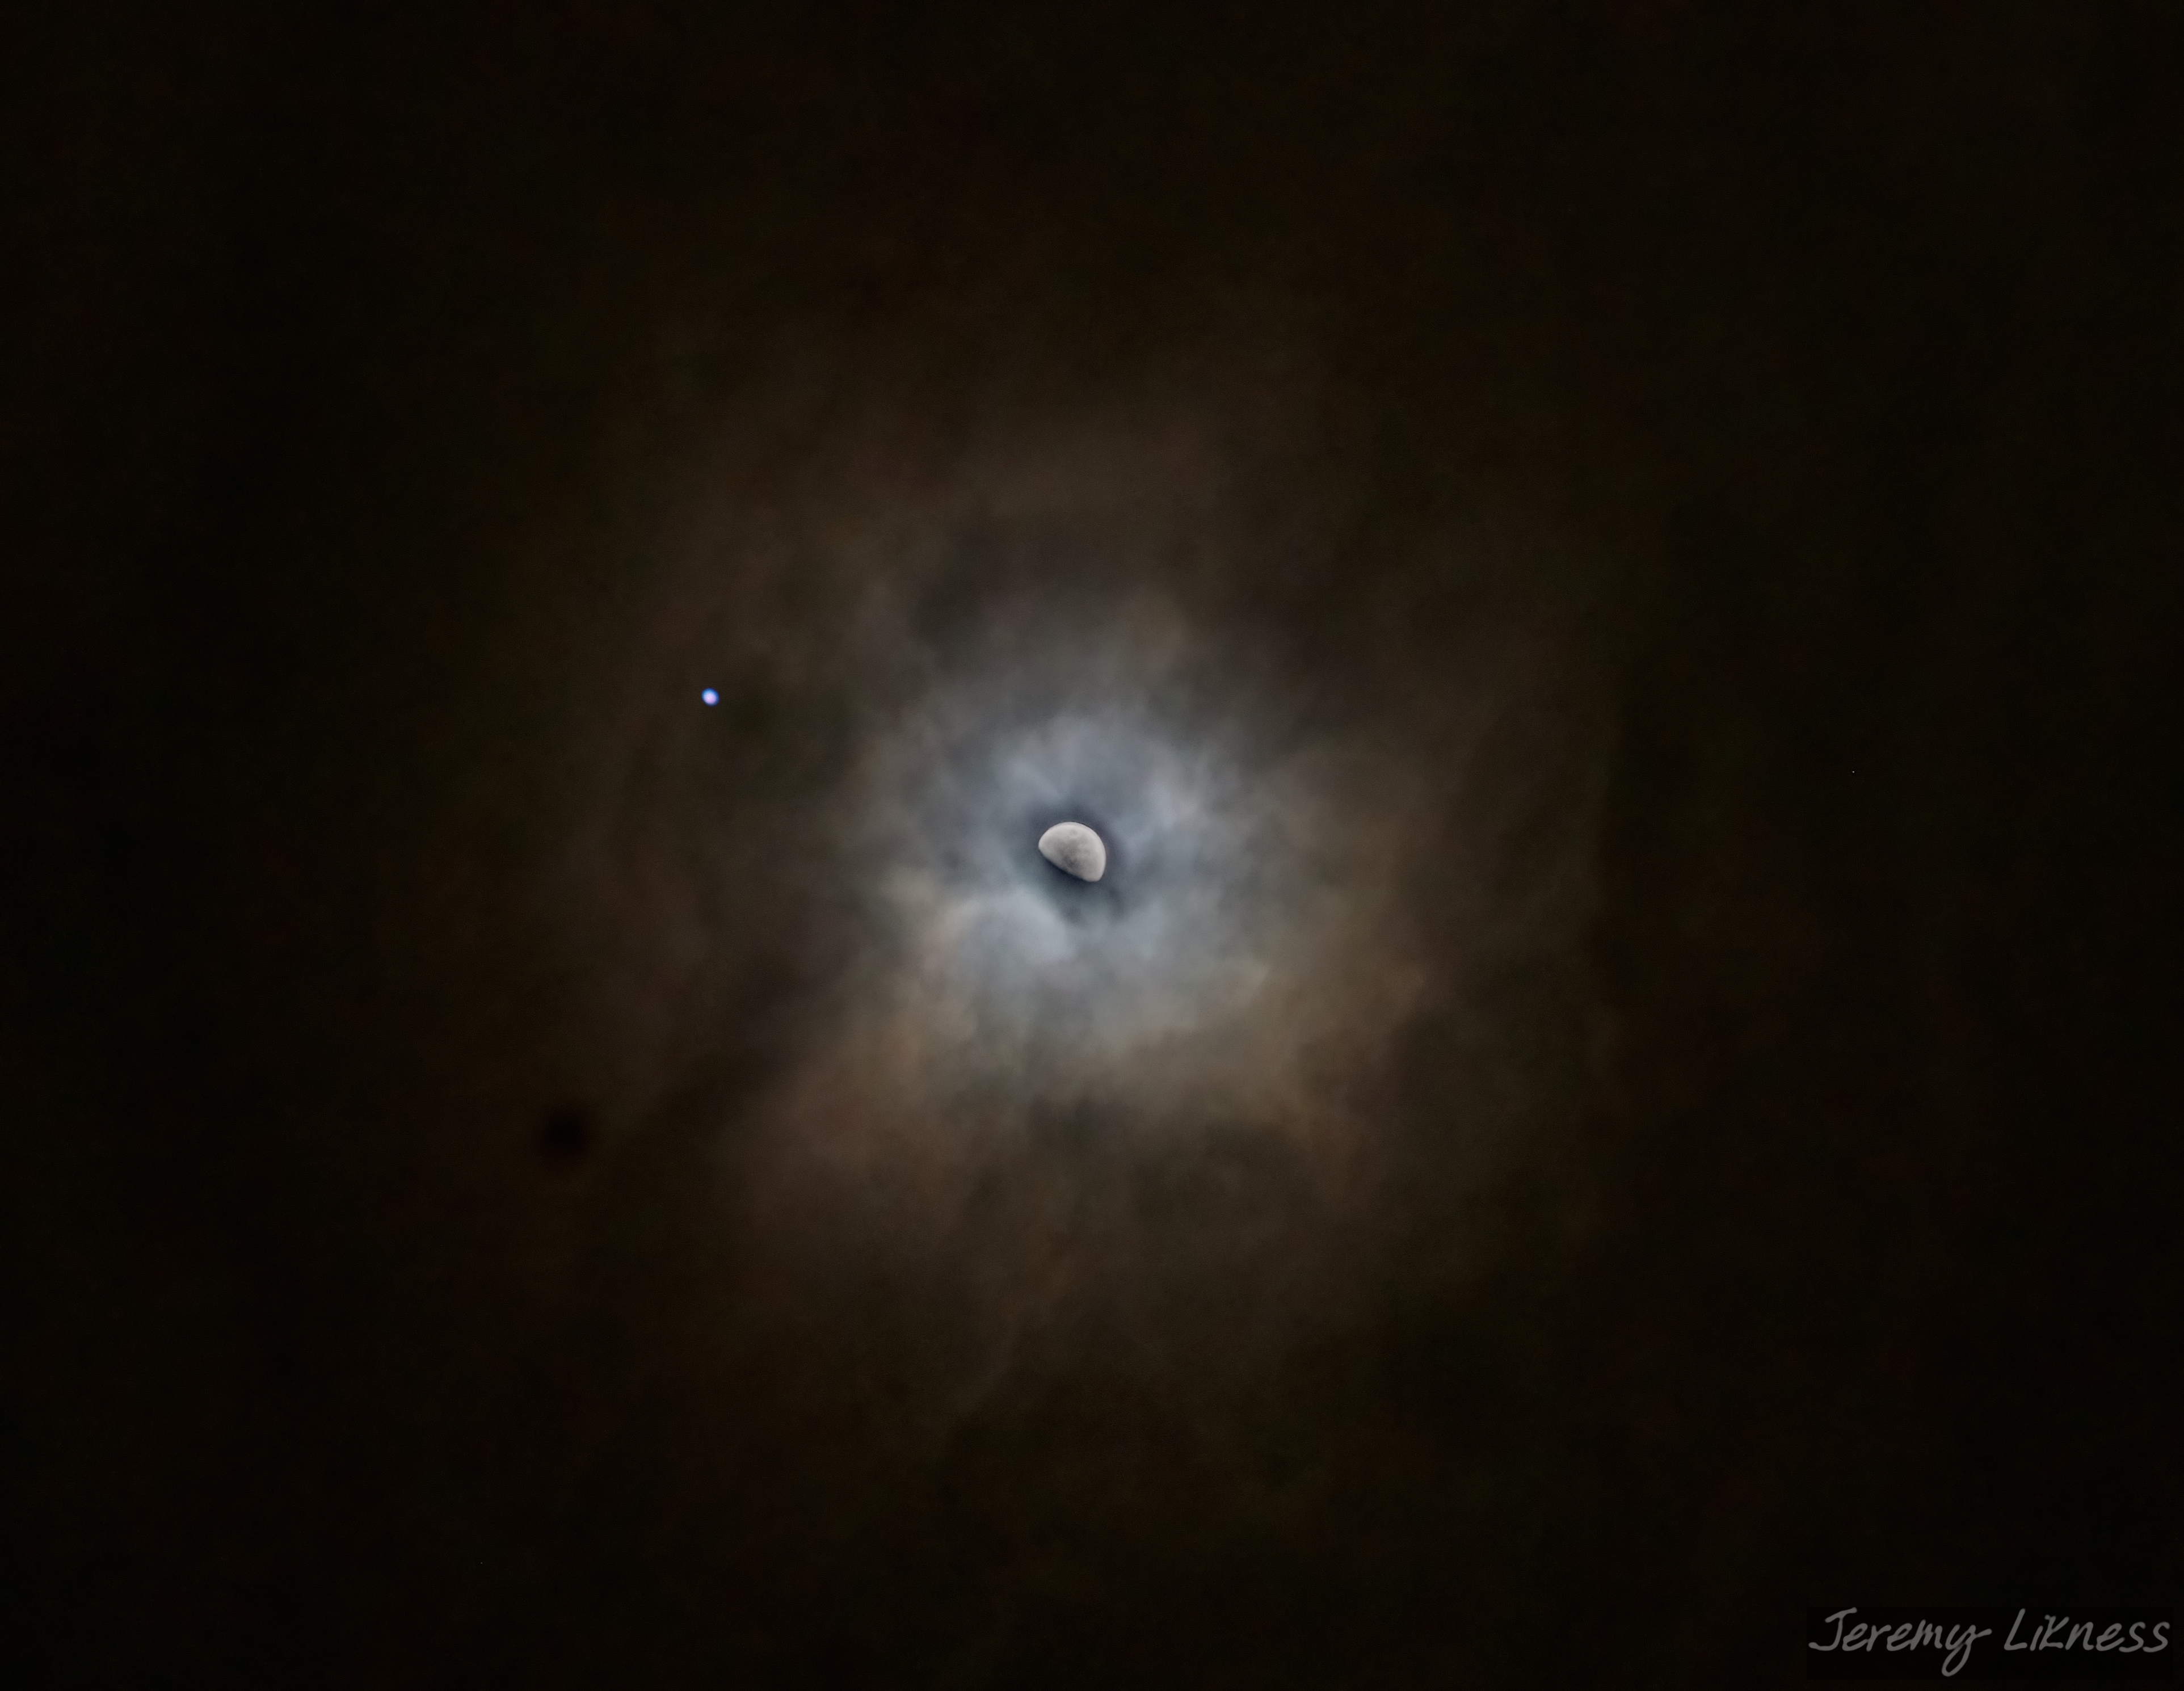
Sometimes it is helpful to take multiple exposures and combine them. For example, this picture:
I had to use a longer exposure (~four seconds) for the detail of the clouds to show, but that left the moon as a washed-out bright blob of light. I took another exposure at a fraction of a second to get the details of the moon, then blended the two together.
ISO
ISO is a bit more complicated to explain. It is a standard unit that reflects the sensitivity of your camera sensor. Higher sensitivity means the signal is amplified so you get more light. The process is more complicated than that, but the details aren’t necessary to know to get a good shot. The two basic things to know are:
- Every doubling of ISO = doubling light = one stop.
- For most cameras, this also increases the noise so it’s a trade-off. Some cameras are ISO invariant which means there is less tradeoff for noise.
- Gain is a term typically used for astrophotography cameras and measures the amplification of the light signal in decibels. This makes gain and ISO related but not the same.
The easiest way to see if there are trade-offs with increasing your ISO is to test it yourself. Here, I start with a 256s exposure (about four and one-half minutes) on a tracker at ISO 100. To find the equivalent stop, we can double the ISO each time we halve the exposure. In an ideal world, that would look like:
| Exposure | ISO |
|---|---|
| 256s | 100 |
| 128s | 200 |
| 64s | 400 |
| 32s | 800 |
| 16s | 1600 |
| 8s | 3200 |
| 4s | 6400 |
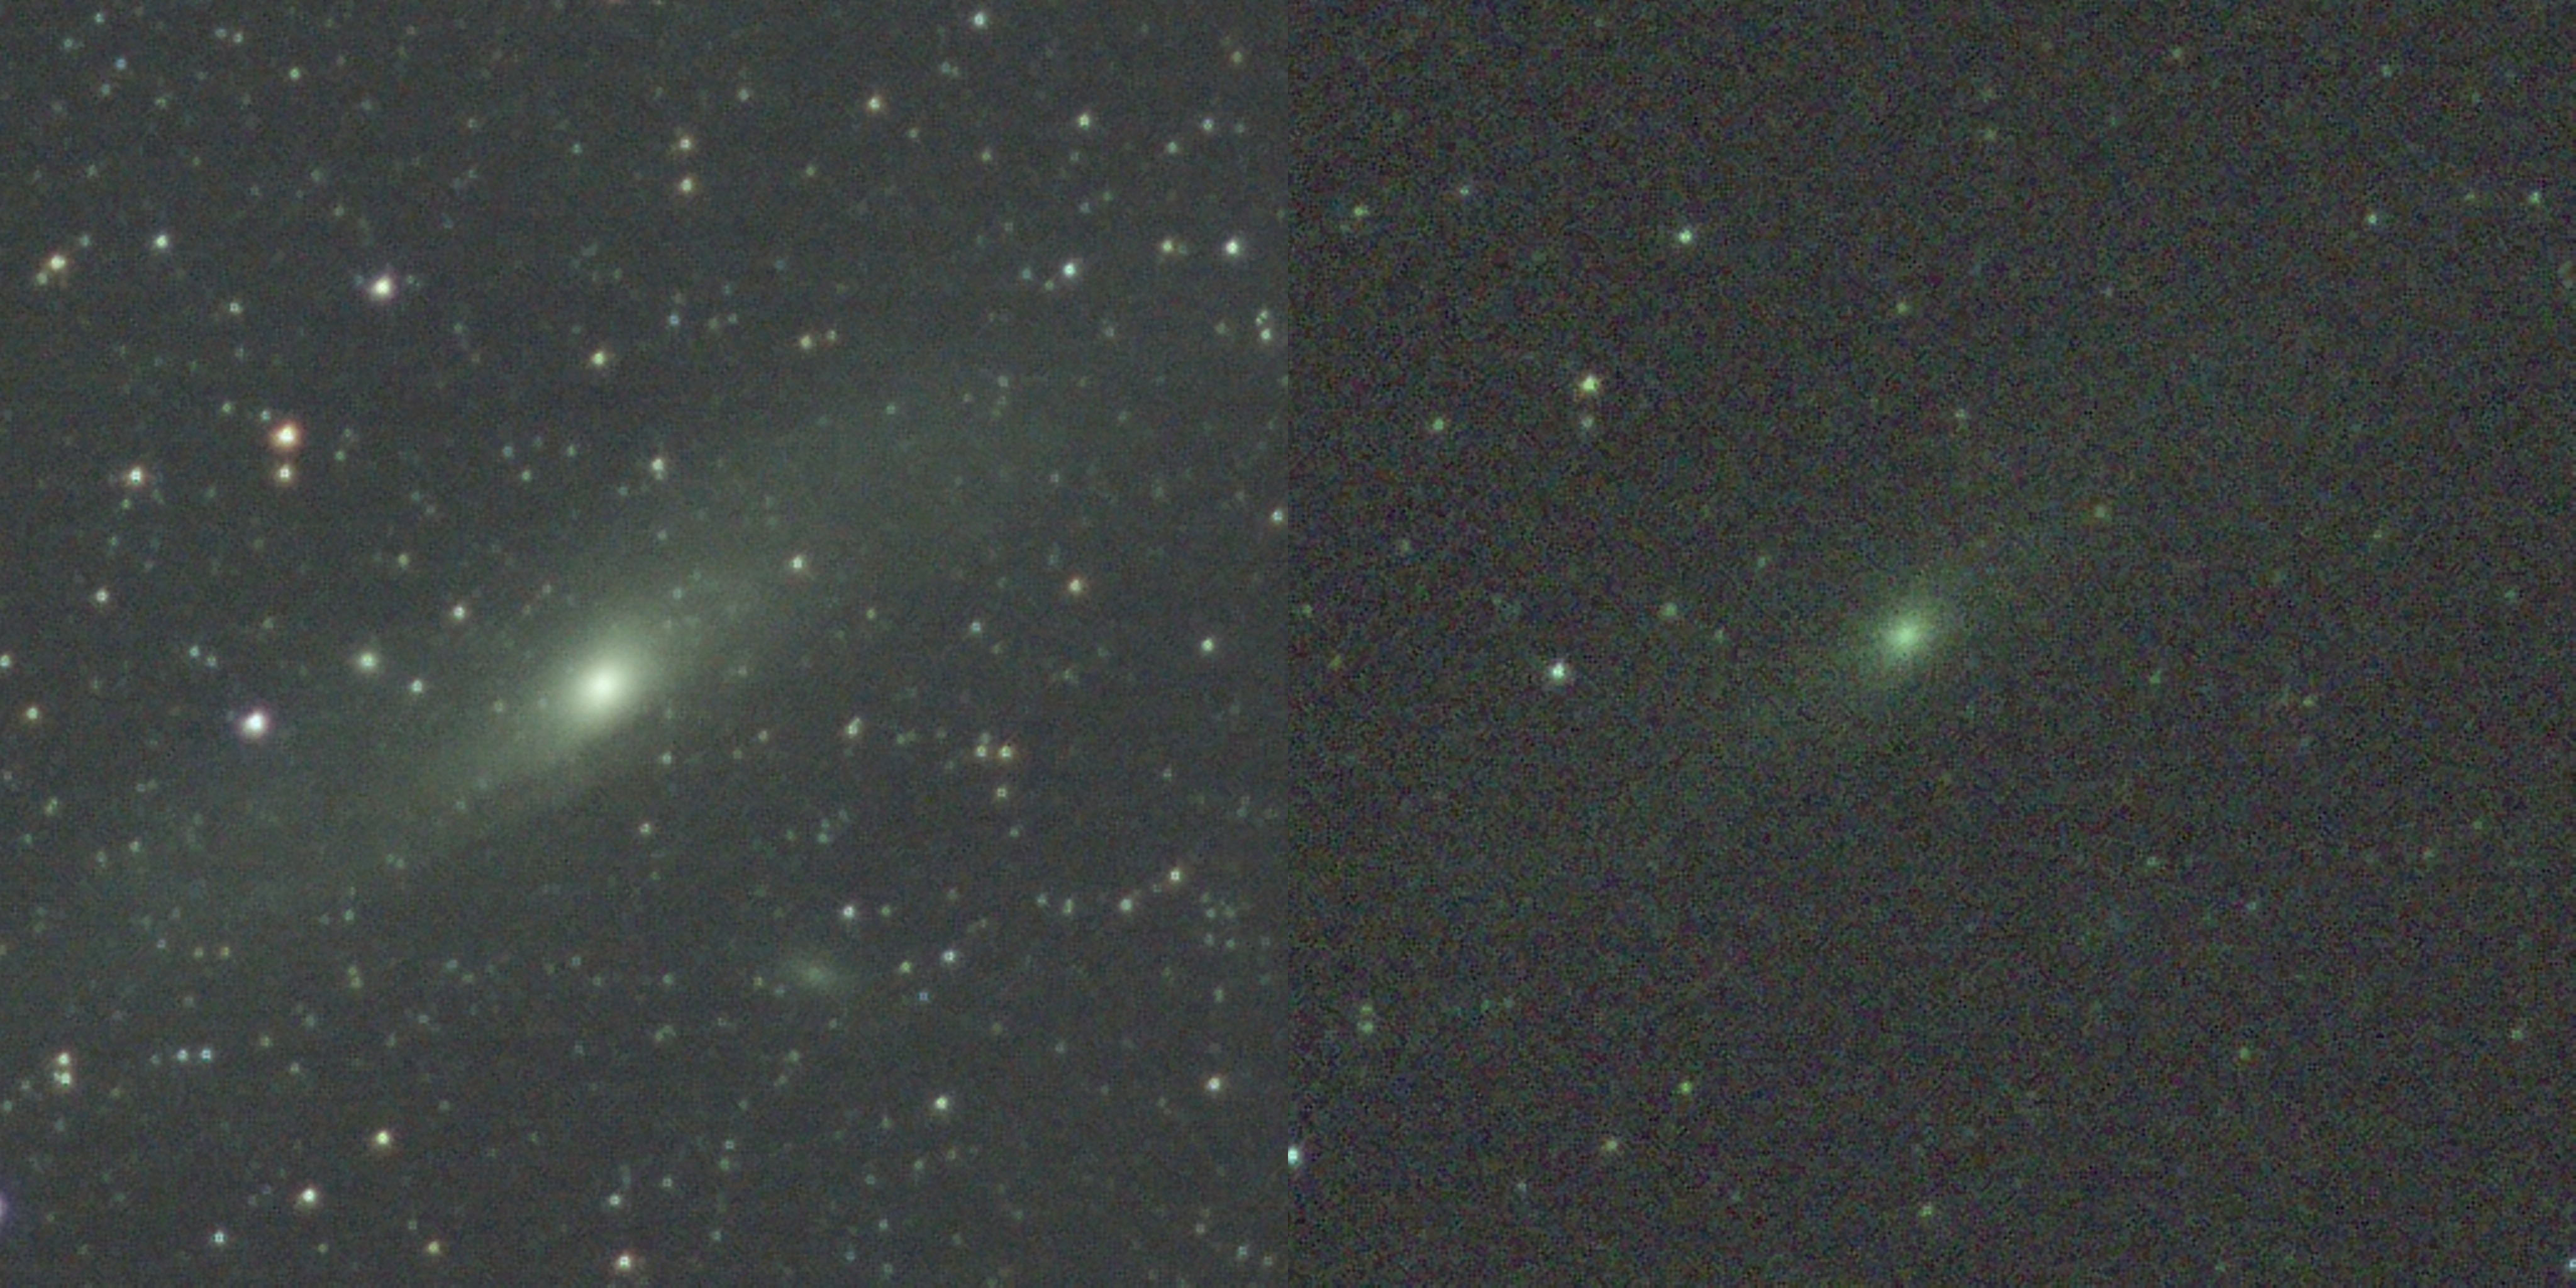
In my case 6400 was too high so I backed off to 3200. This is what the two look like side-by-side (256s, ISO 100 vs. 4s, ISO 3200).
As you can see, there is a very visible trade-off. The last variable I use when the pictures are too noisy is to drop the ISO and simply take more photographs and stack them. If you’re interested in how that works, check out my camera processing workflow in PixInsight.
Interactive playground
Finally, I created an interactive tool to see the differences between different ISO settings and exposures. All images were taken during the same session with a 50mm lens at f/1.4. The target was the Andromeda Galaxy. The images are as they appear raw from the camera. To see them “stretched” for better visibility, check the box. The psychedelic images are from extreme noise being stretched from ISO settings that were too high. Some of the images are black because they were too washed out to be usable.
Post categories: Related tags:
